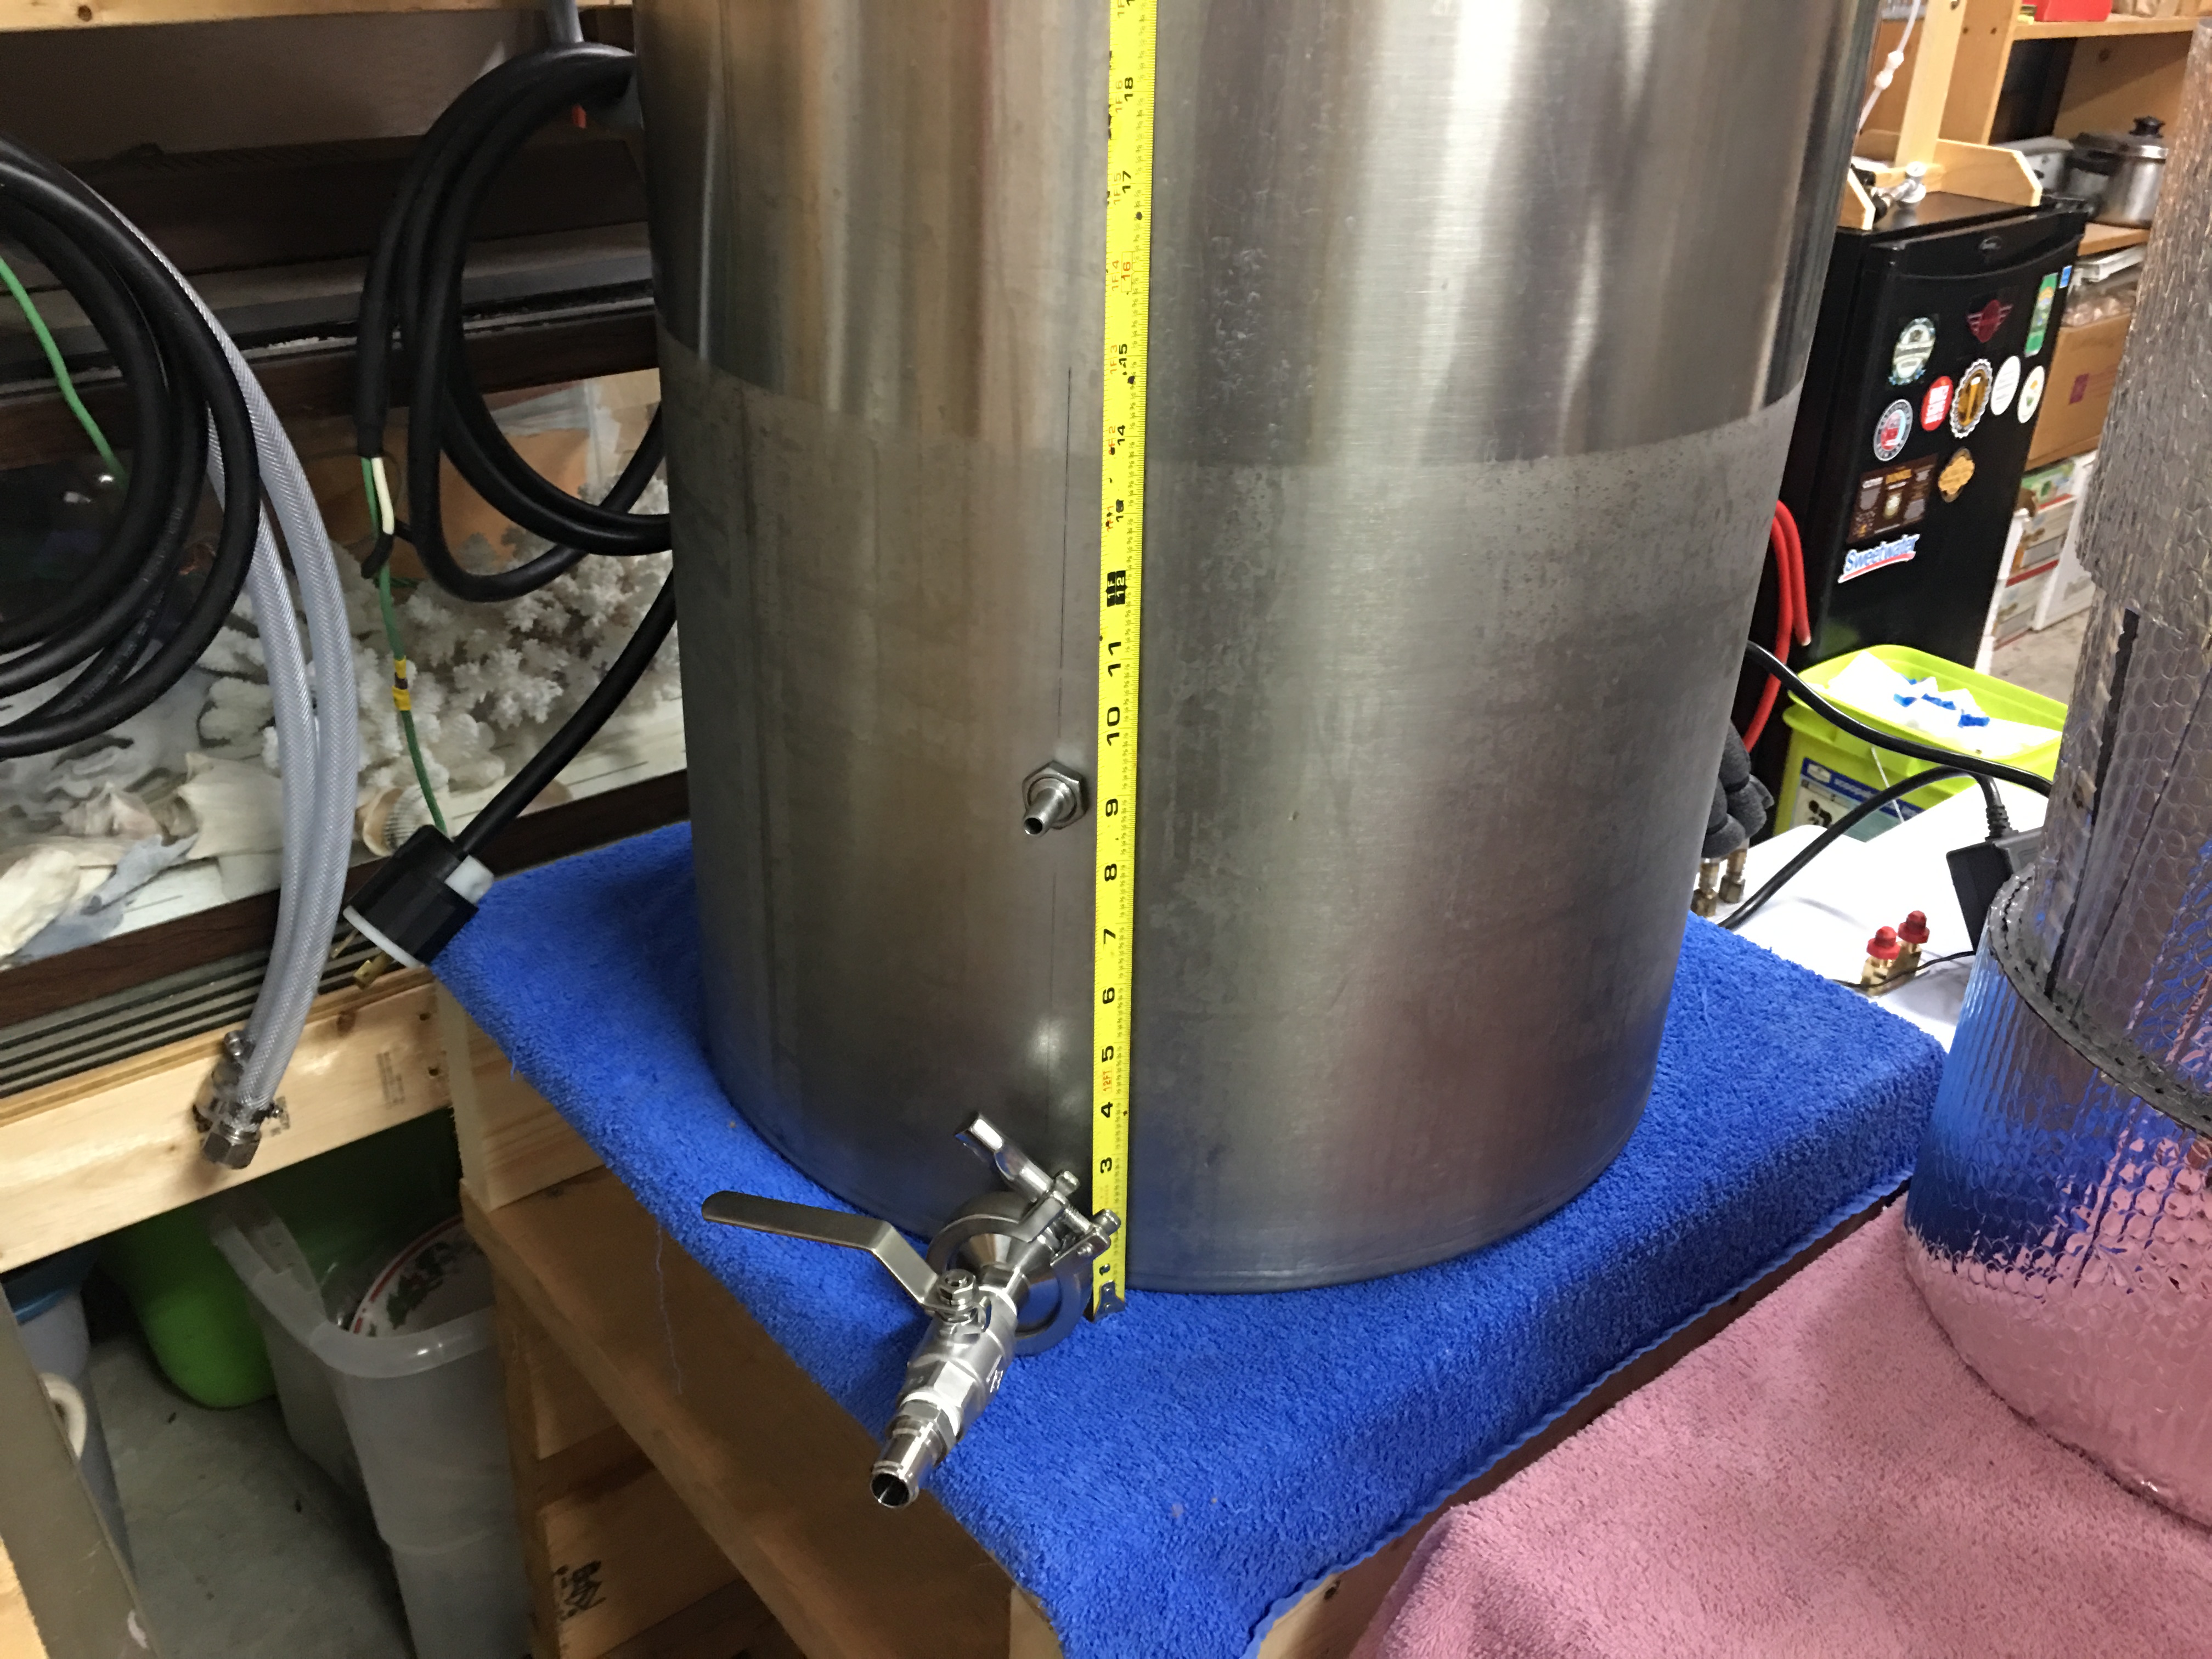
 I have had two large stainless steel fermenters sitting around for years. They had been used for wine a long time ago. I decided to get them ready for fermenting big batches of beer. I removed the drain valves and replaced with stainless steel 1/2″ ball valves fitted with 1.5″ triclover fittings.
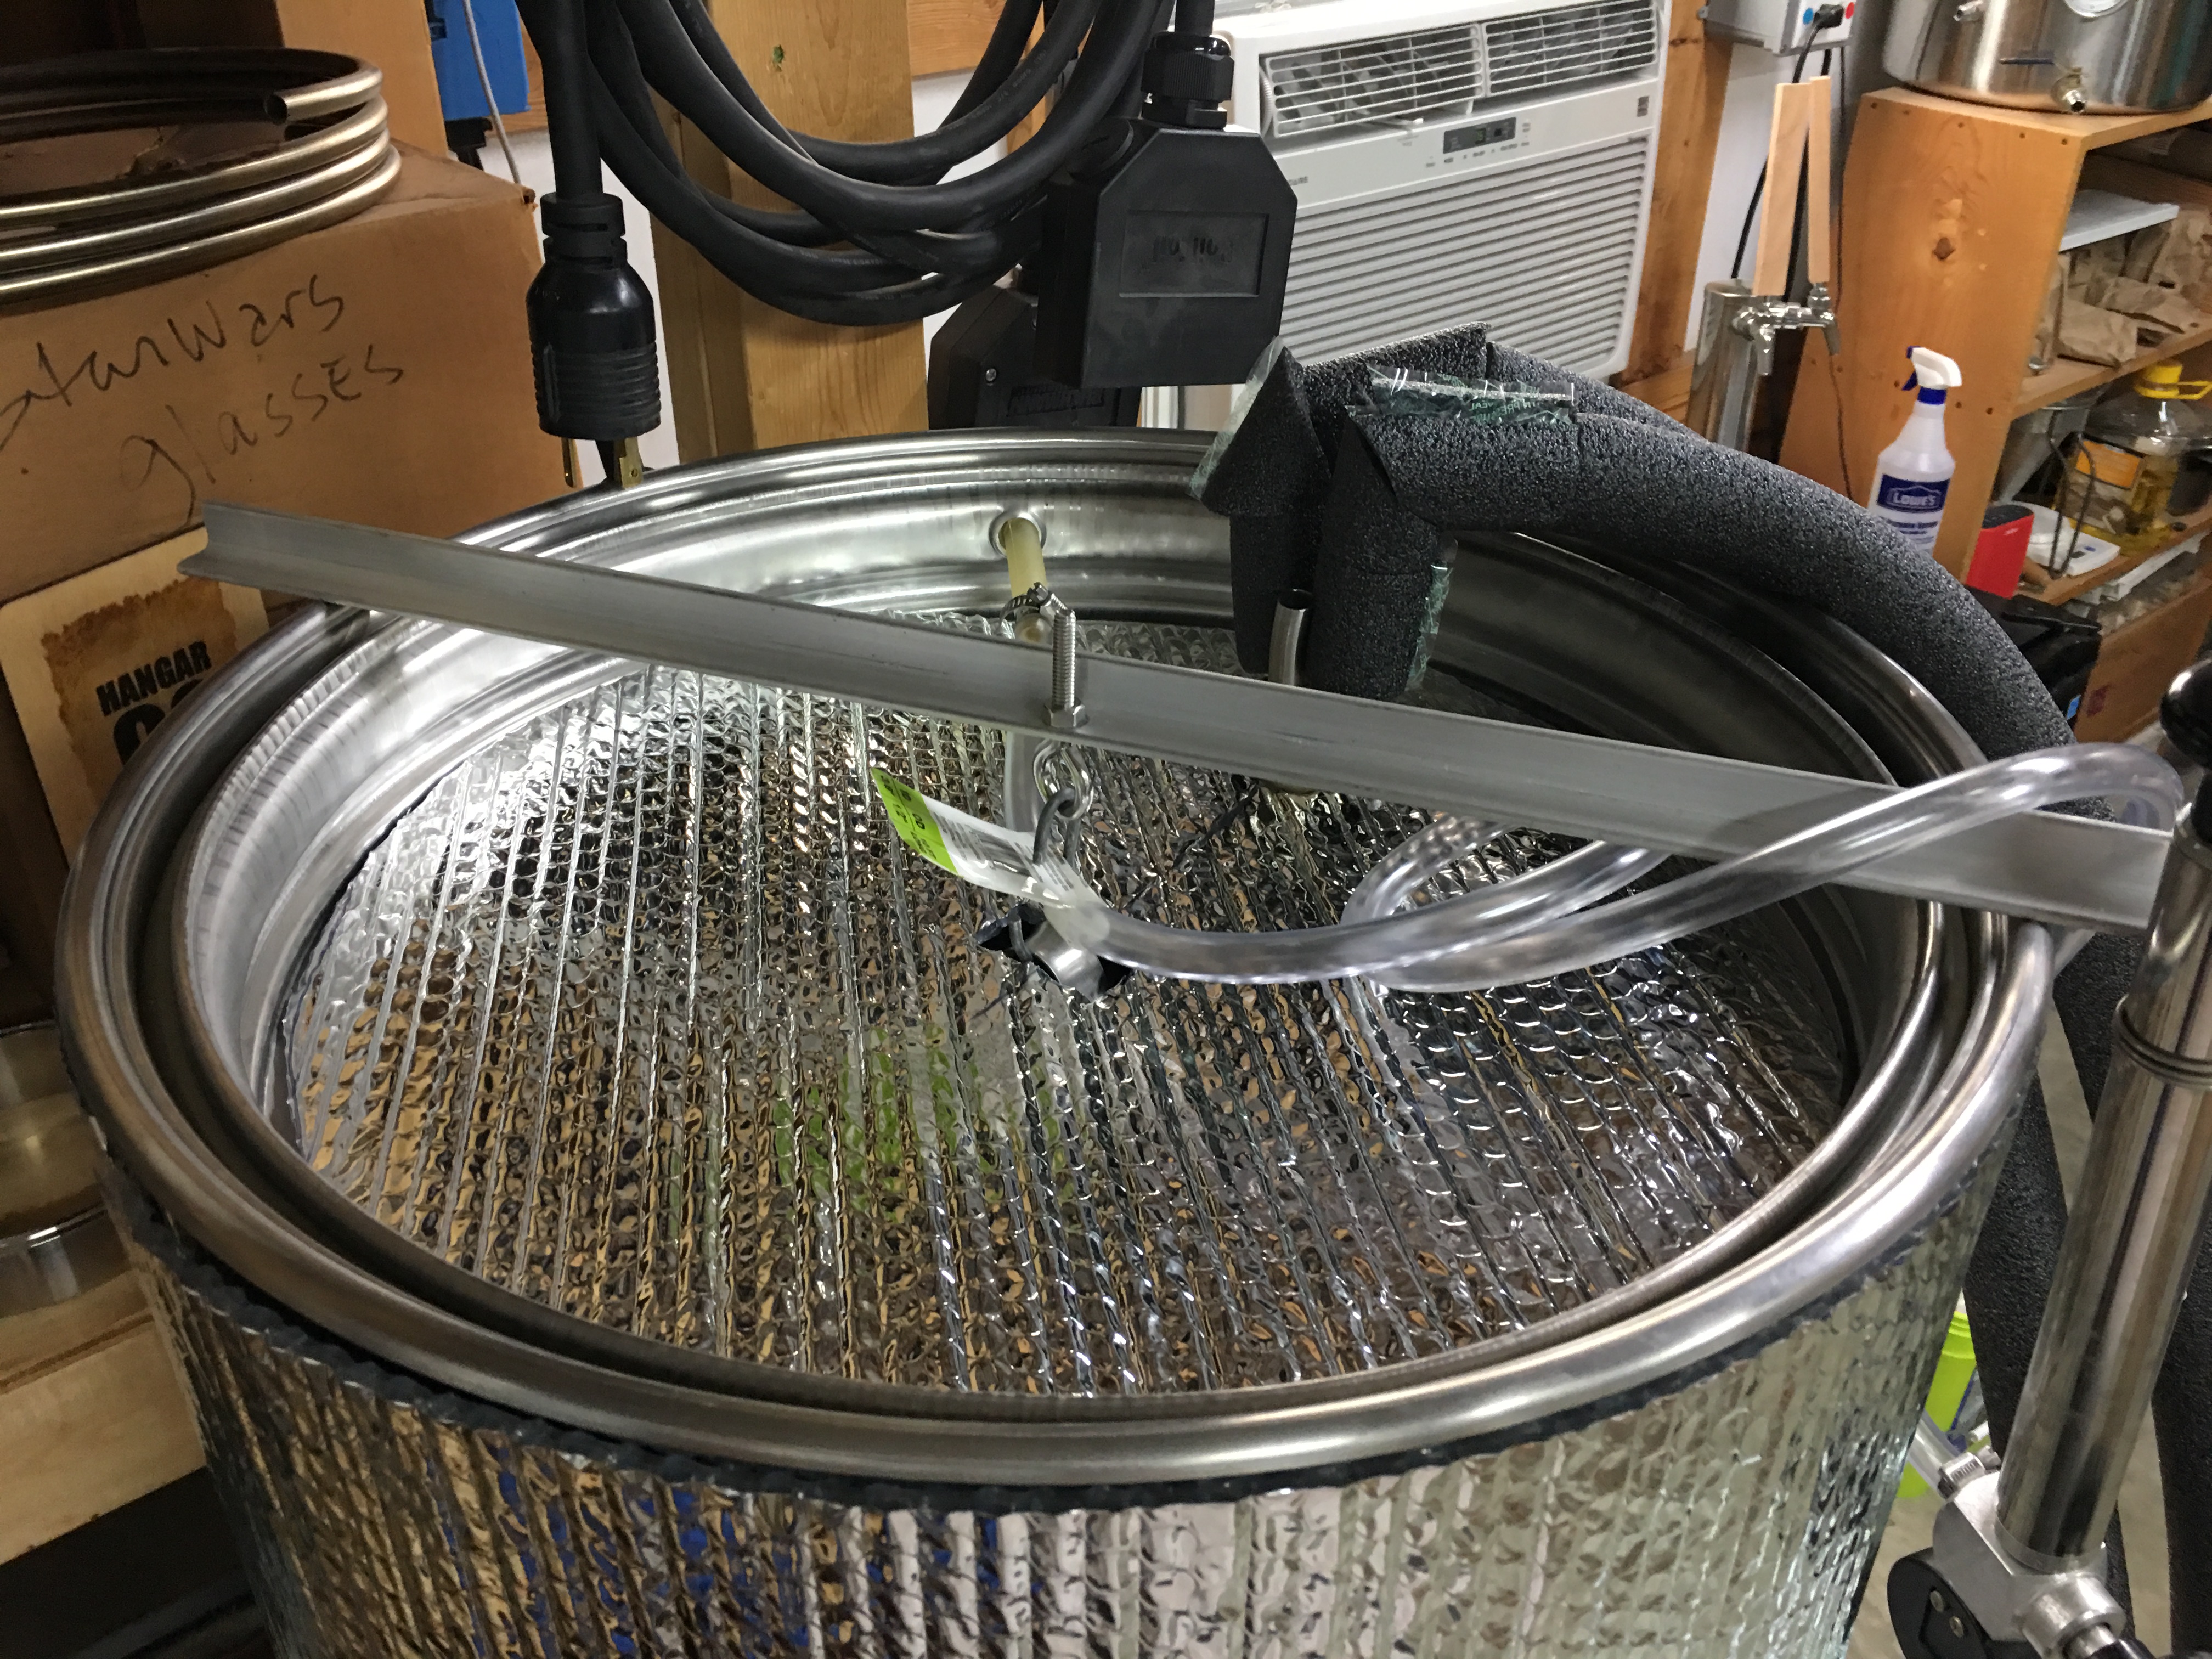
I bought some insulating foil to wrapped around them. It is 1/4″ thick per layer. I put two layers on each fermenter for about R value of R=6. Update 11/2/18: The 150L fermenter now has four layers for approximately R=12, and the 200L fermenter has four layers for approximately R=12.
Notes:
200L fermenter:
Jacket Height: 39″
Drain Valve Center Point (from bottom): 2.625″, 2.125″ diameter hole
Thermowell Center Point (from bottom): 8.25″, 1.0″ diameter hole
Layer one: diameter=20.25″ (51.435 cm), circumference=63.61″
Layer two: diameter=20.75″, circumference=65.2″
Layer three: diameter=21.25″, circumference:67.0″
Layer four: diameter=21.75″, circumference:68.625″
150L fermenter:
Jacket Height: 35″
Drain Valve Center Point (from bottom): 1.375″, 1.125″ diameter hole
Thermowell Center Point (from bottom): 8.875″, 1.0″ diameter hole
Layer one: diameter=19.0″ (48.26 cm), circumference= 59.625″
Layer two: diameter=19.5″, circumference=61.25″
Layer three: diameter=20.0″, circumference:63.0″
Layer four: diameter=20.5″, circumference=64.75″
For the first layer, I measured the diameter to be 18.75″. The circumference = 2 * PI * r = 58.936″.
String measure wrapped around the fermenter: 59.0″
I cut the insulation to 59″. It came up 5/8″ too short to wrap completely around. I cut a 5/8″ strip of the insulation and taped to the first layer. Not sure how the calculation was off since I had two different methods of measuring and they came very close to each other.
For the second layer, I calculated the corrected diameter given that I had to add a strip of insulation, which made the corrected diameter 19″. I added 0.5″ (the thickness of the 1st layer) to the corrected fermenter diameter to arrive at the length of insulation required for the second layer: 19.0 + 0.5 = 19.5″. Circumference = 61.26. I cut the second layer to 61.25″ It fit just fine.
I cut holes in each layer to fit the temperature sensor thermowells and ball valves. The thermowell holes is 1″ diameter. The 200L valve required a 2″ hole. The 150L valve required a 1.125″ hole.
I have also built a glycol chiller using a Frigidaire 5000 btu air conditioner and am in the middle of testing it. Perhaps another post on that later.

For the 150L vessel, I cut two rounds piece of insulation 17.25″ and made cutouts for the center and stopper.
Some notes on setting up the 150L fermenter for 1/2 BBL or 1 BBL:

Added 09/13/19: This is the 150L fermenter with a “1/2 BBL” of beer. The chill line indicates right at 13.75 inches which calculates out to 16.88 gallons.