This is my second glycol chiller build. I used a new 5000 BTU window AC unit I had sitting around still in the box for several years. I decided to build out a second chiller to have as a backup in case my first one fails, but also to use to chill wort after boiling.
My first chiller, practically the same build, has been in use for 13 months so far with excellent results. I have had it in use the whole time, holding the nine gallons of glycol solution in the Rubbermaid 48-quart cooler at 30-33°F. It is controlled with an Inkbird ITC-1000 controller. The chiller has come on at least 10 to 15 times a day since it was put into service.
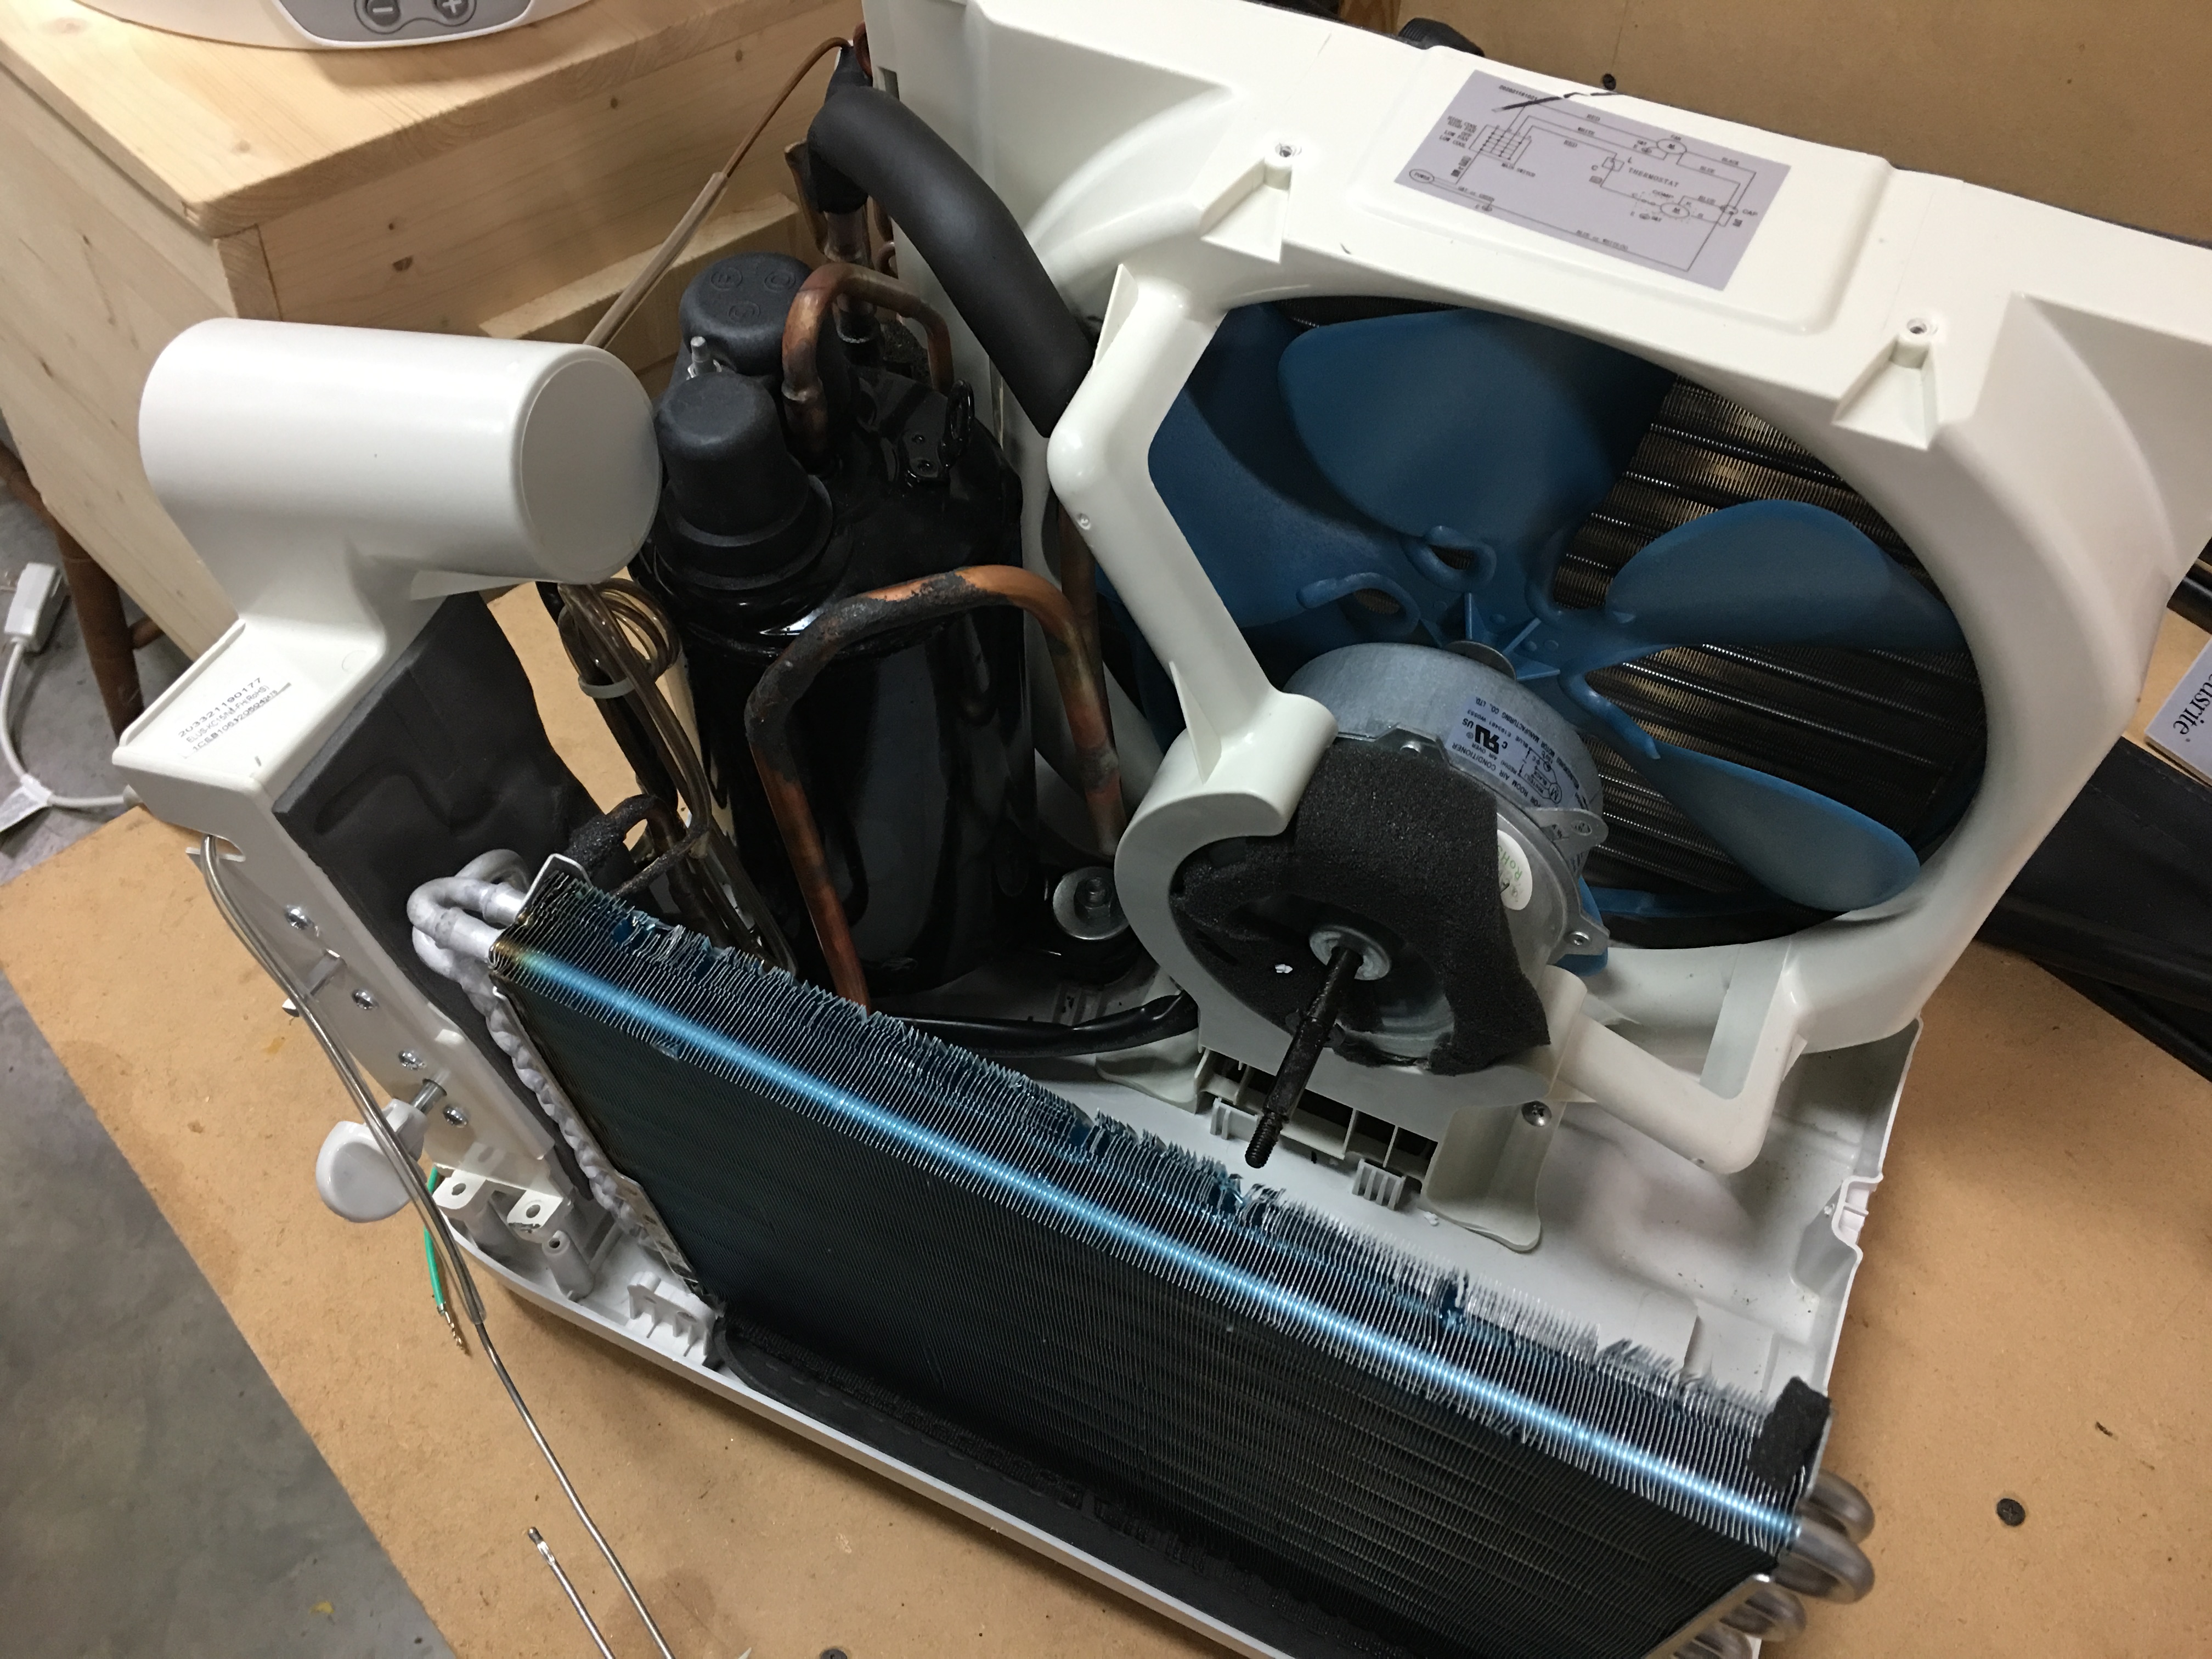
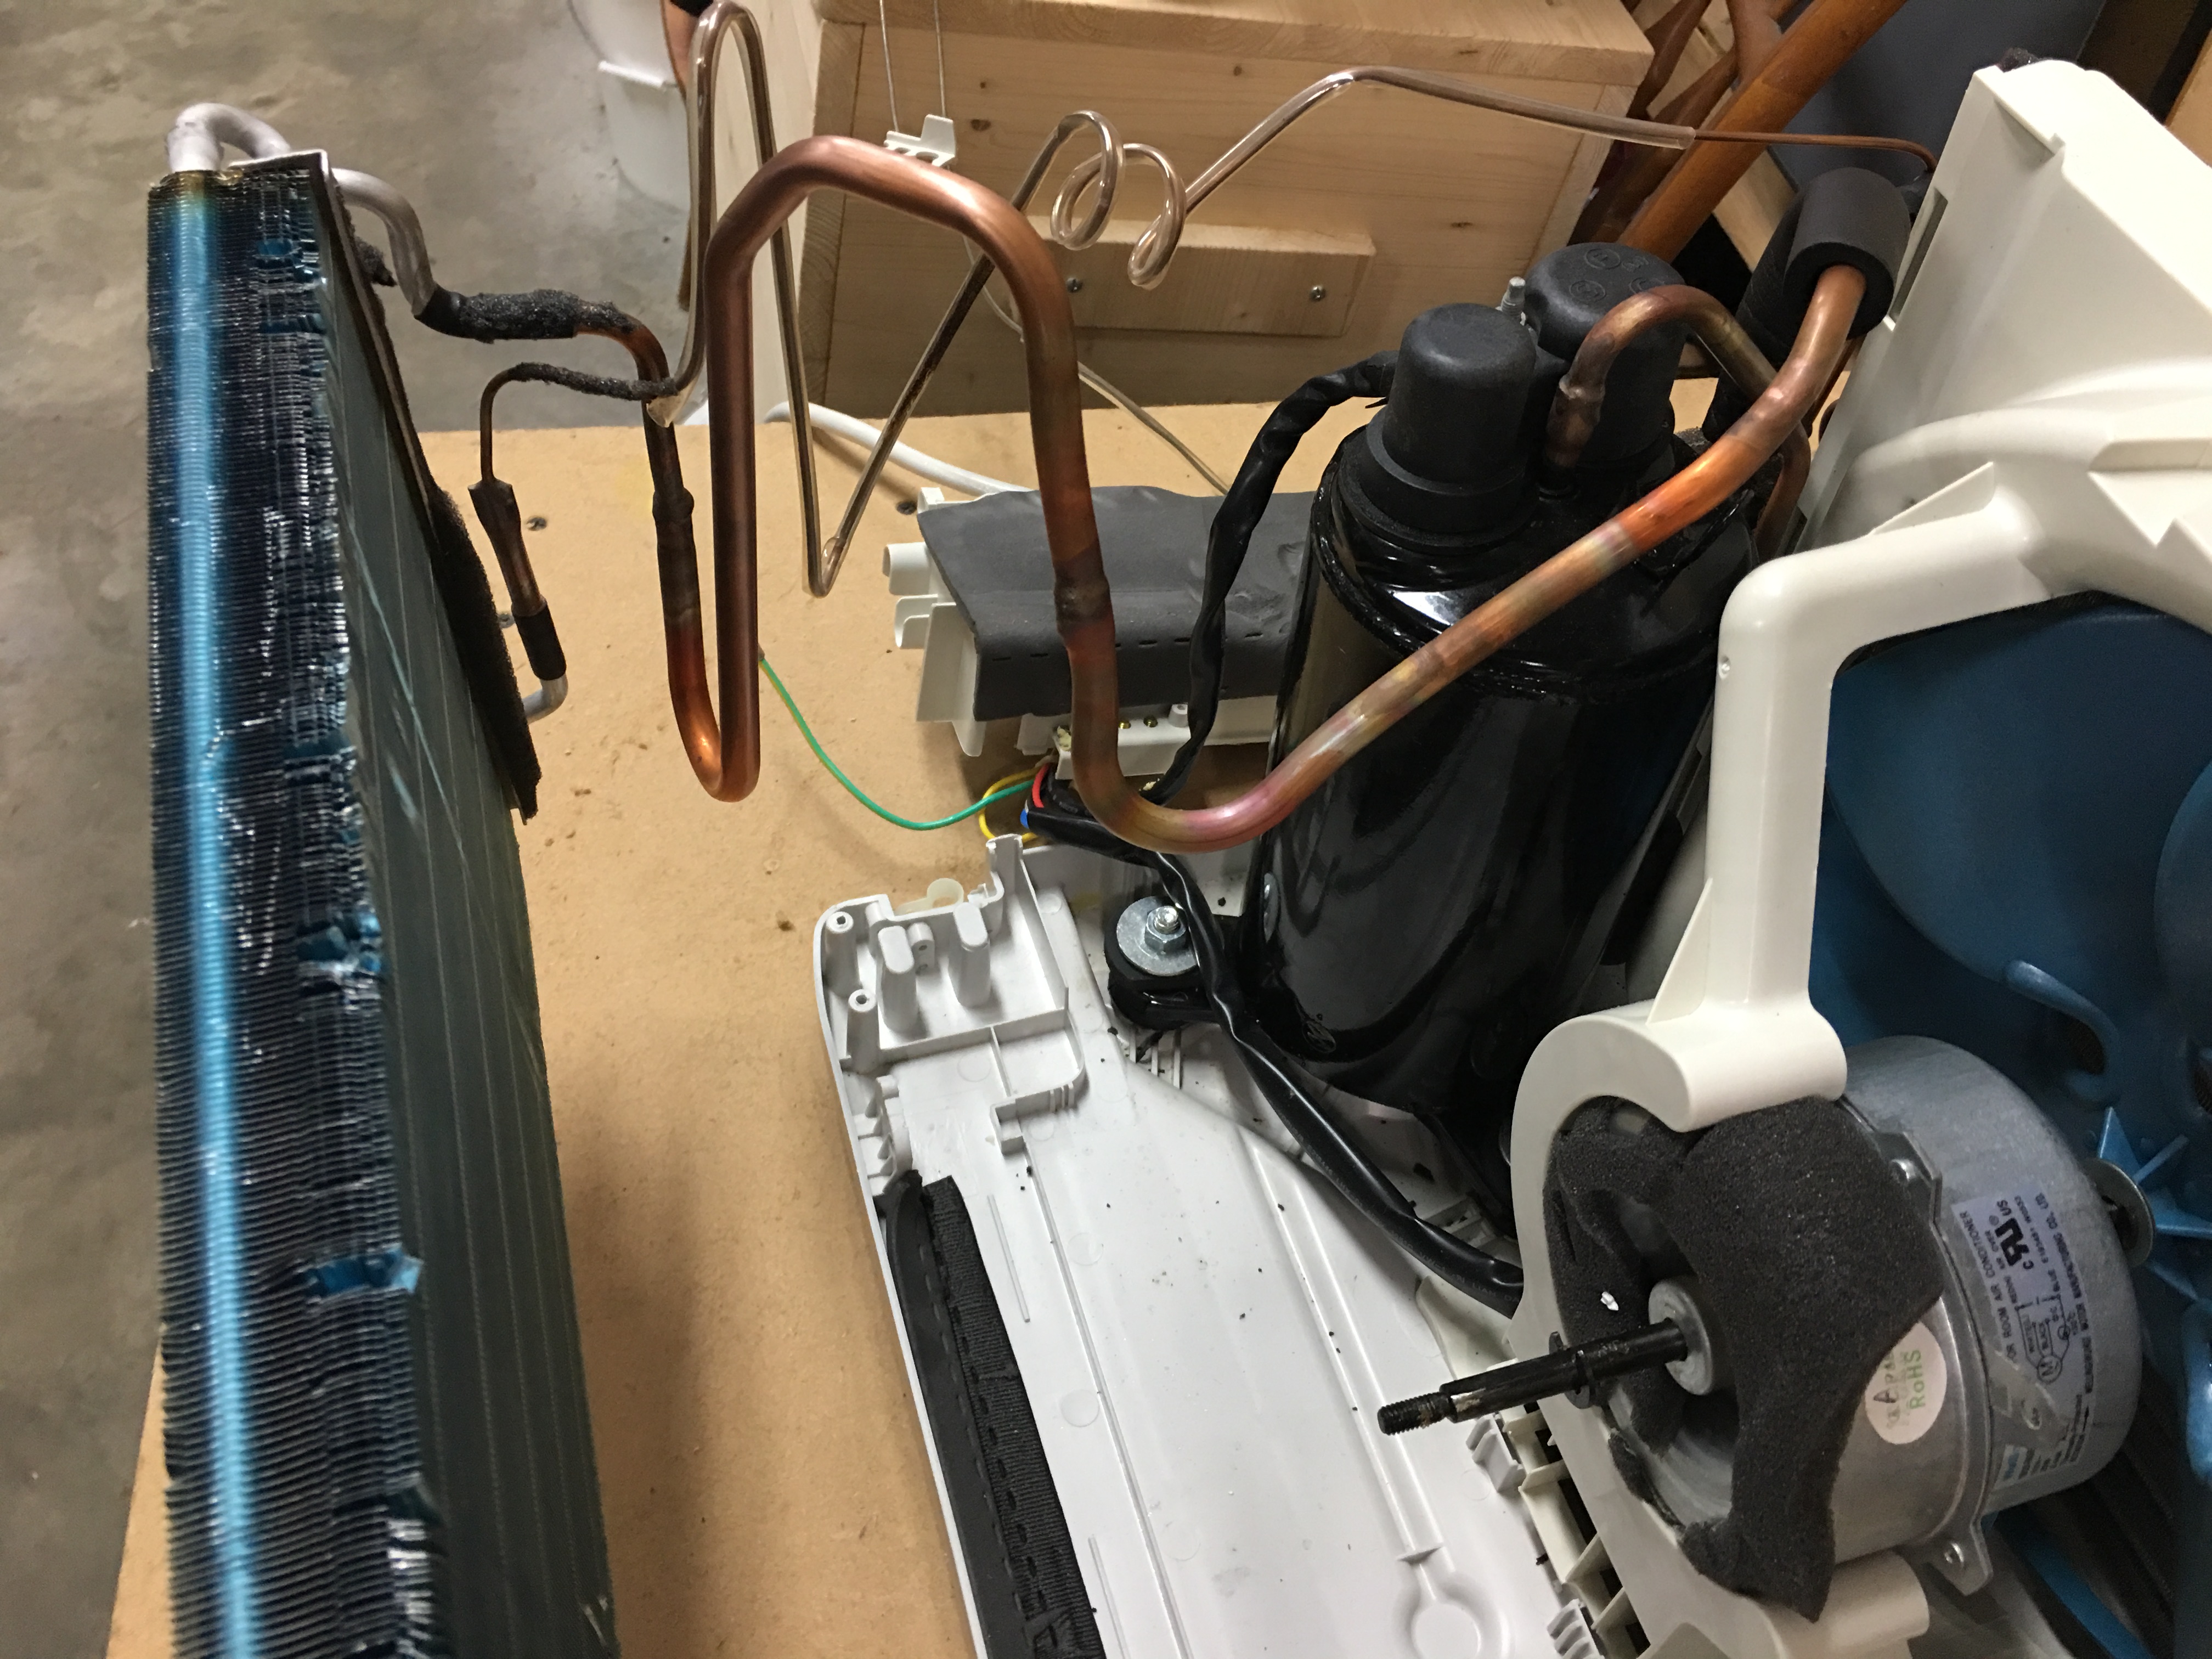
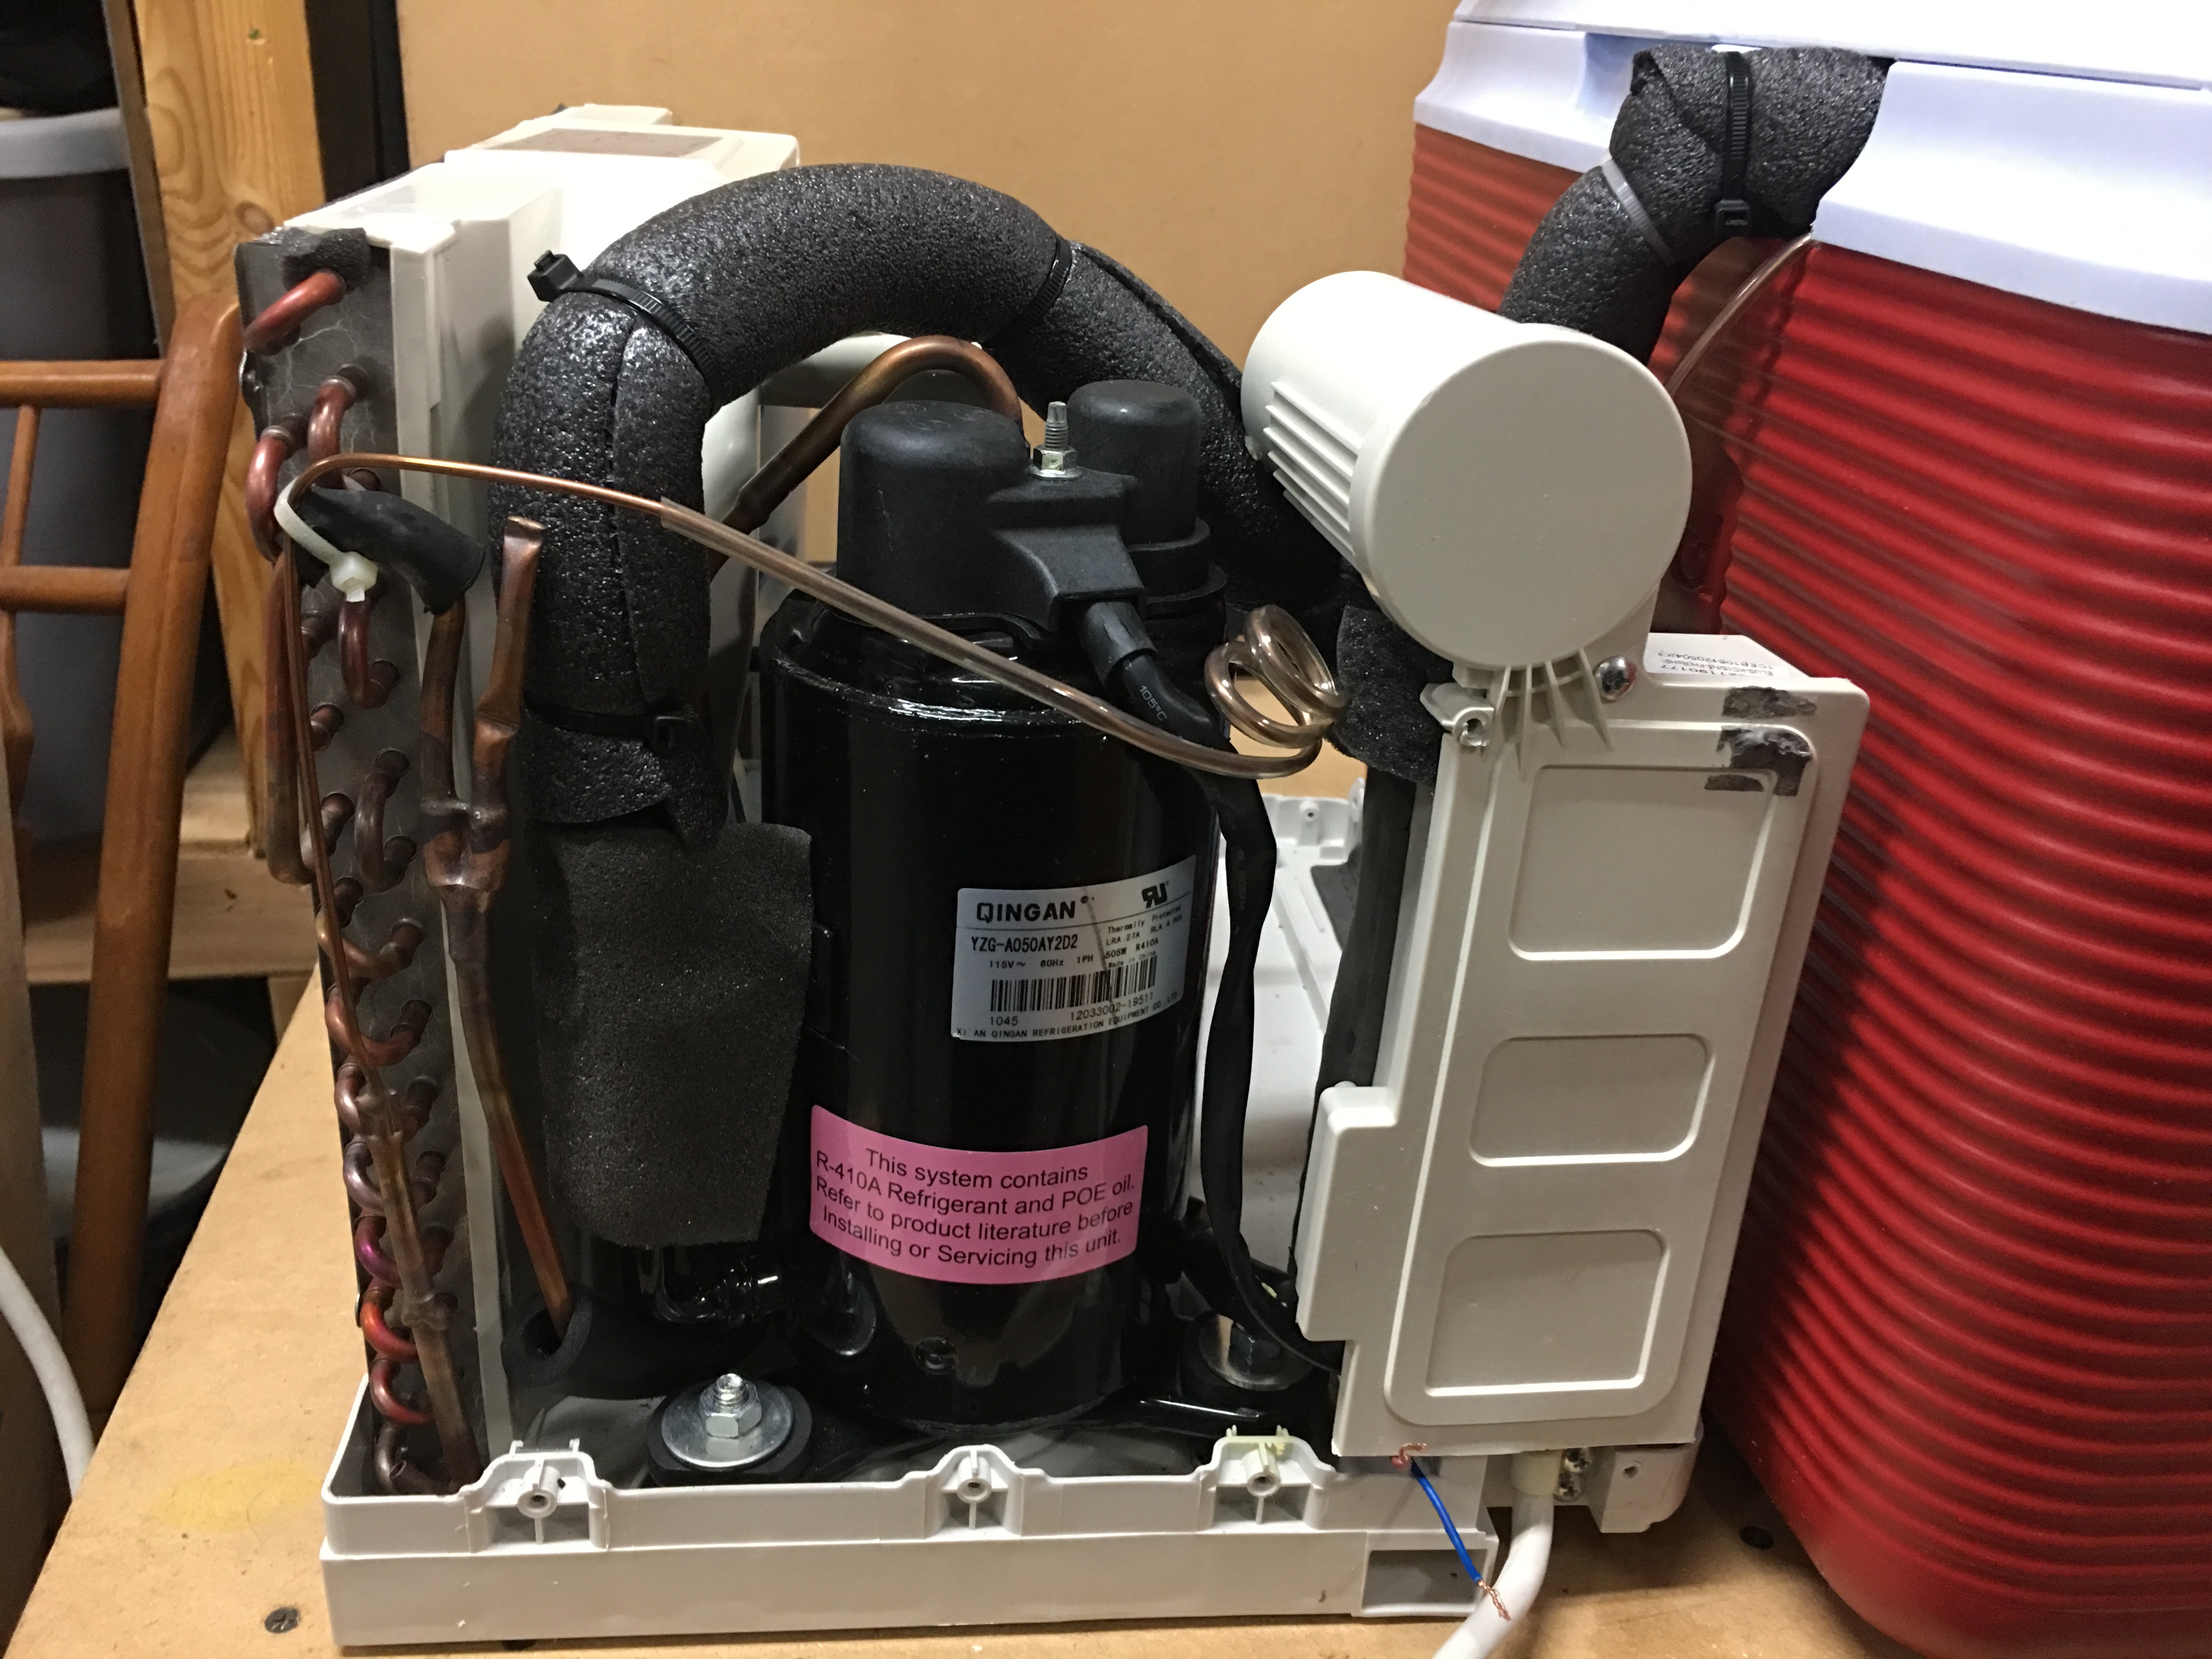
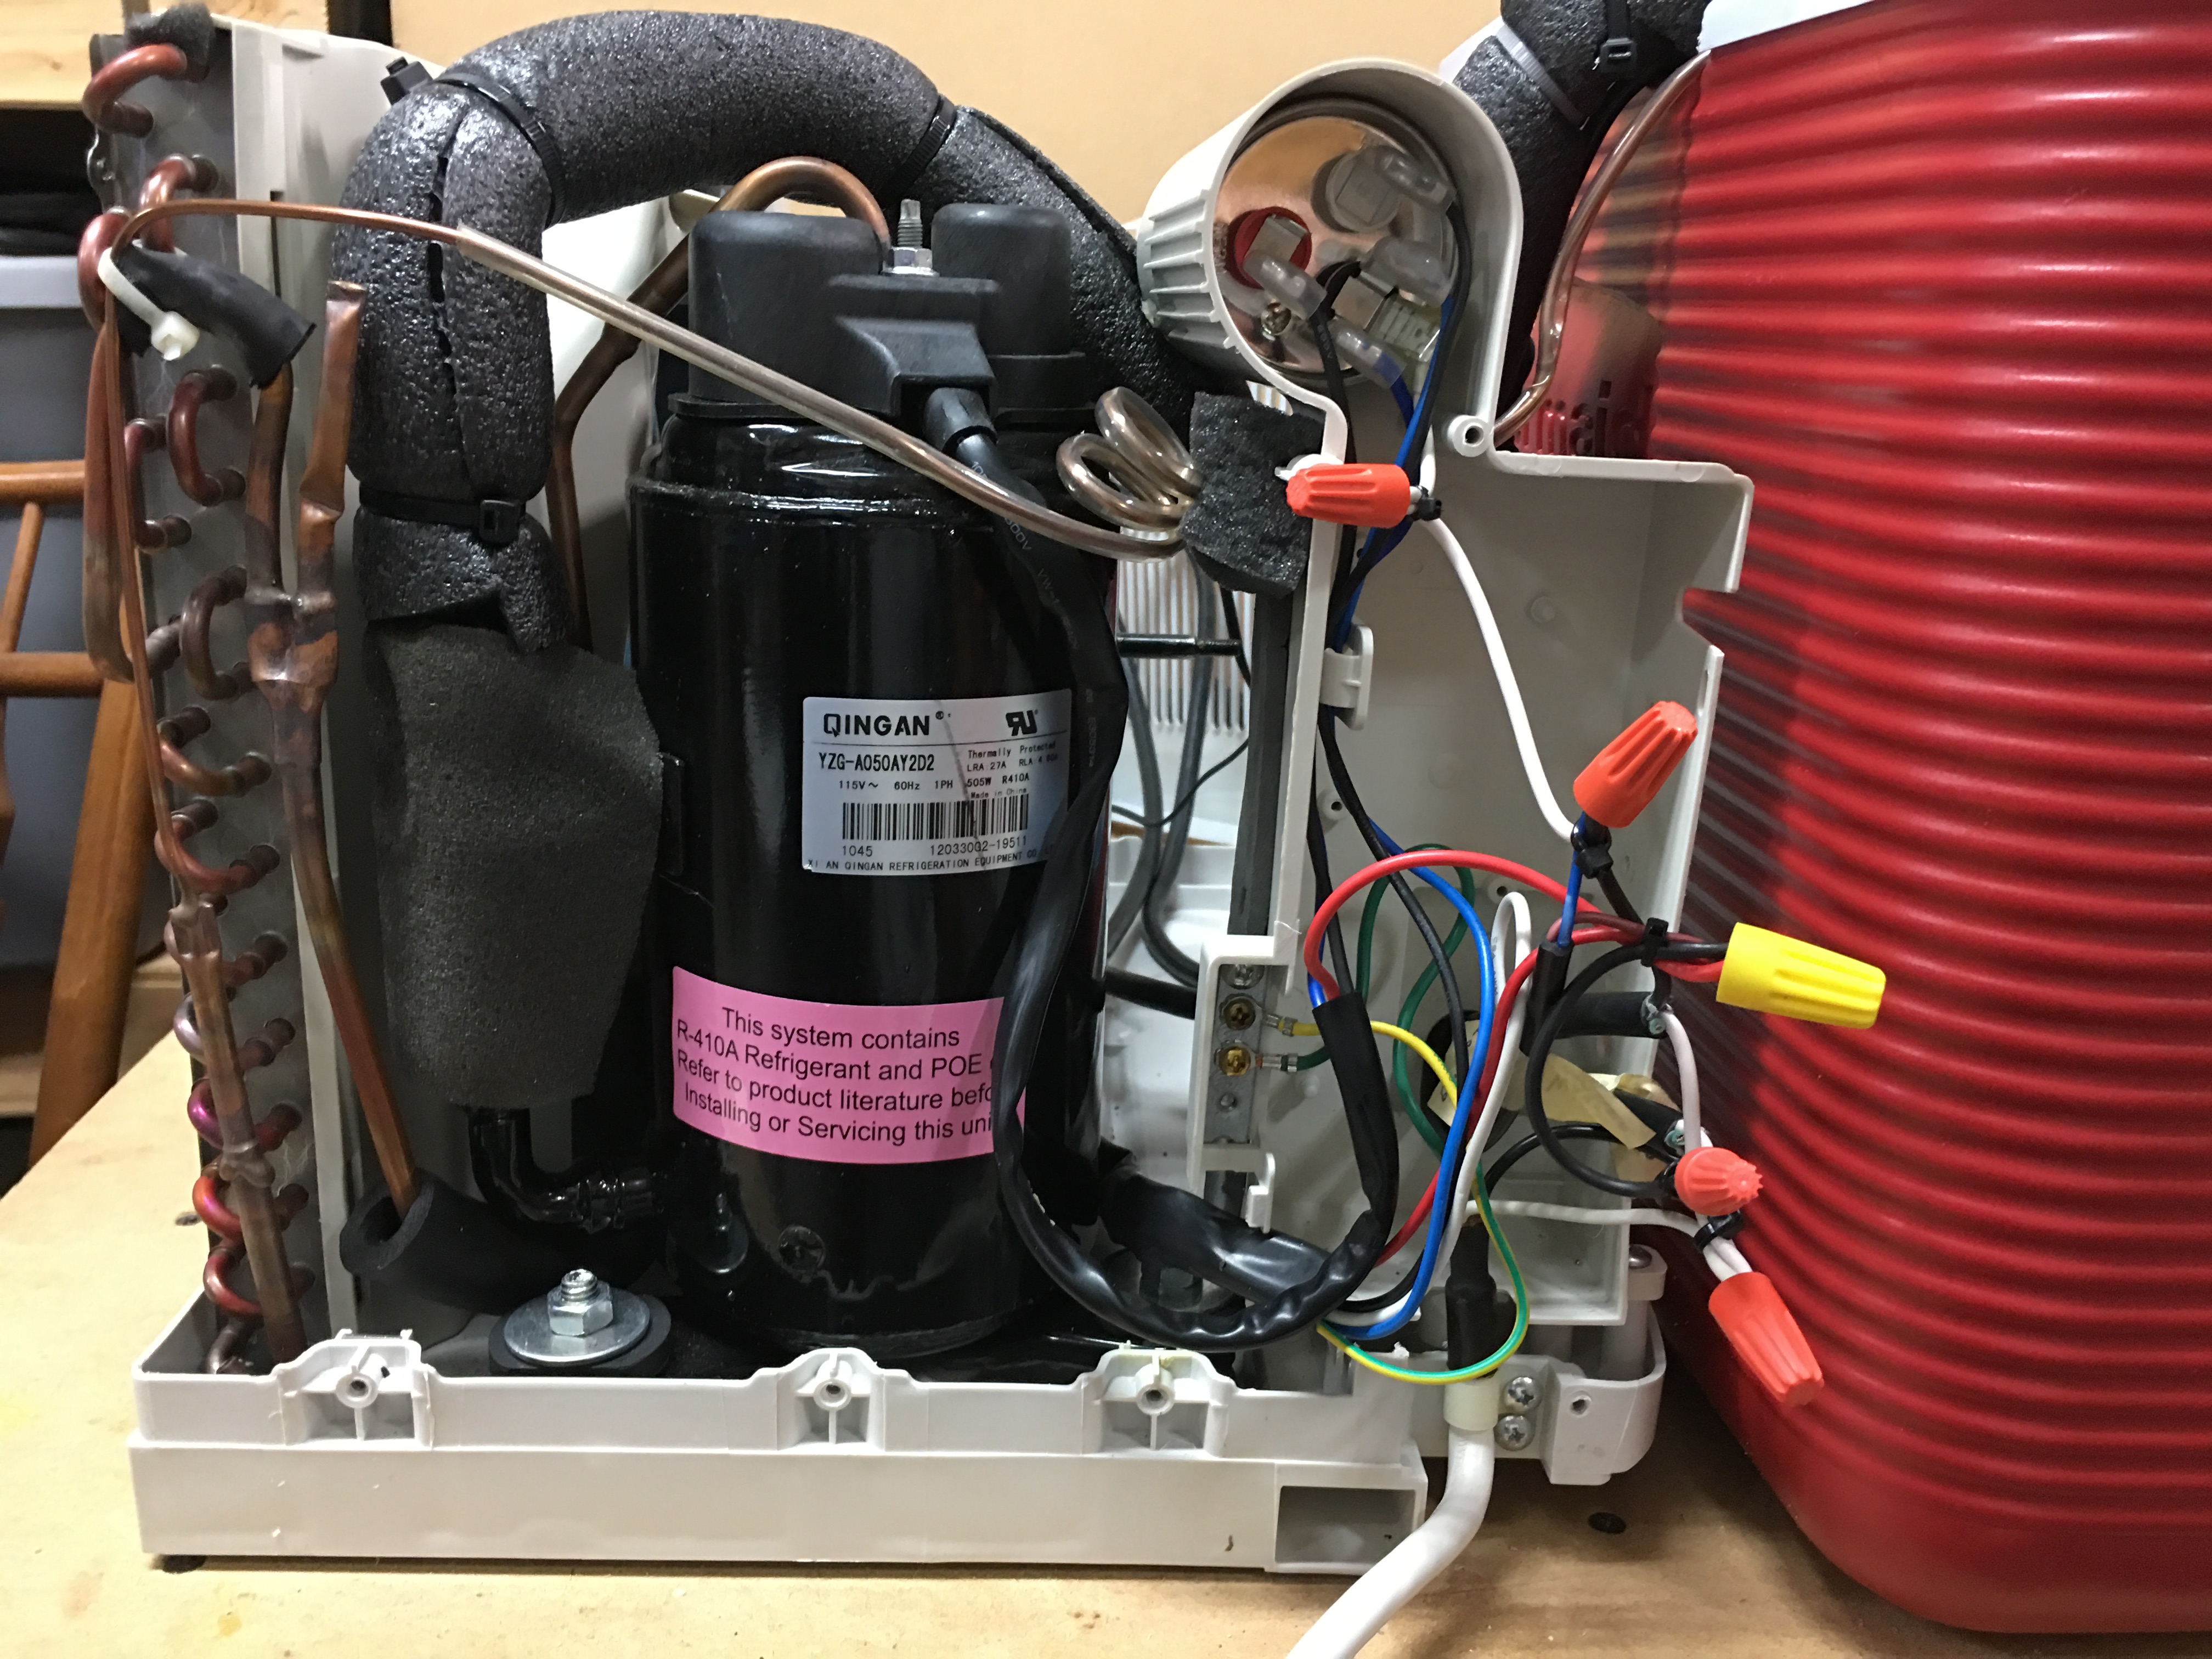
This is a Frigidaire 5000 BTU window AC unit with analog controls. Whether it is an analog or digital unit, the only components needed are five things: the HERM compressor, compressor fan, compressor coil, evaporator coil and capacitor. Other than that, I kept the base it is all mounted to, the housing cover, and wires.
Here is the unit with cover removed, return air blower wheel and styrofoam air routing removed. It is ready to begin working on.
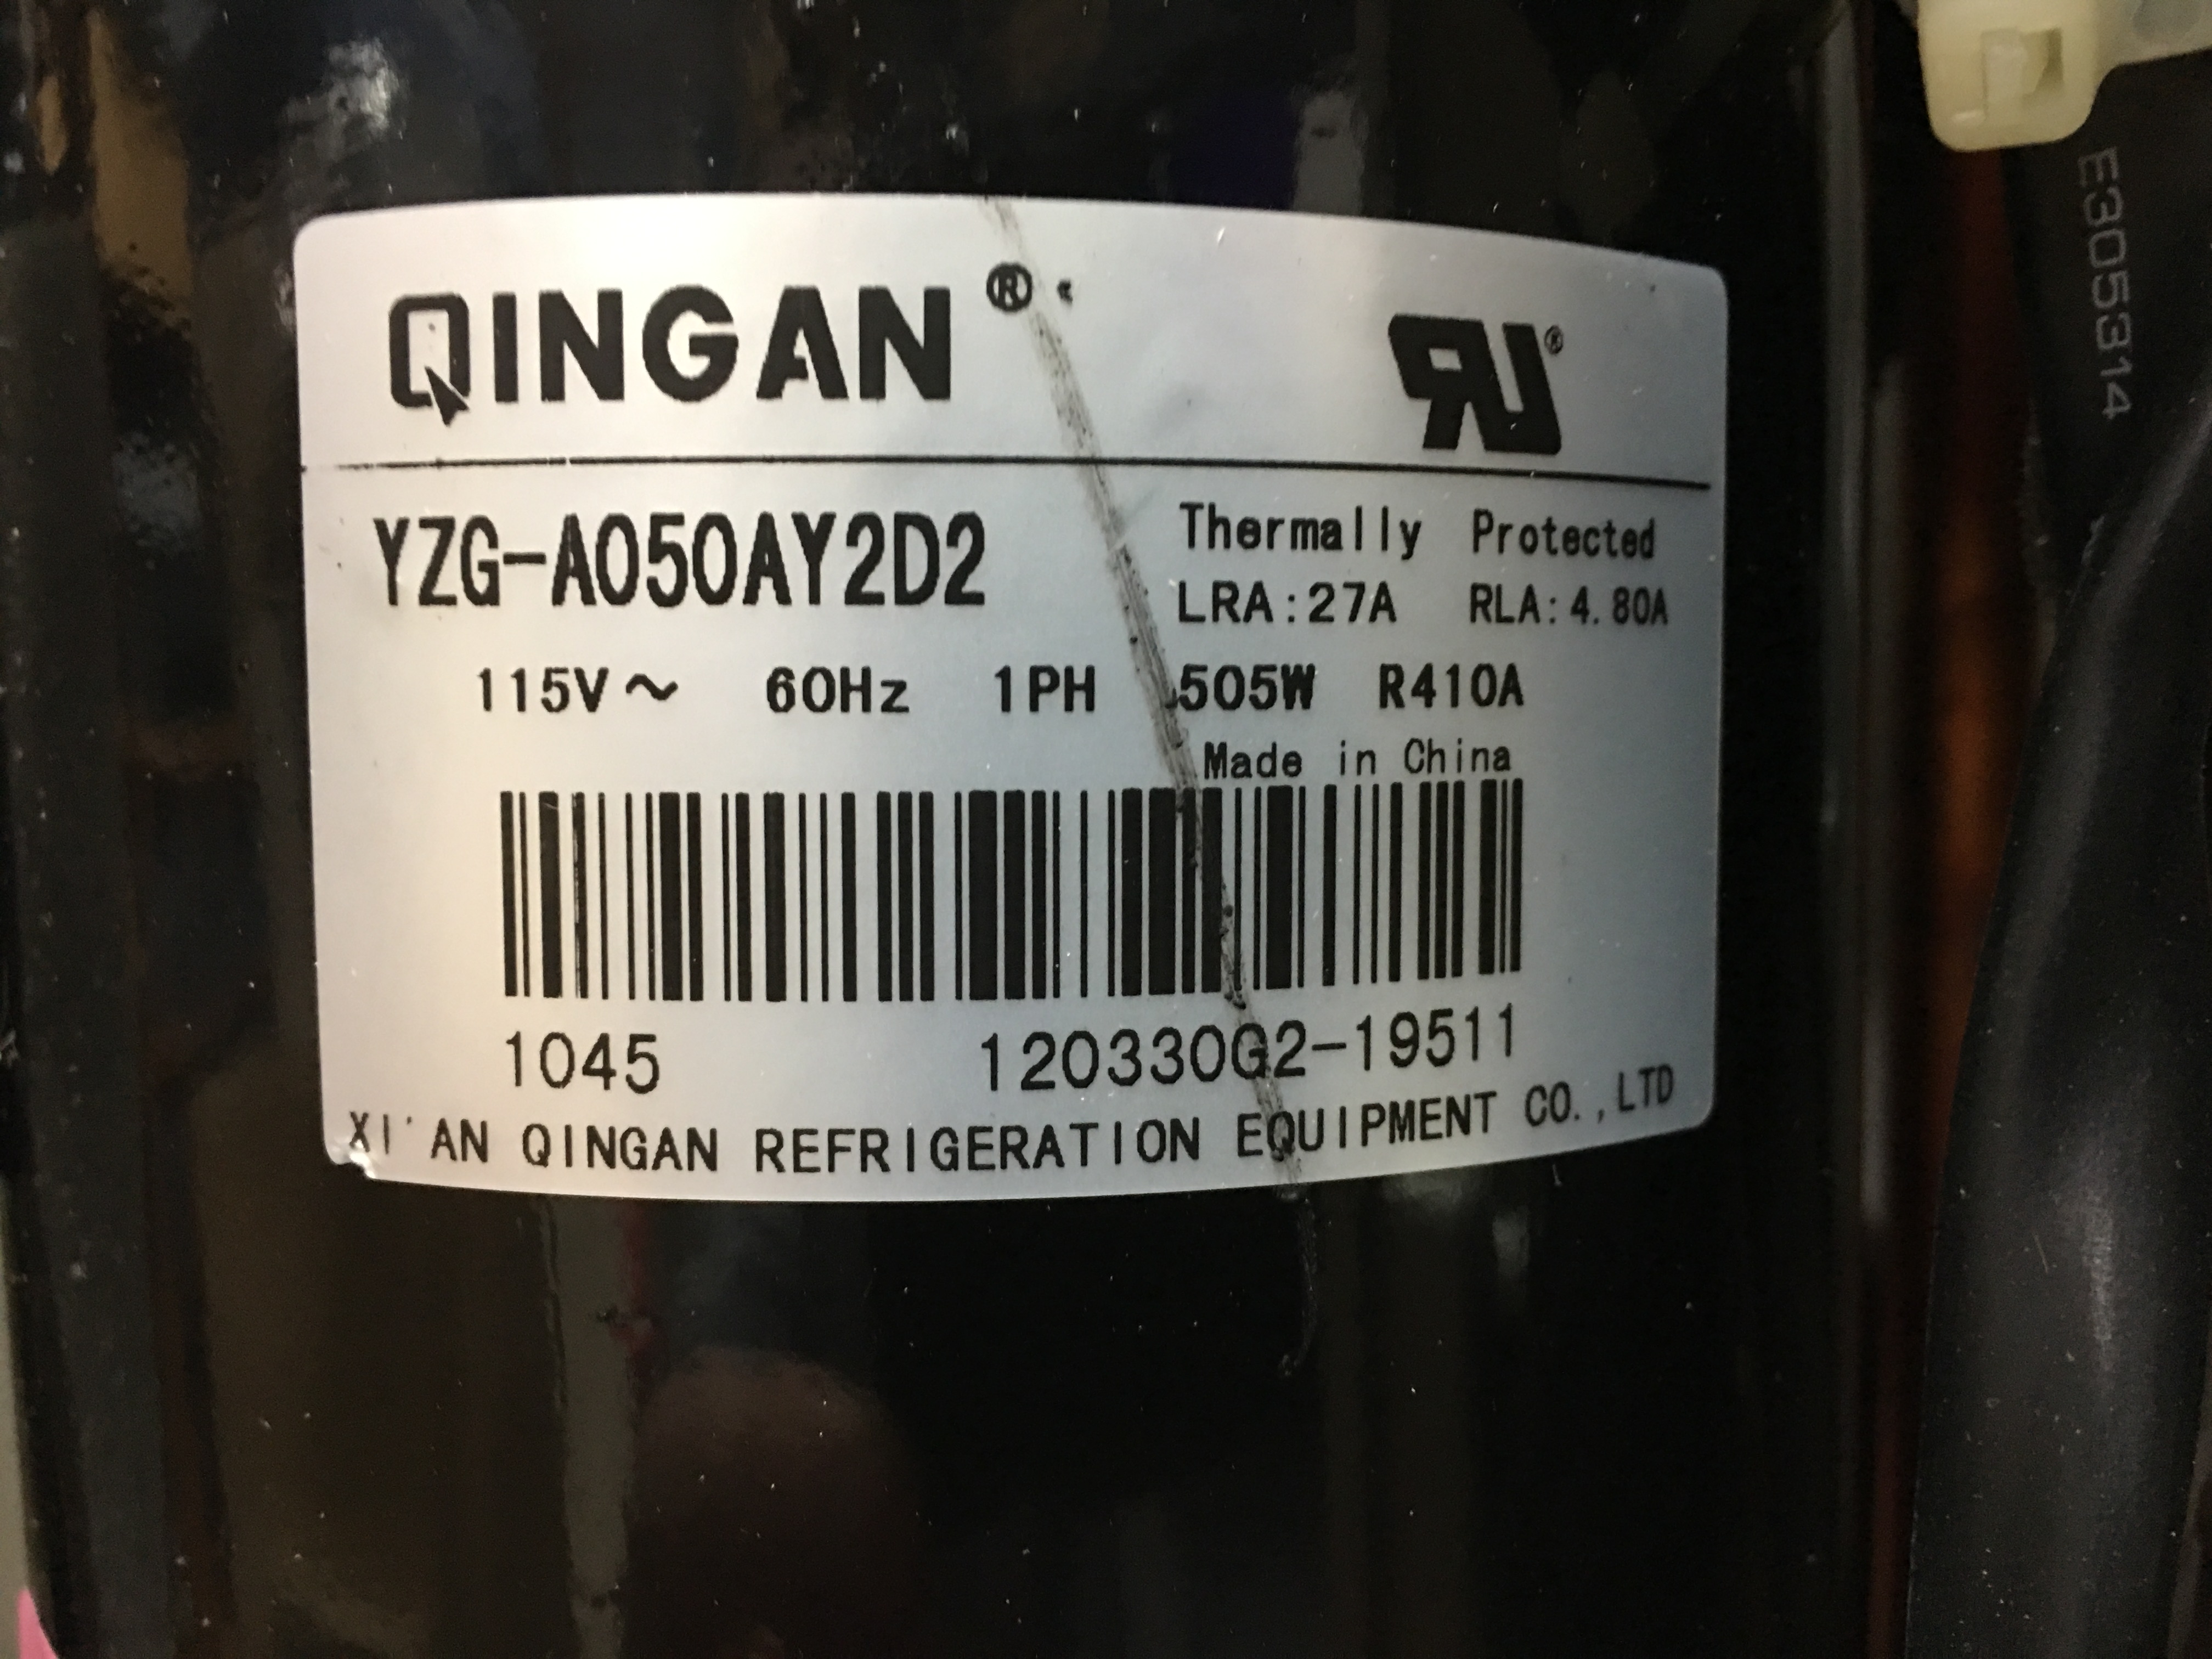
I took pictures of everything, including how all the wiring was hooked up originally. This is the label on the HERM compressor unit:
This is the schematic diagram:

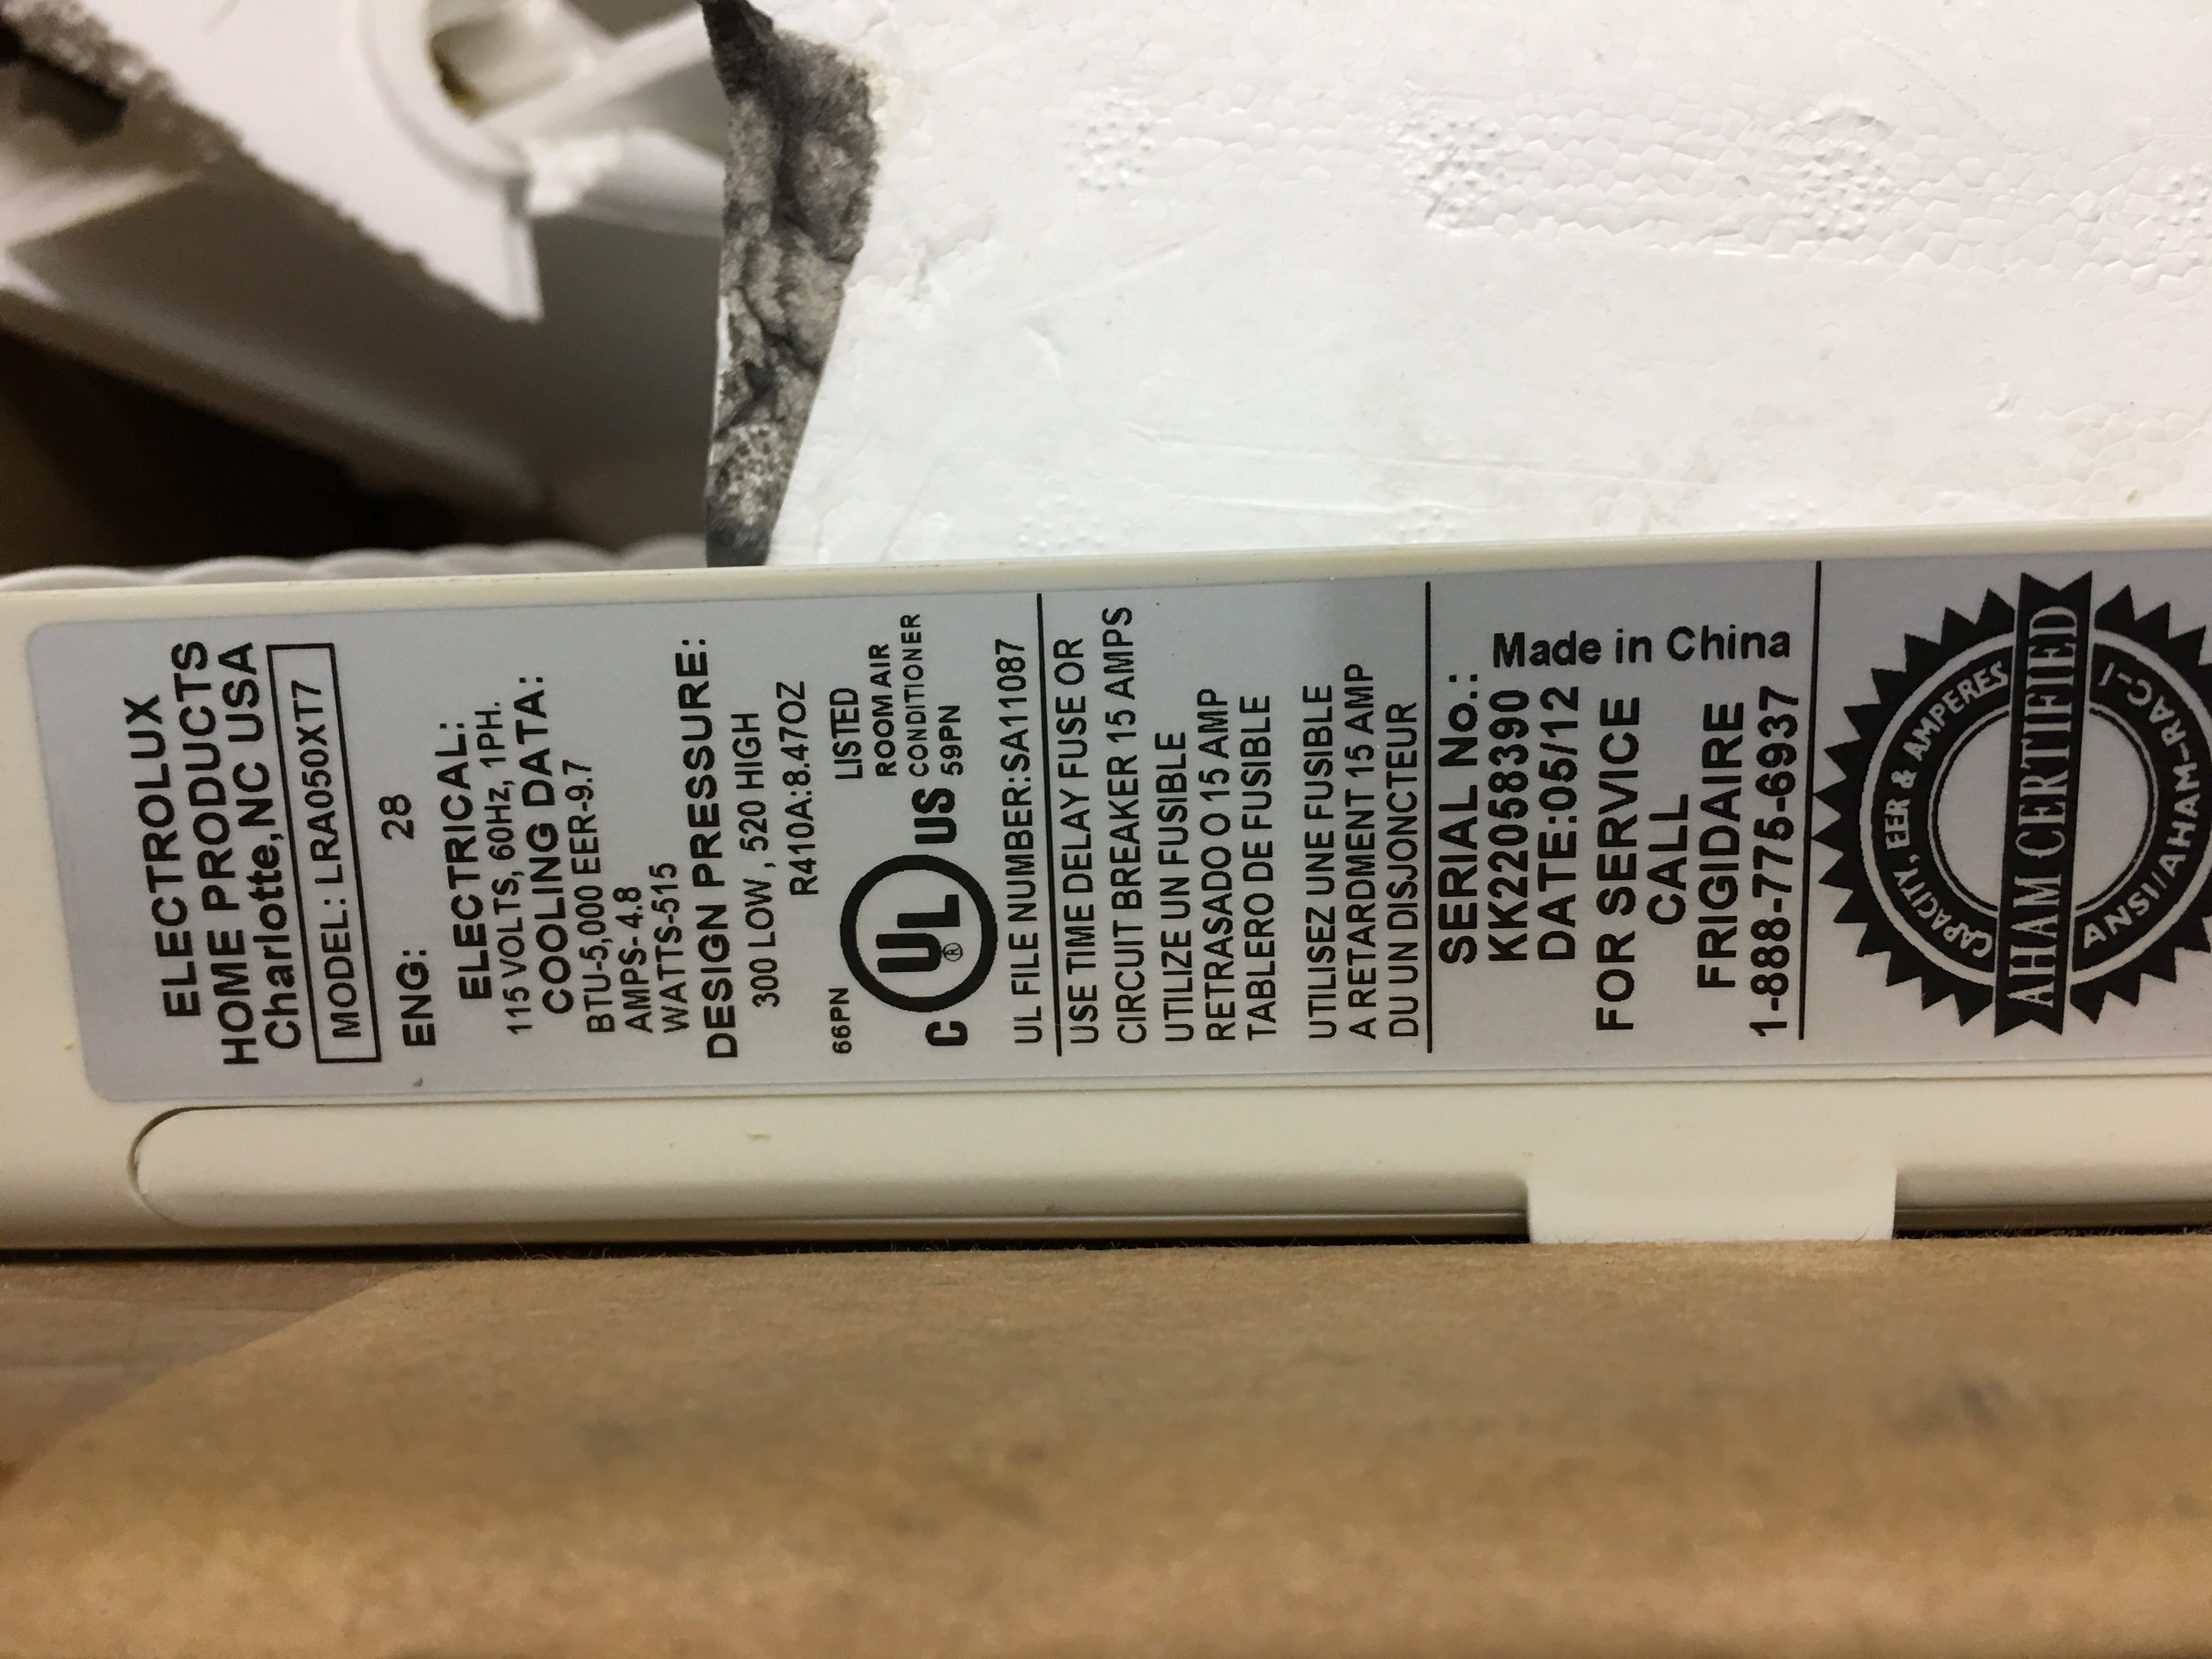
This is the unit model information label:
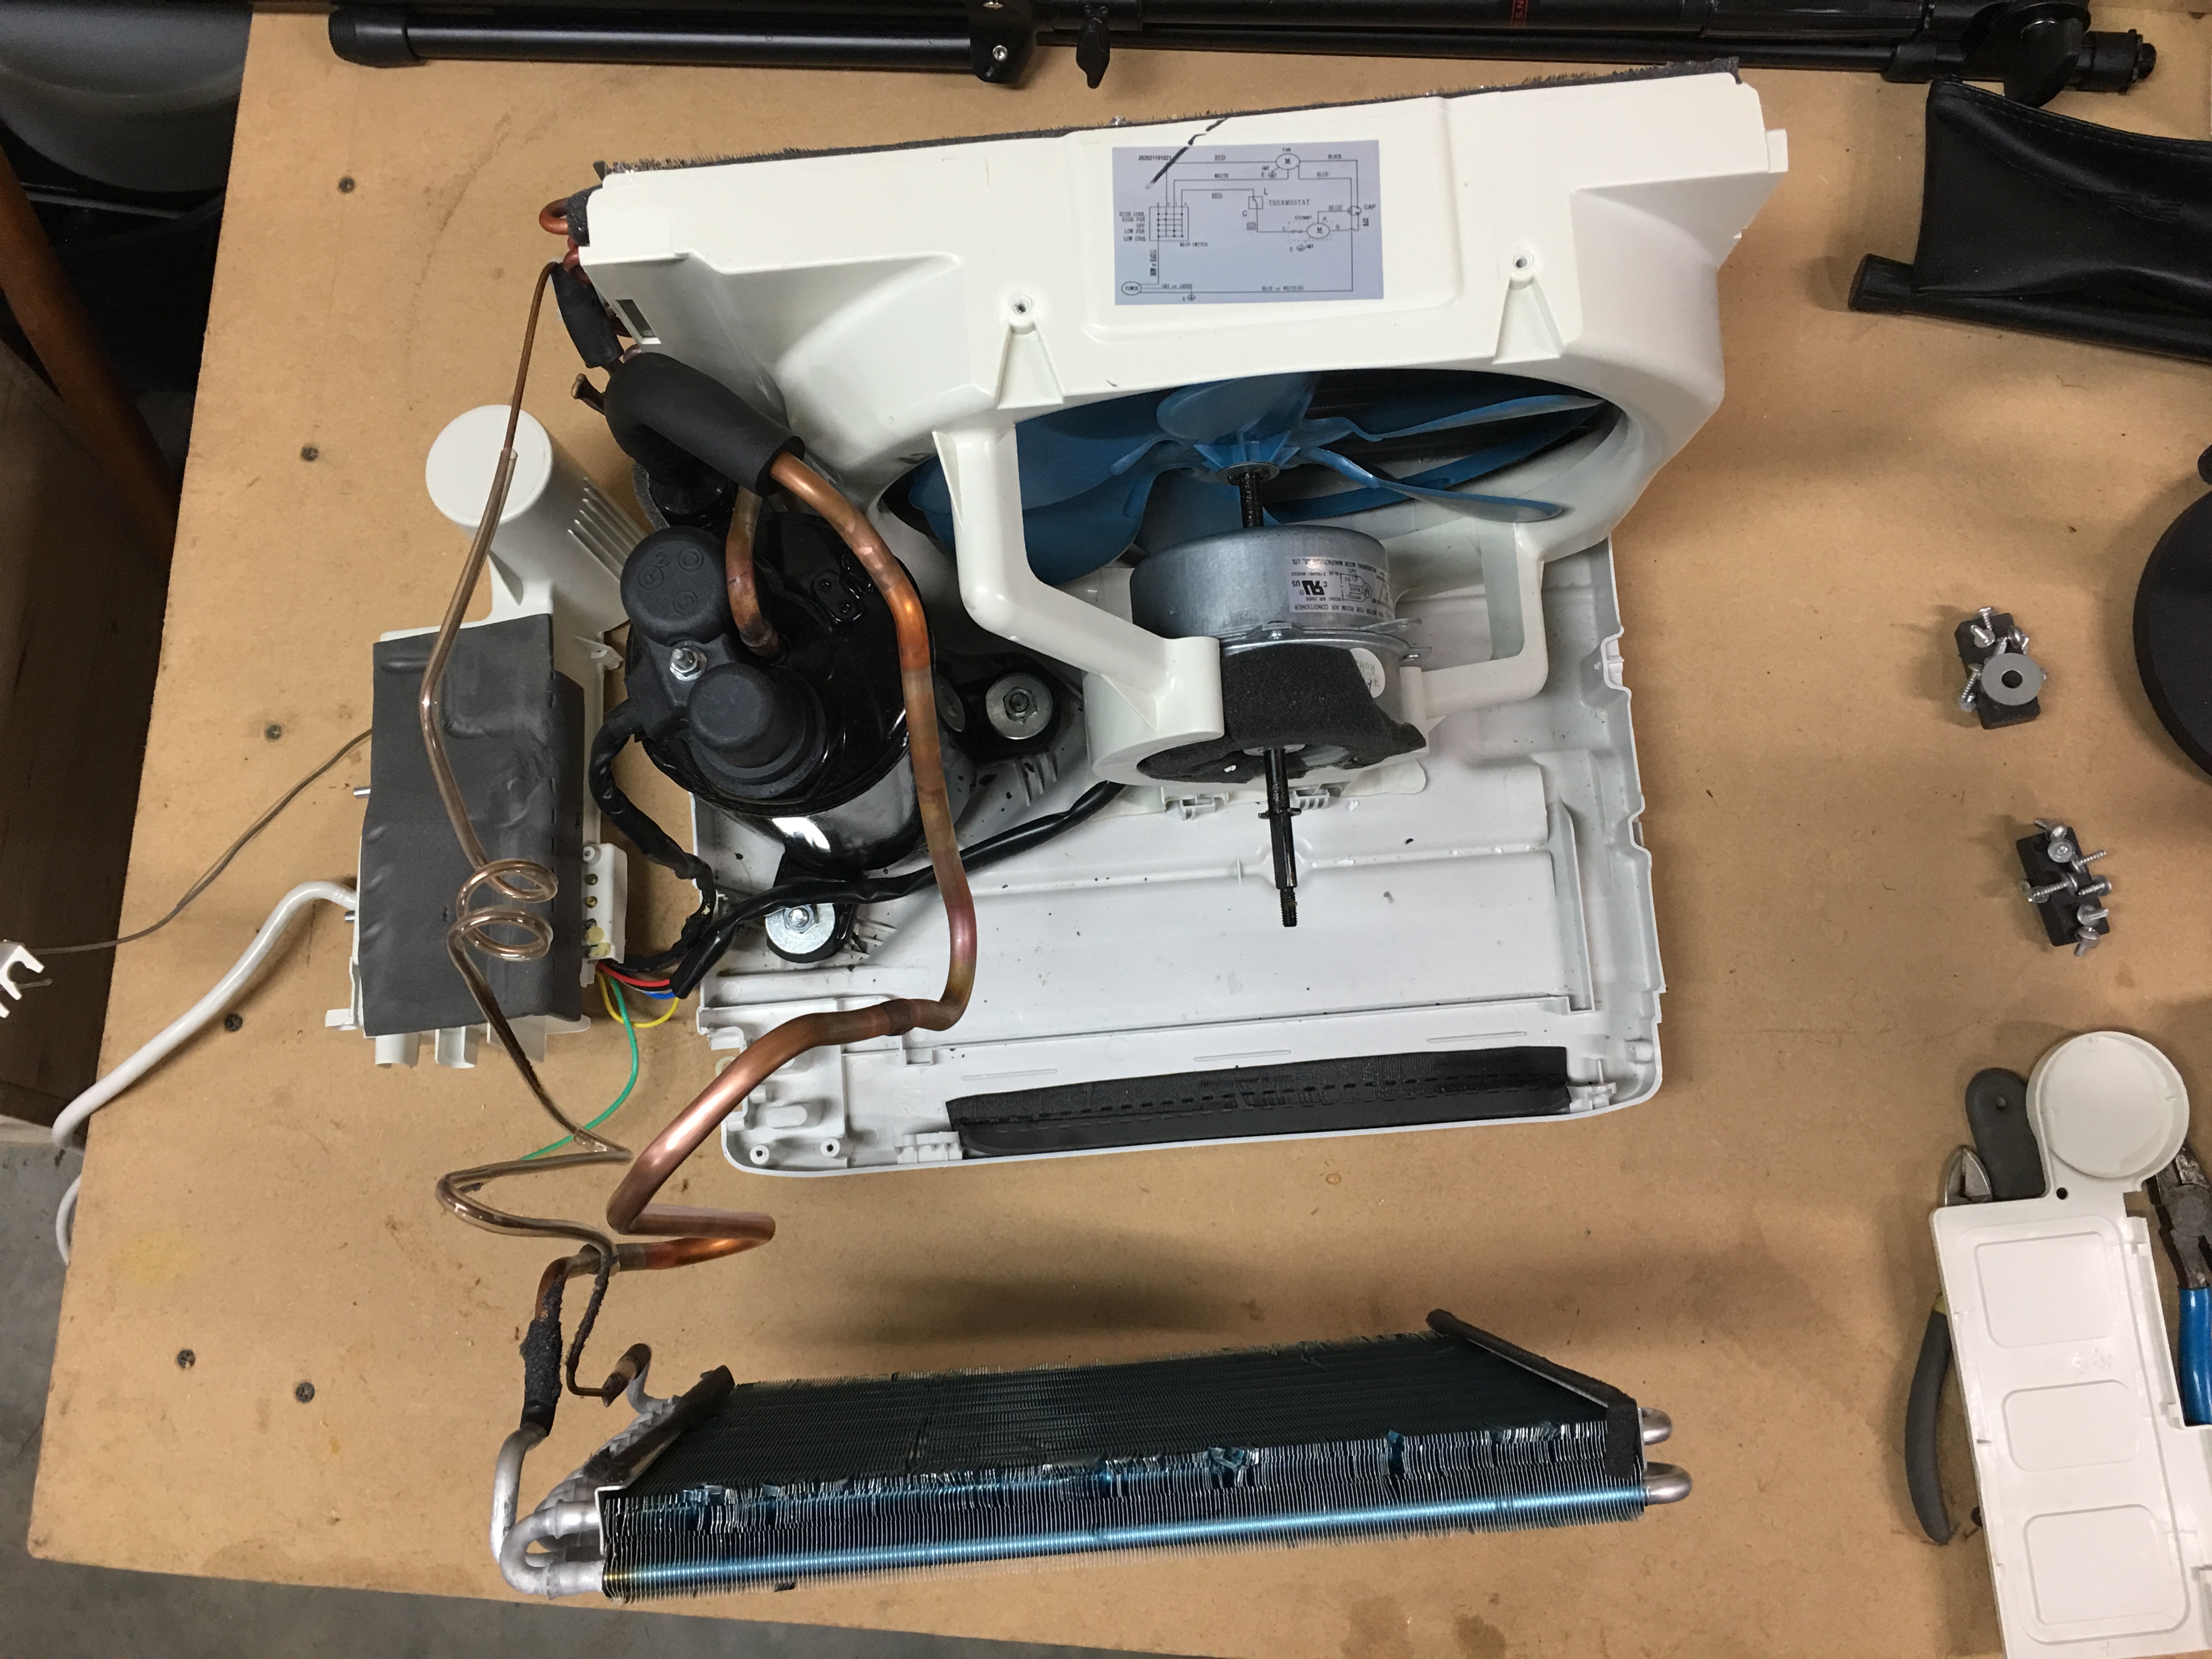
Here I have begun bending the copper tubing very slowly, very carefully to move the evaporator coil into a position that mimics how it will be positioned inside the cooler:
A top down view for more perspective:
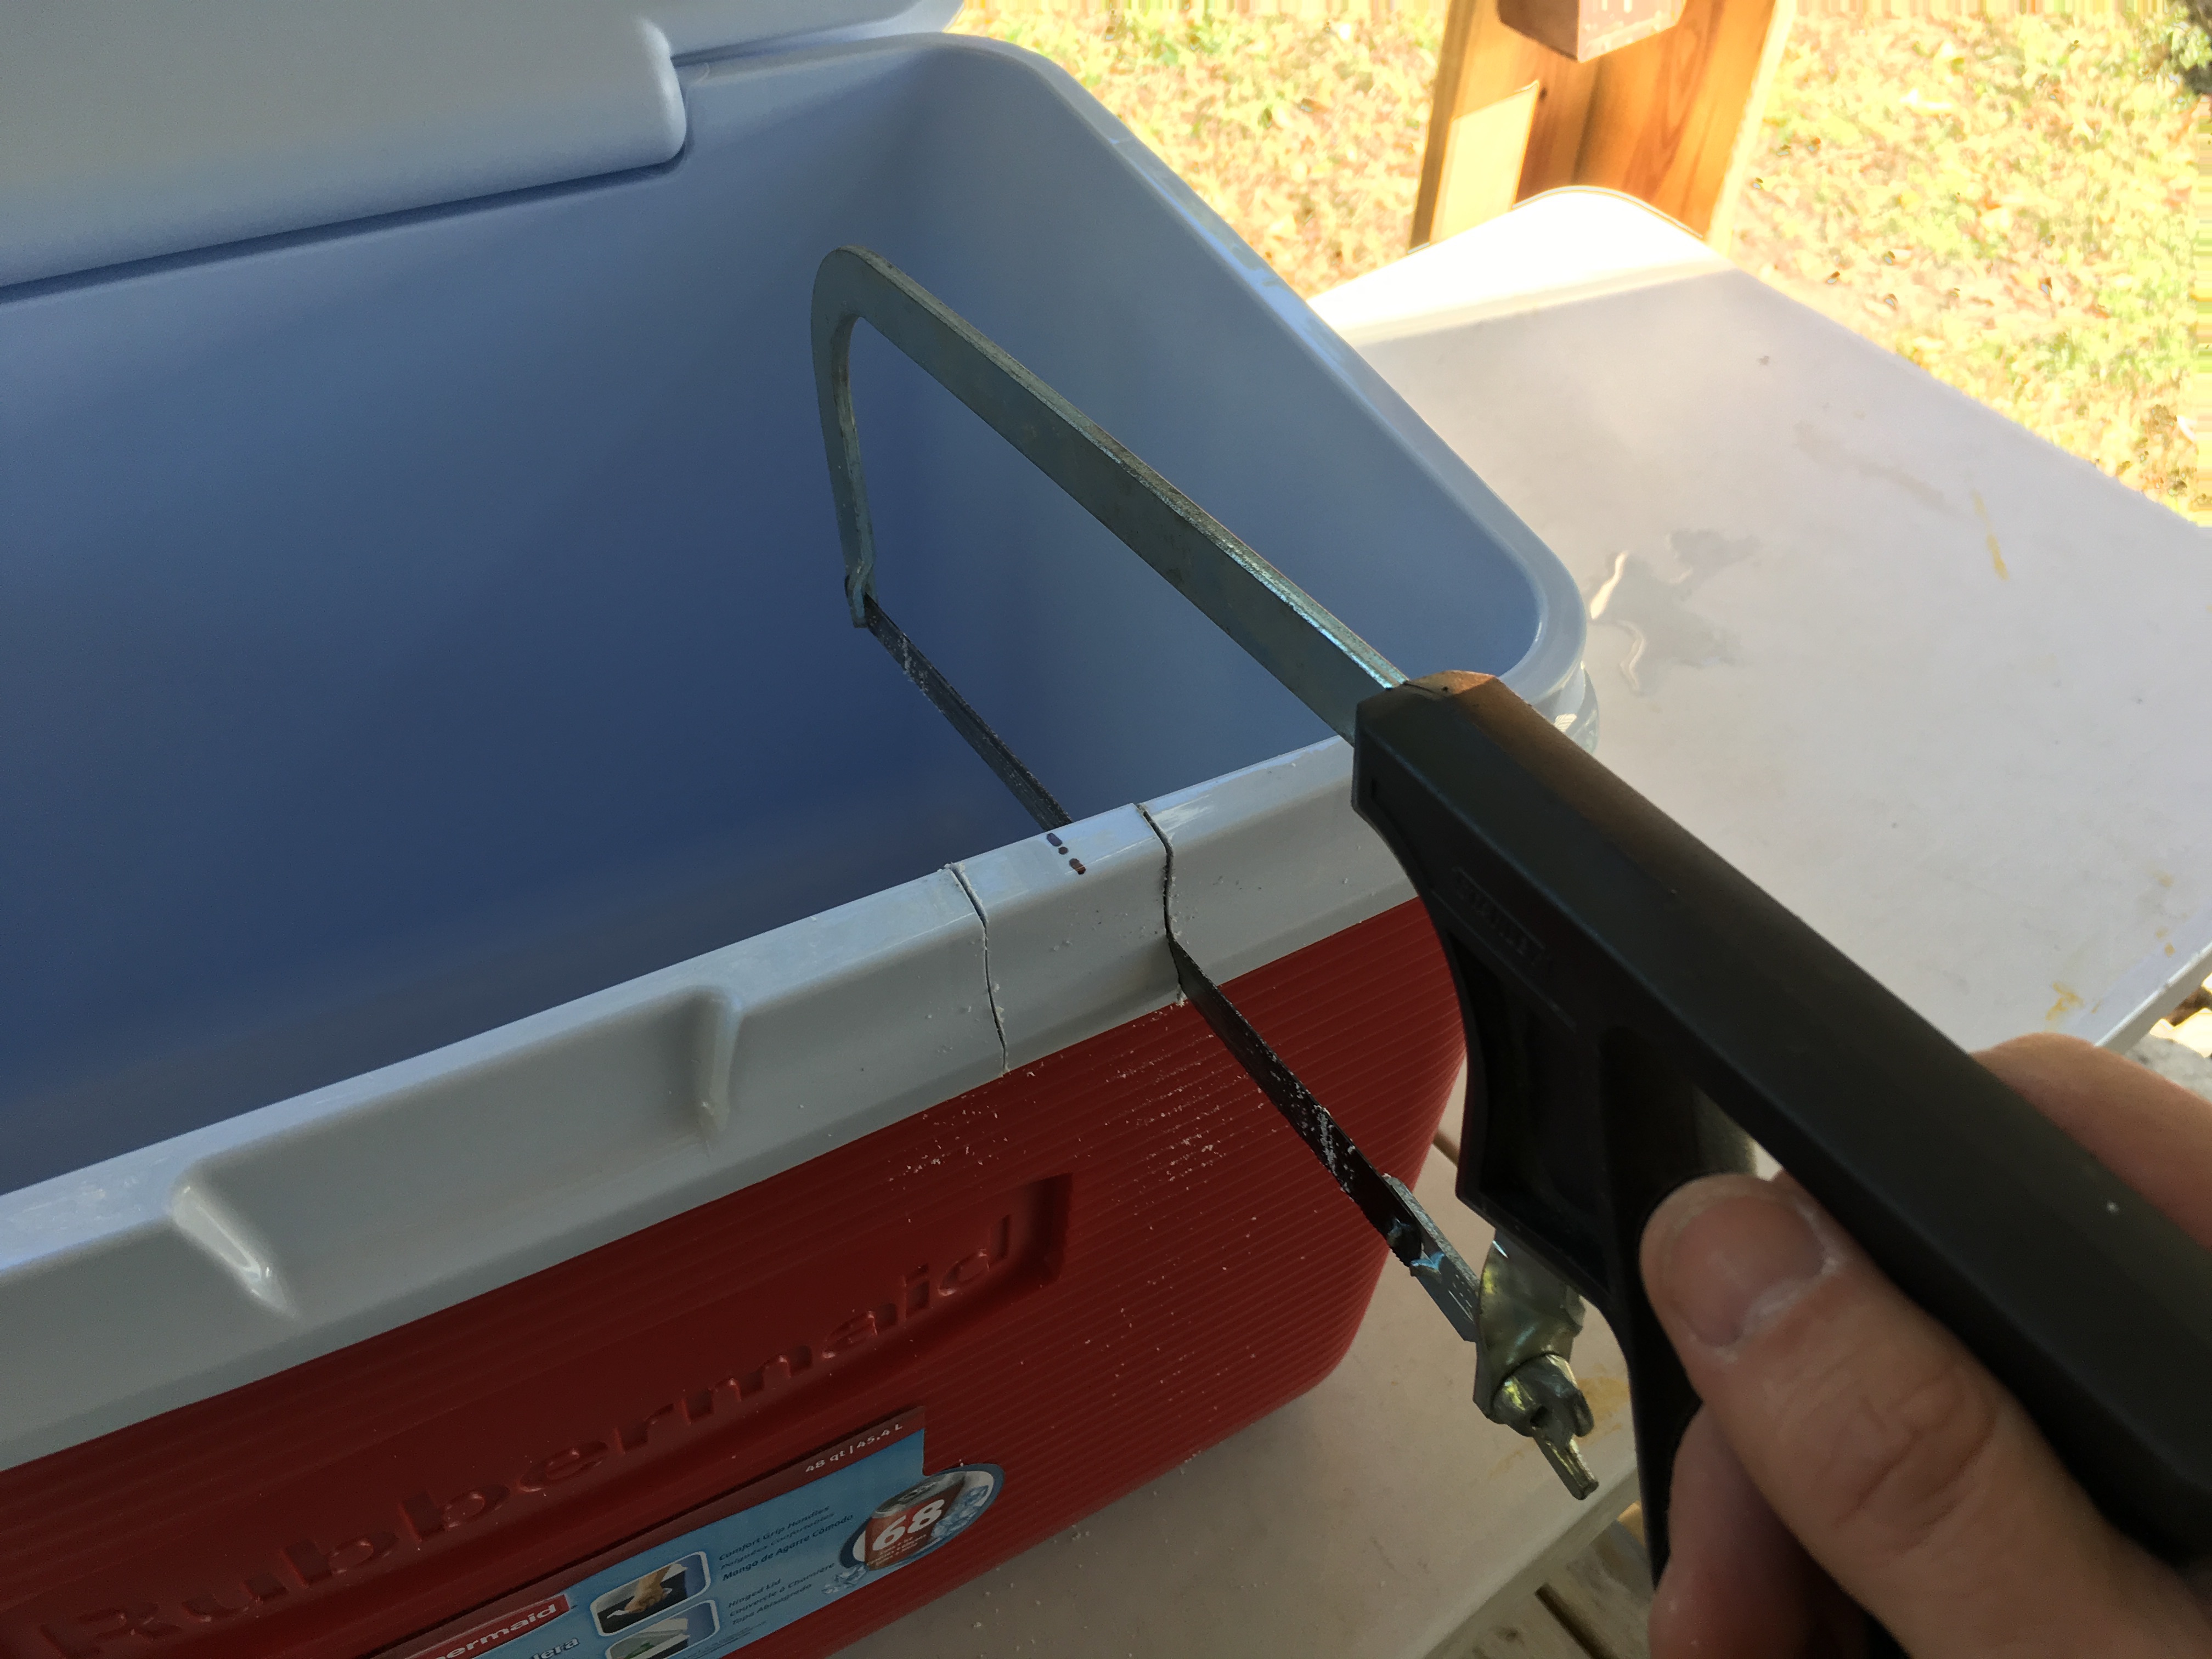
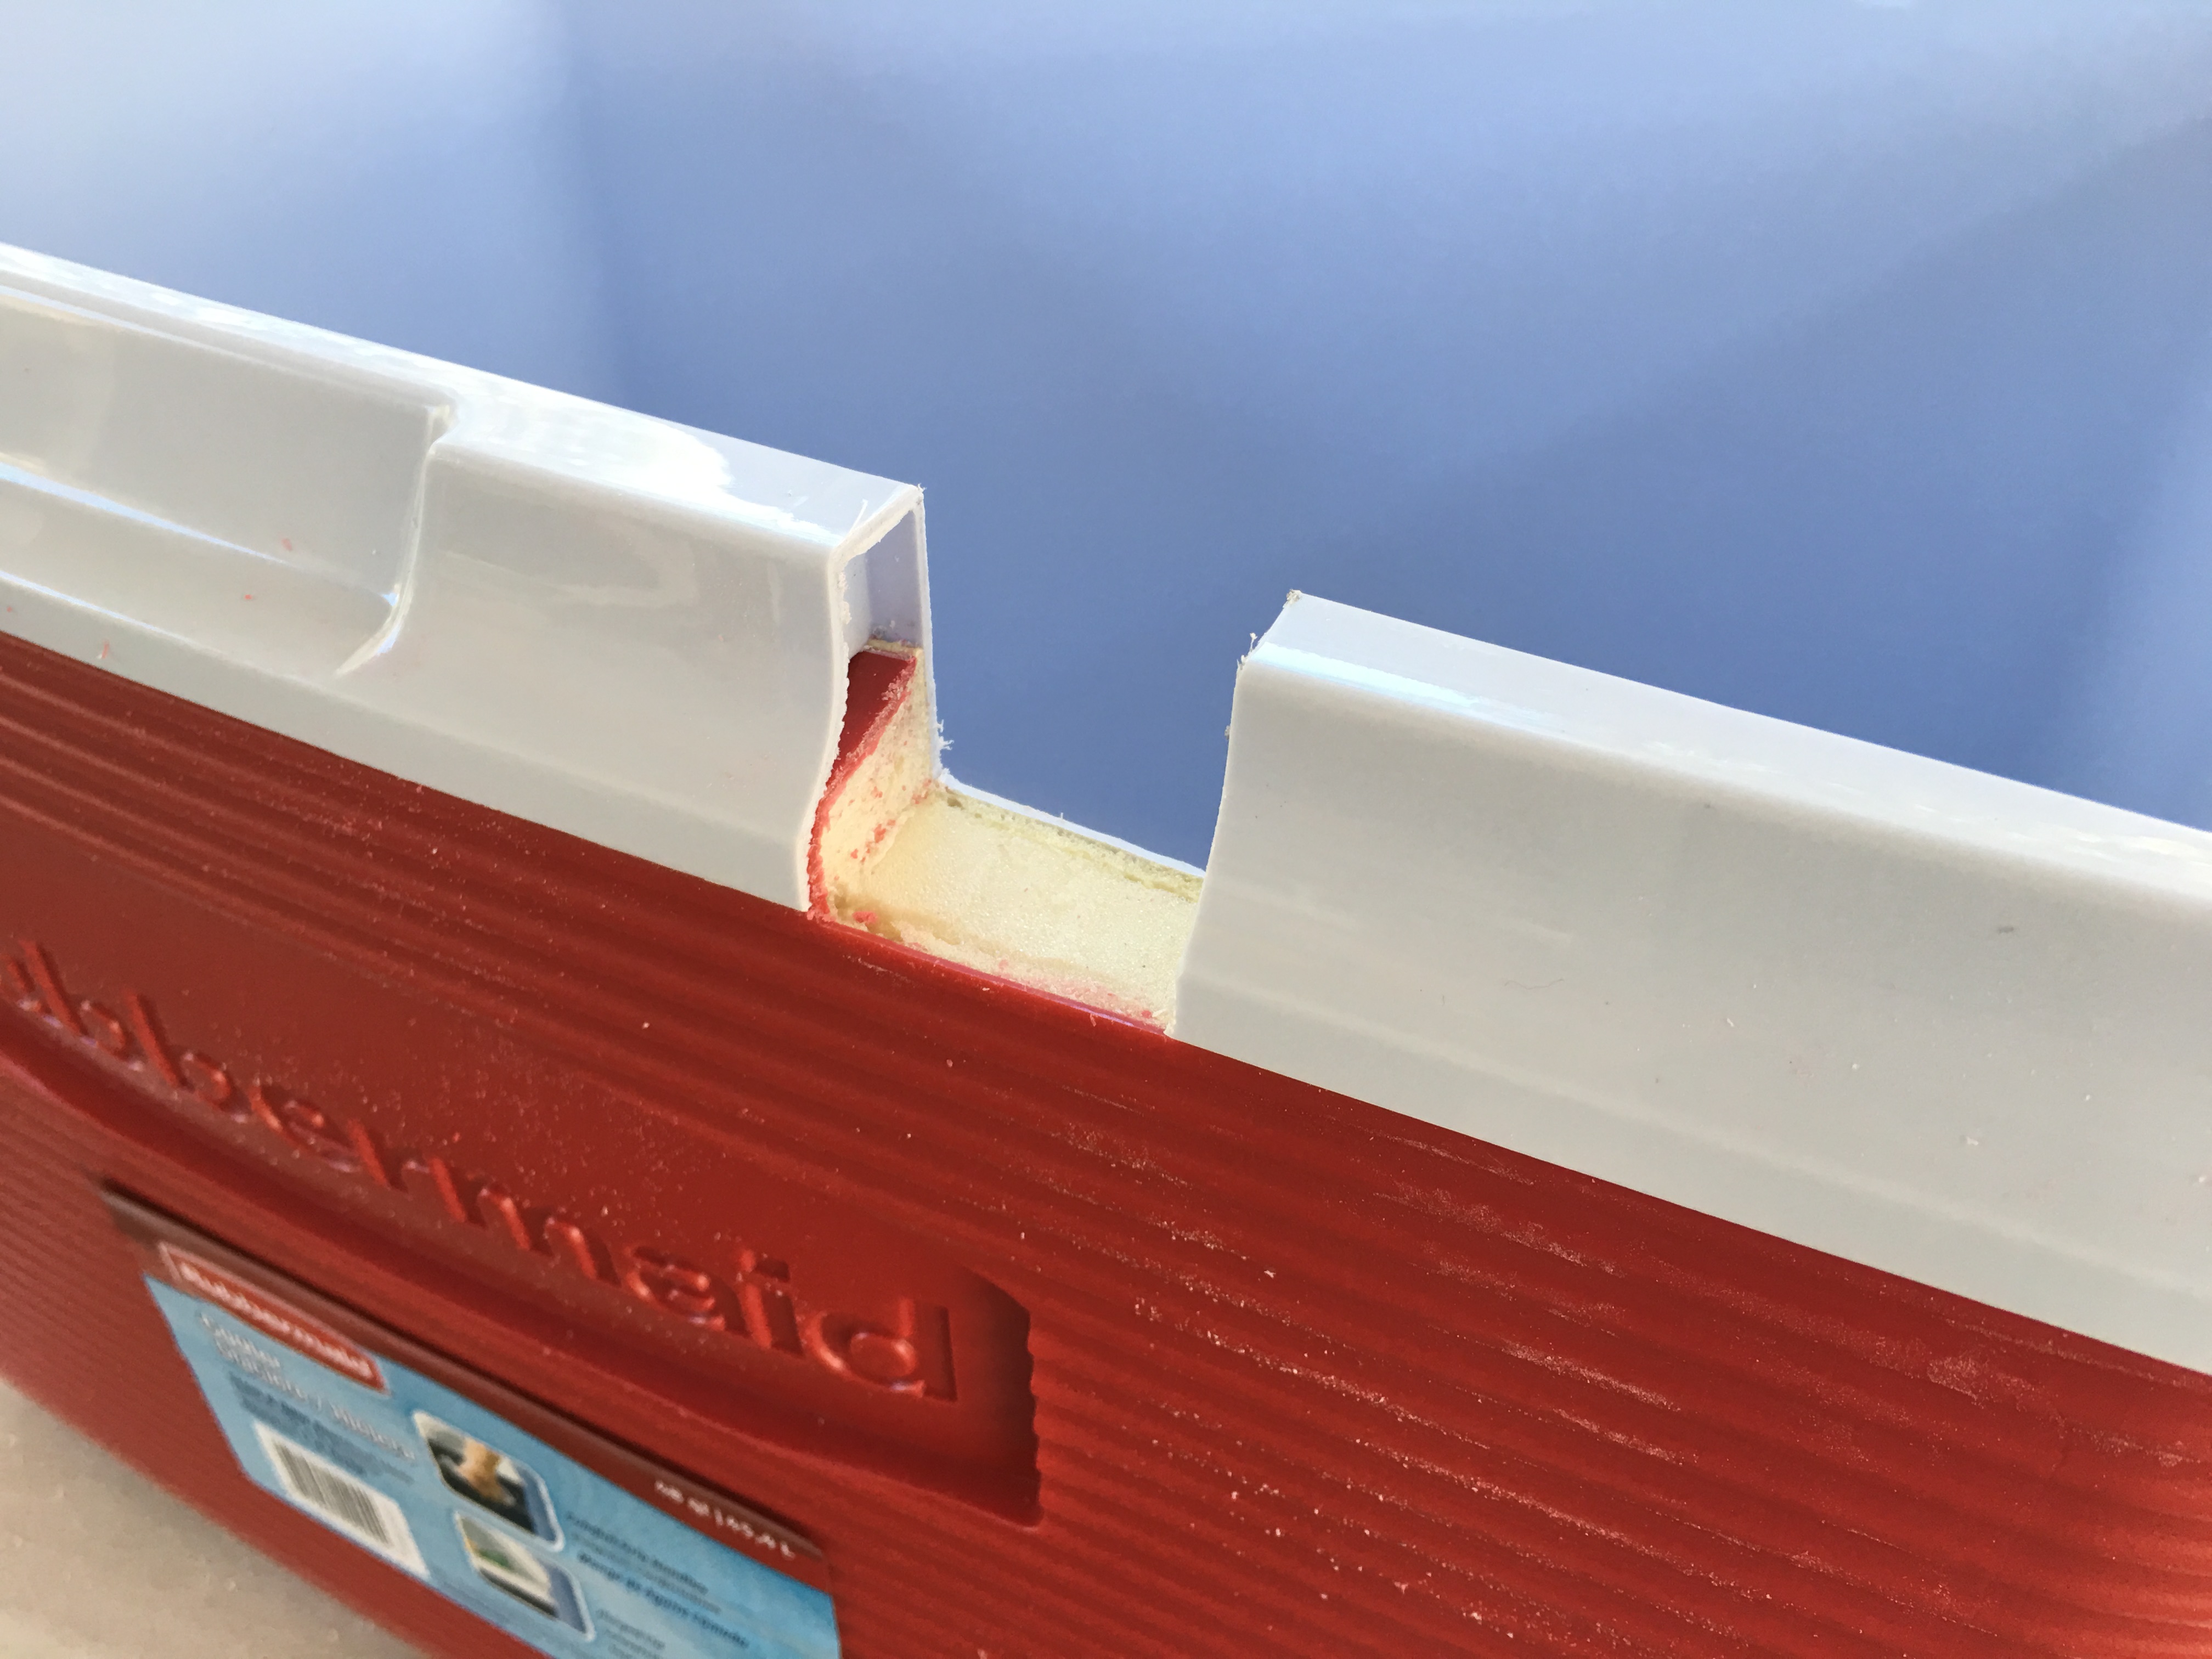
I have measured where I need to cut a slot in the cooler for the copper tubing. It cuts easily with a my hack saw:
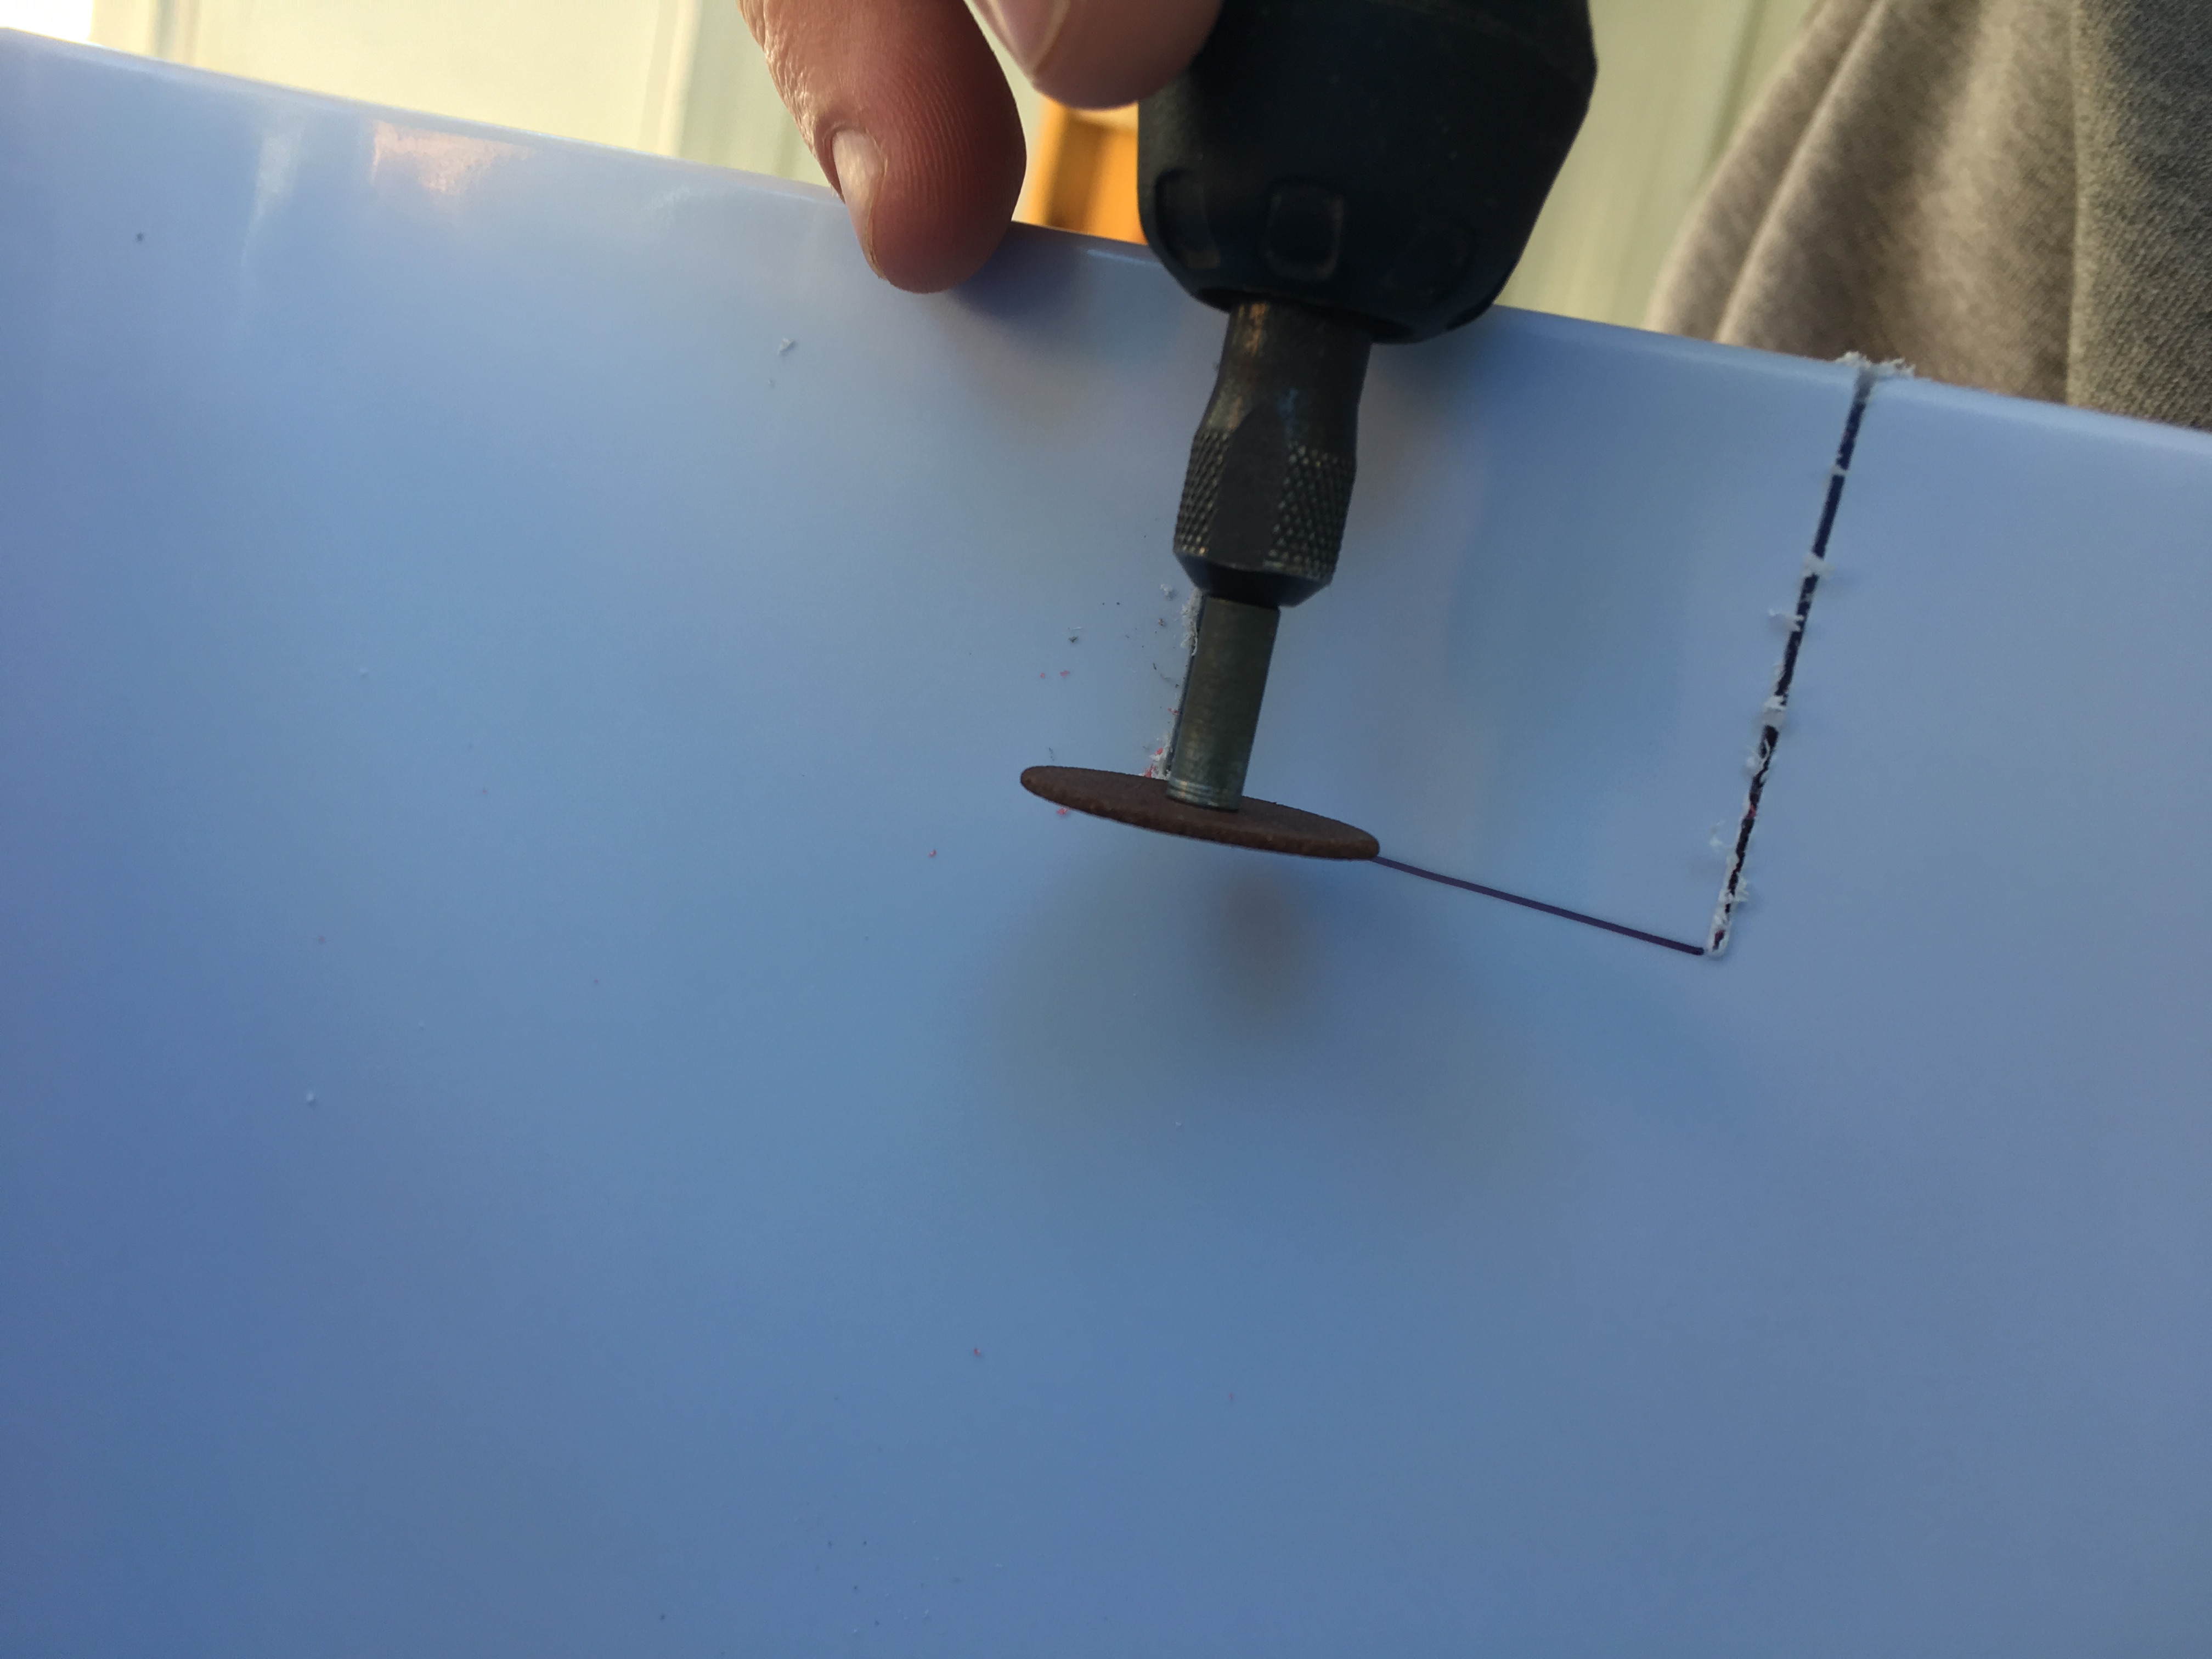
I used a Dremel drill with a cutoff wheel to make the horizontal cut:
Here is the cooler with the slot cut out and ready for the evaporator coil:
The initial fit of the evaporator coil. The coil is a bit high so I made some bends in the copper tubing to get the coil to set on the bottom of the cooler. It needed to be as low as possible in the cooler to make sure the entire coil is submerged in the glycol solution:
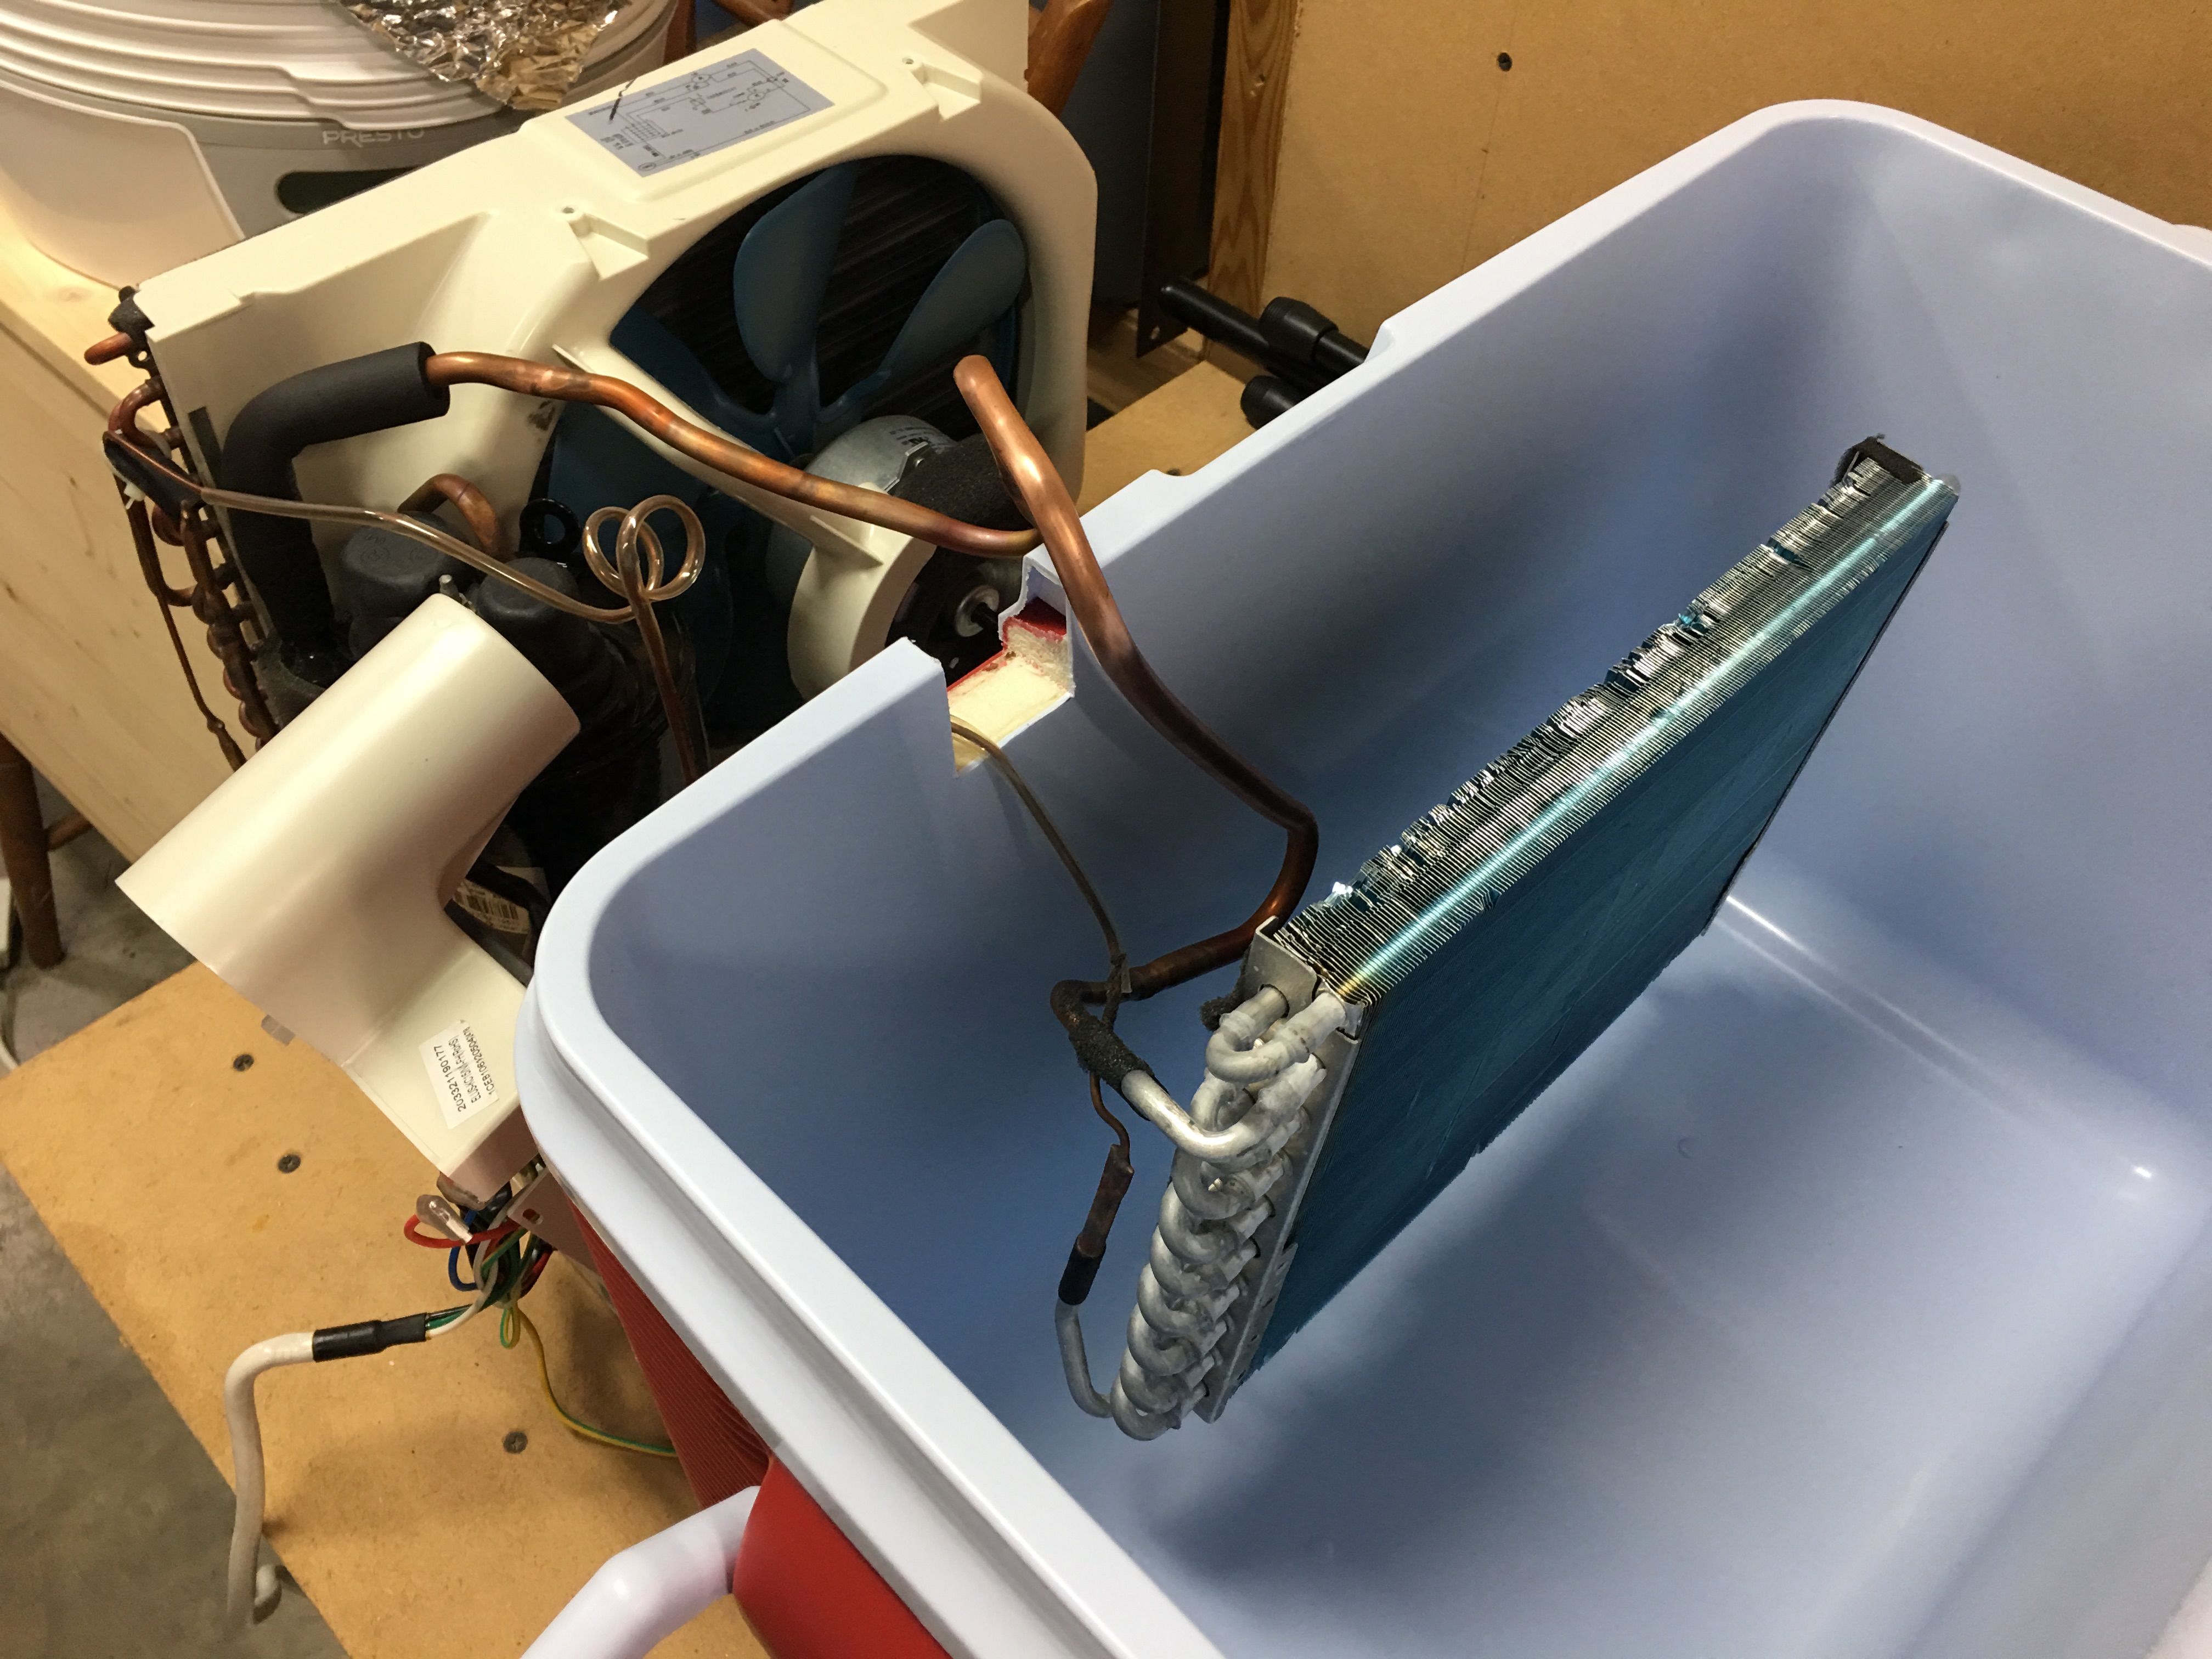
Another view of the copper tubing in final position through the slot in the cooler:
Another view for perspective:
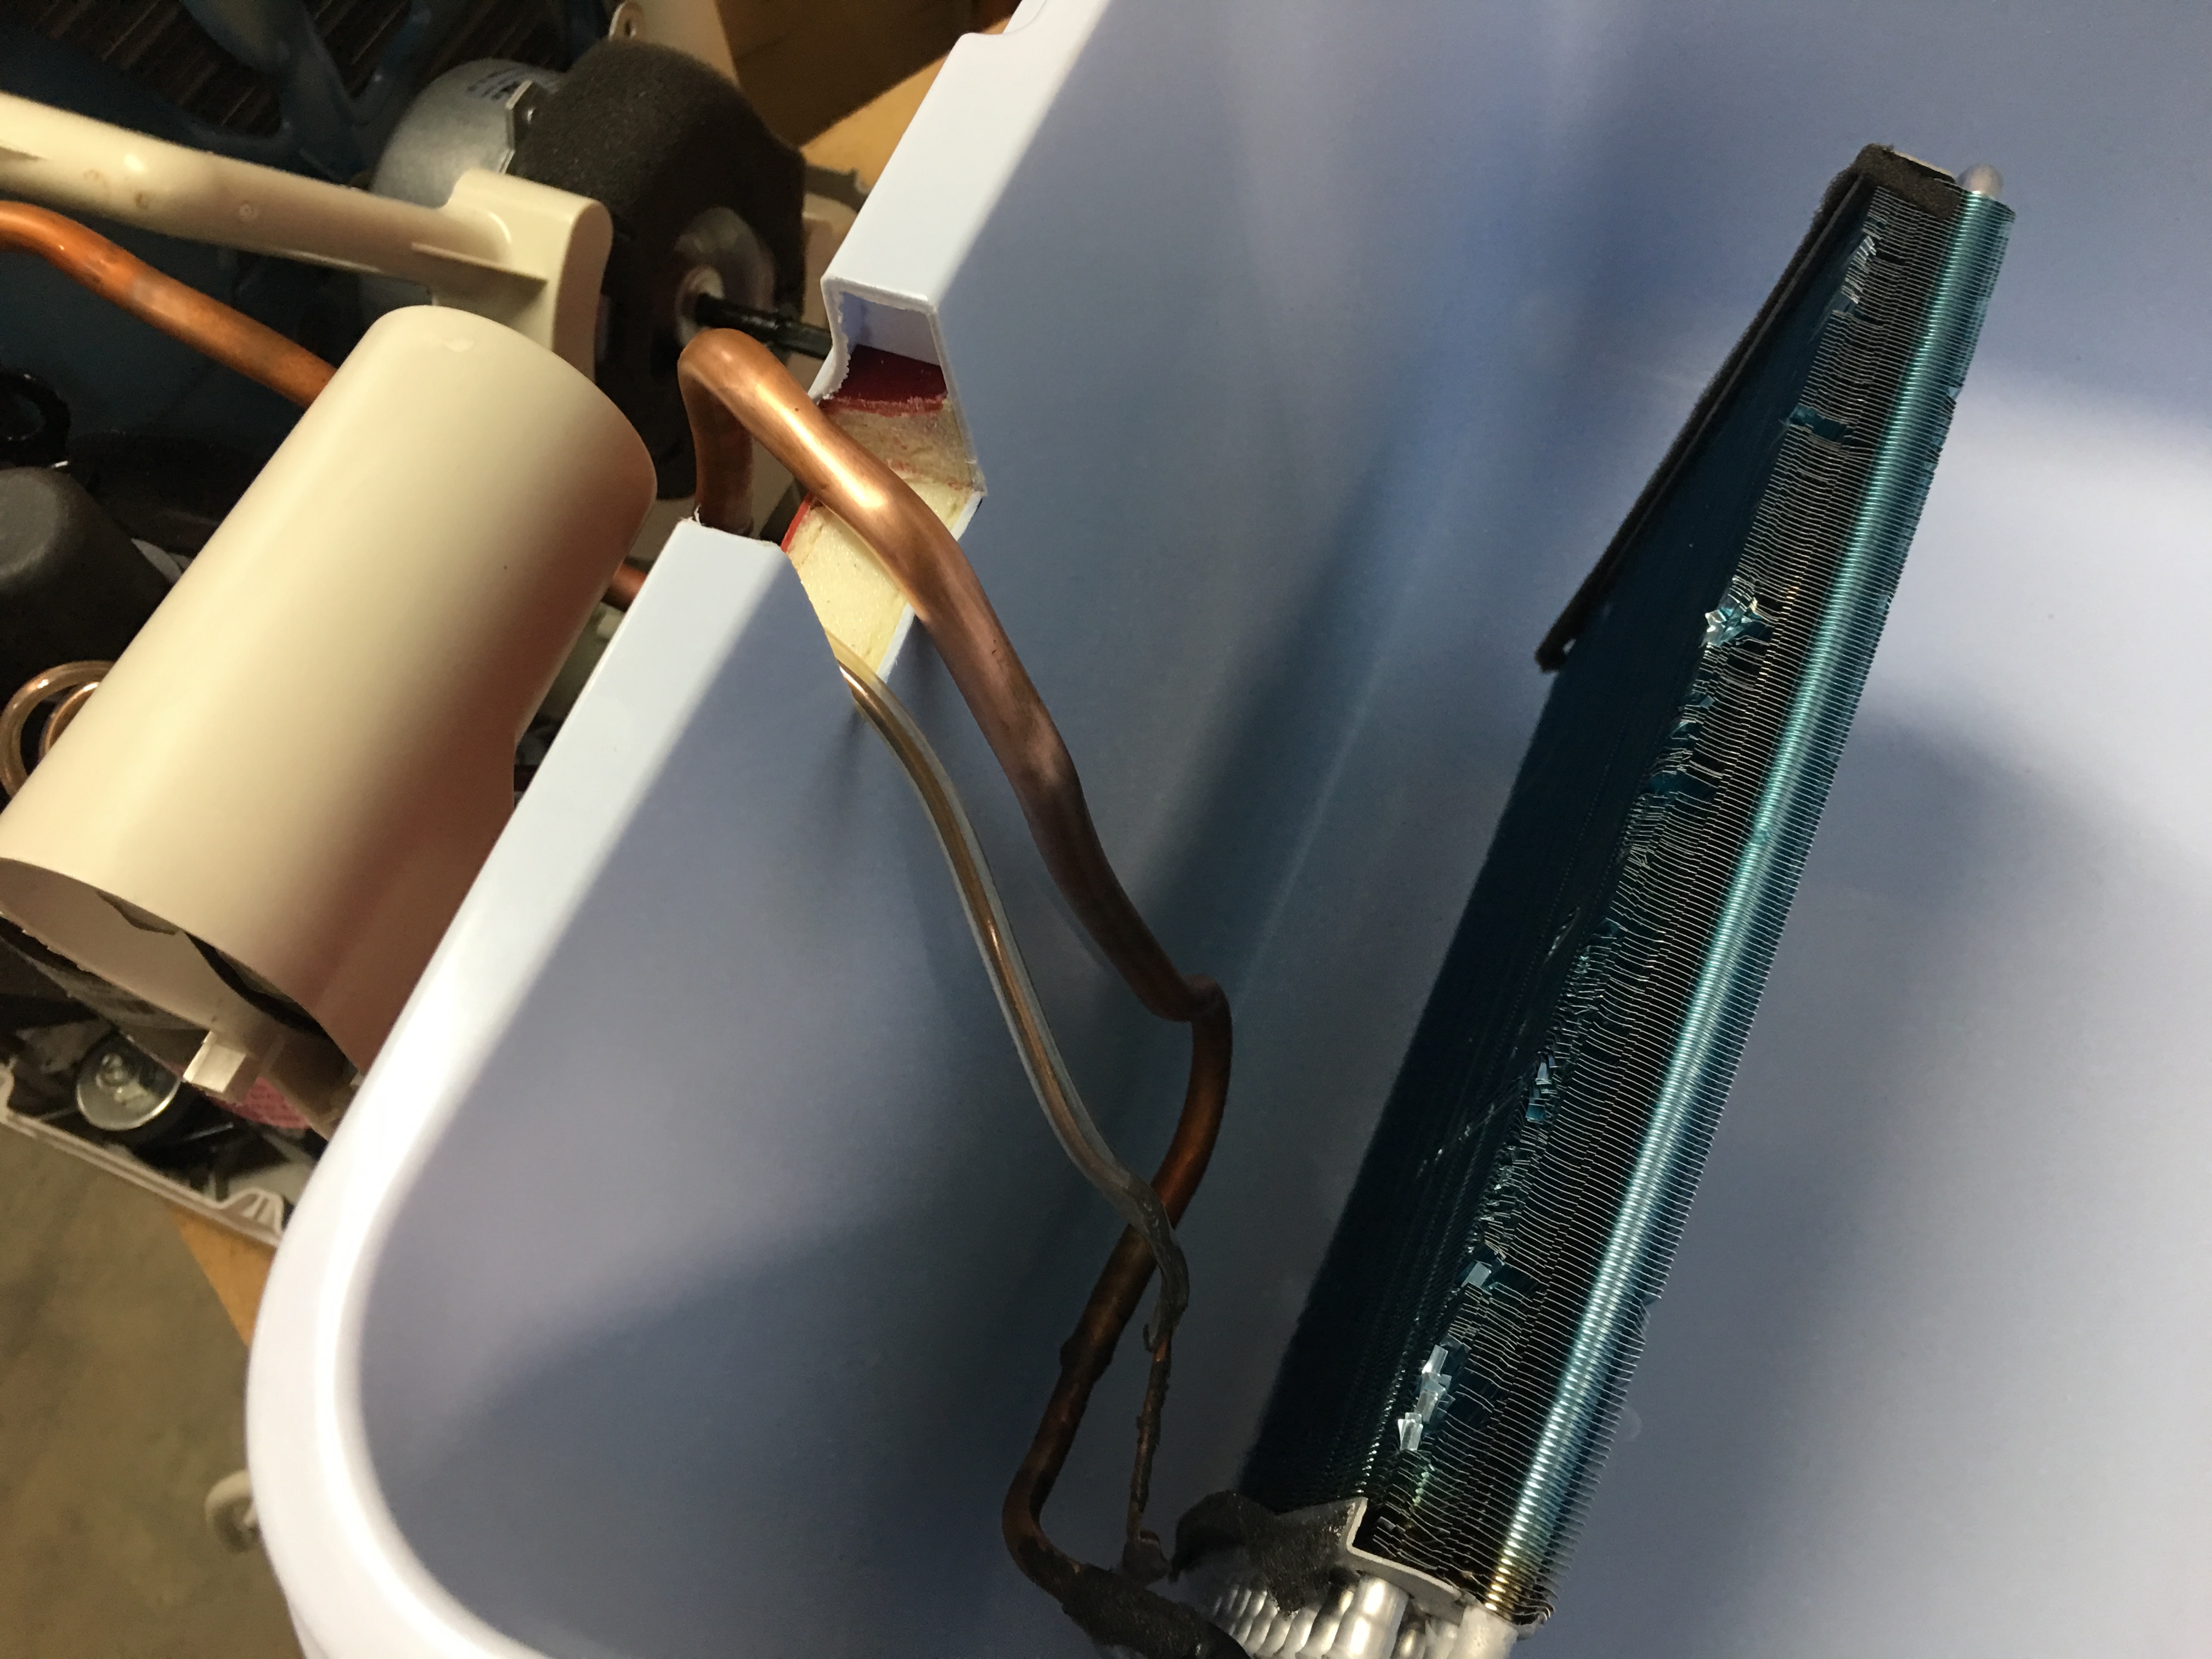
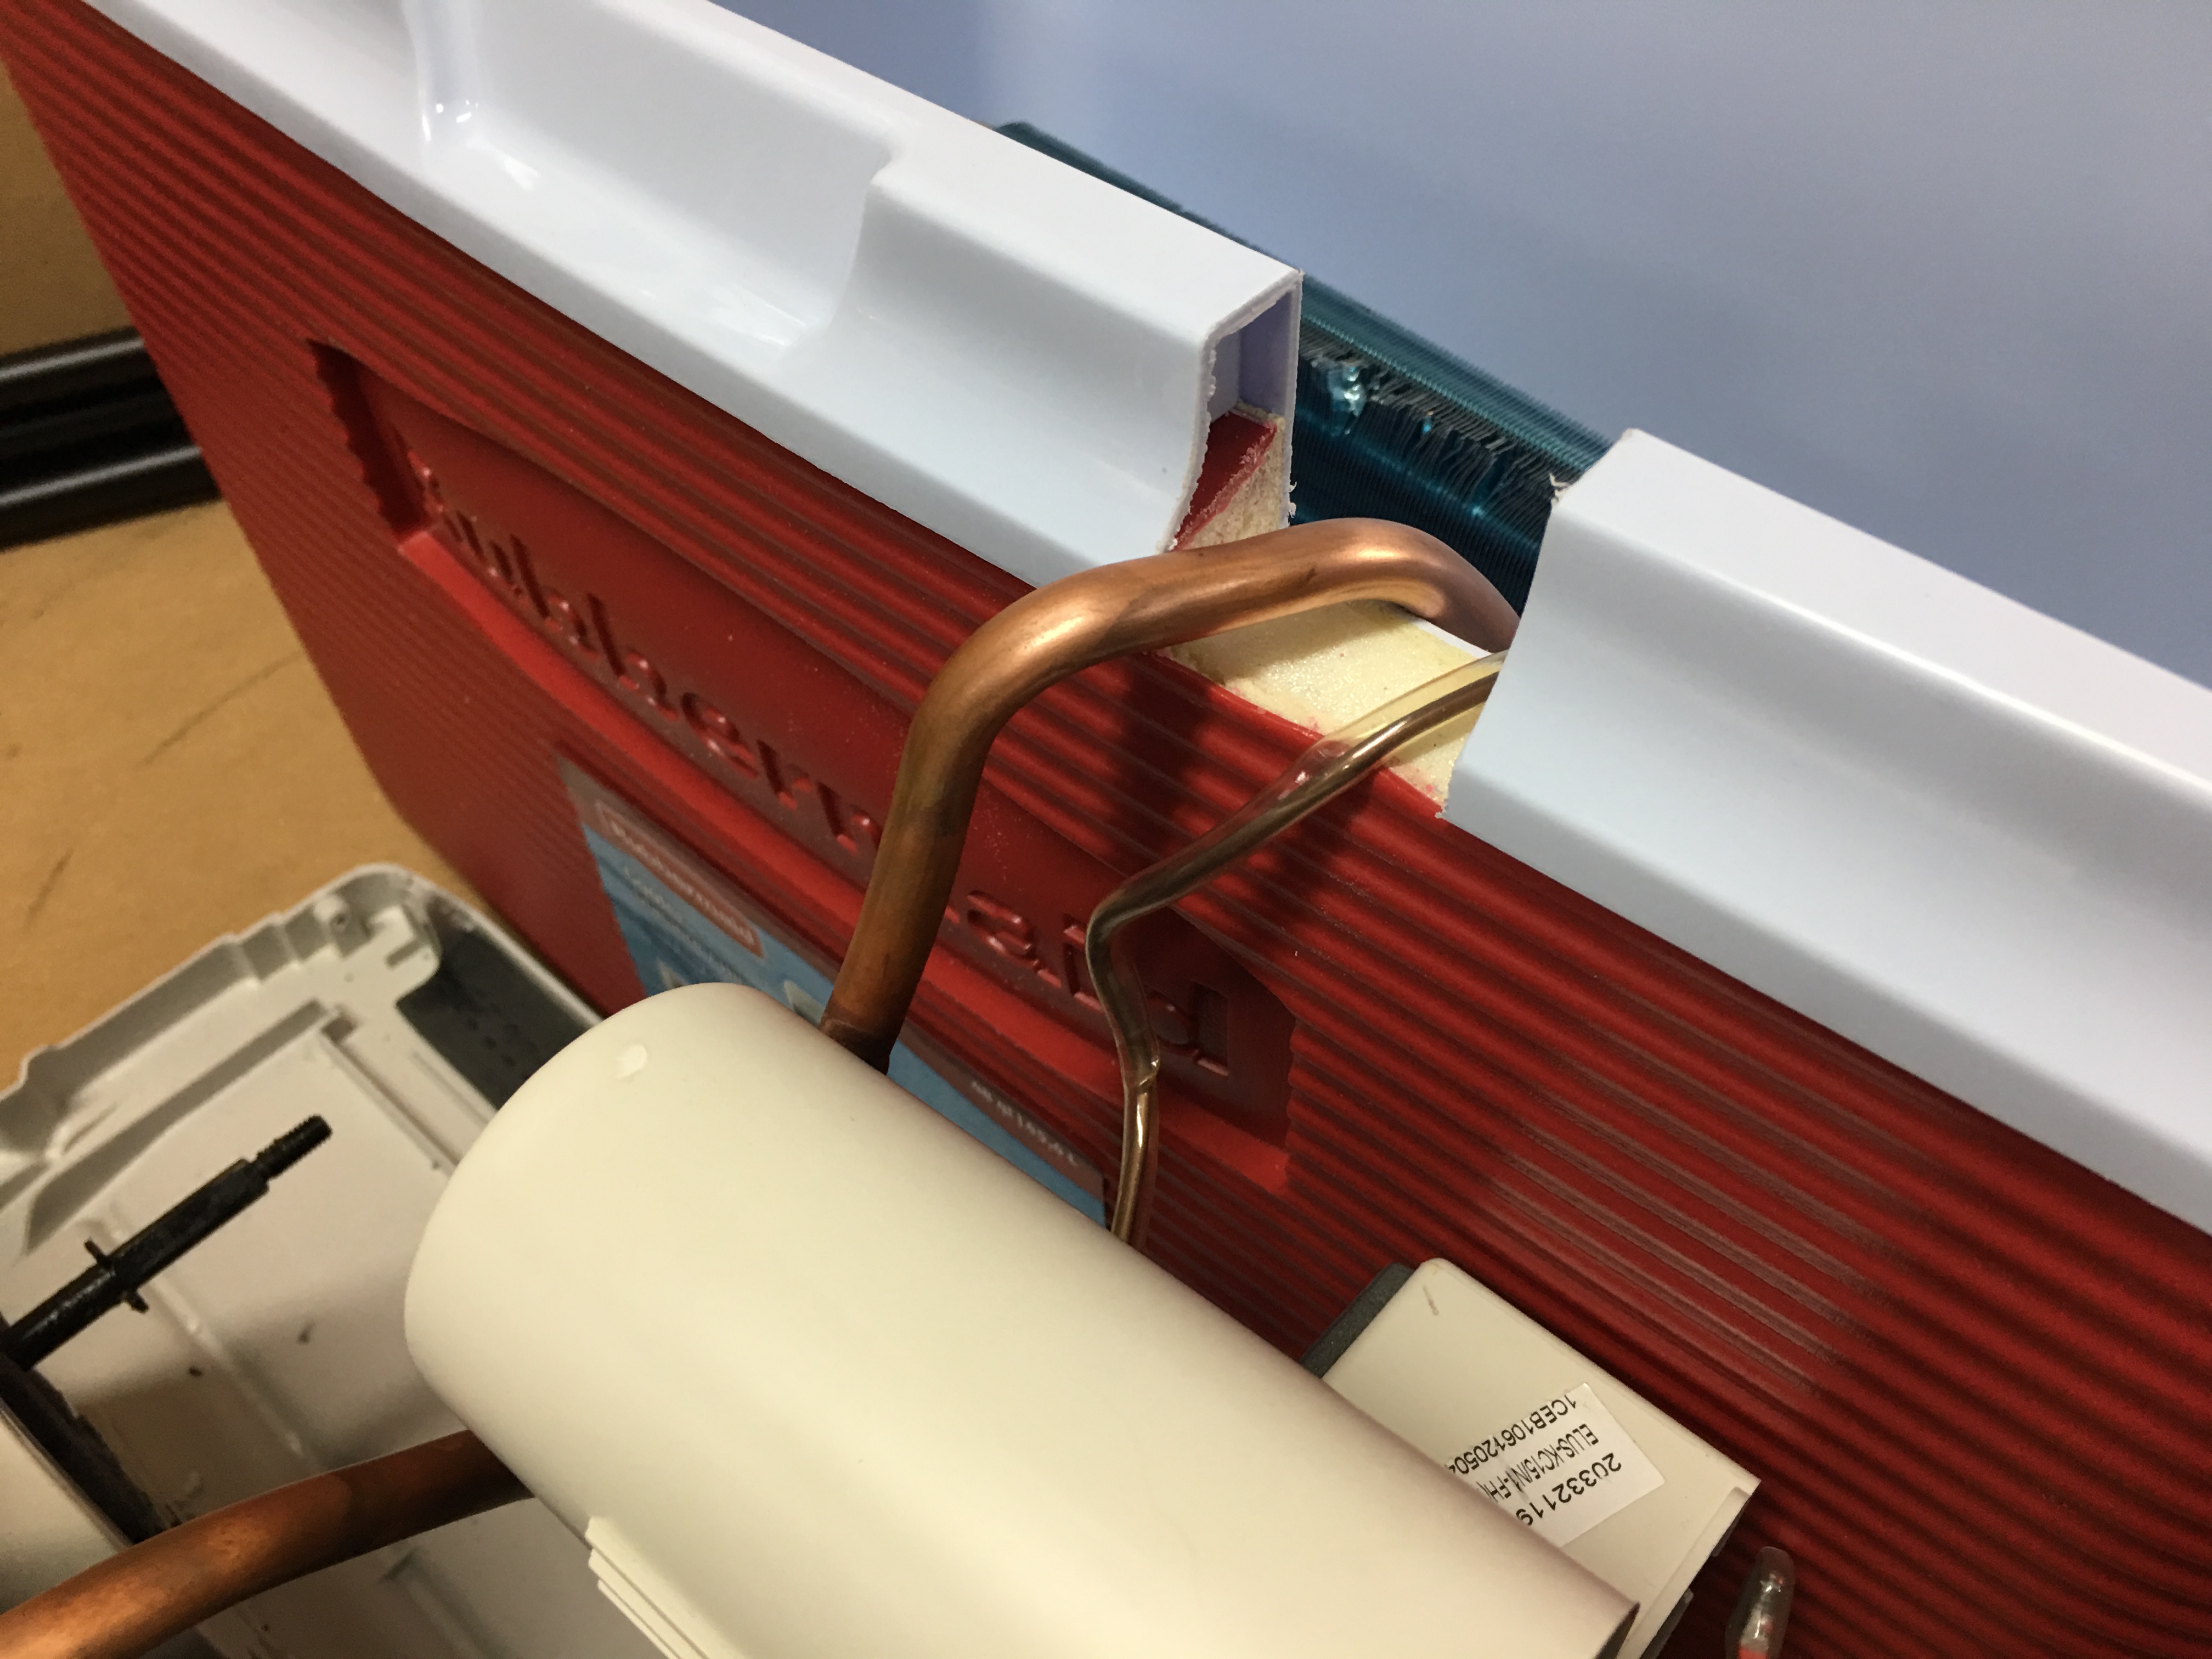
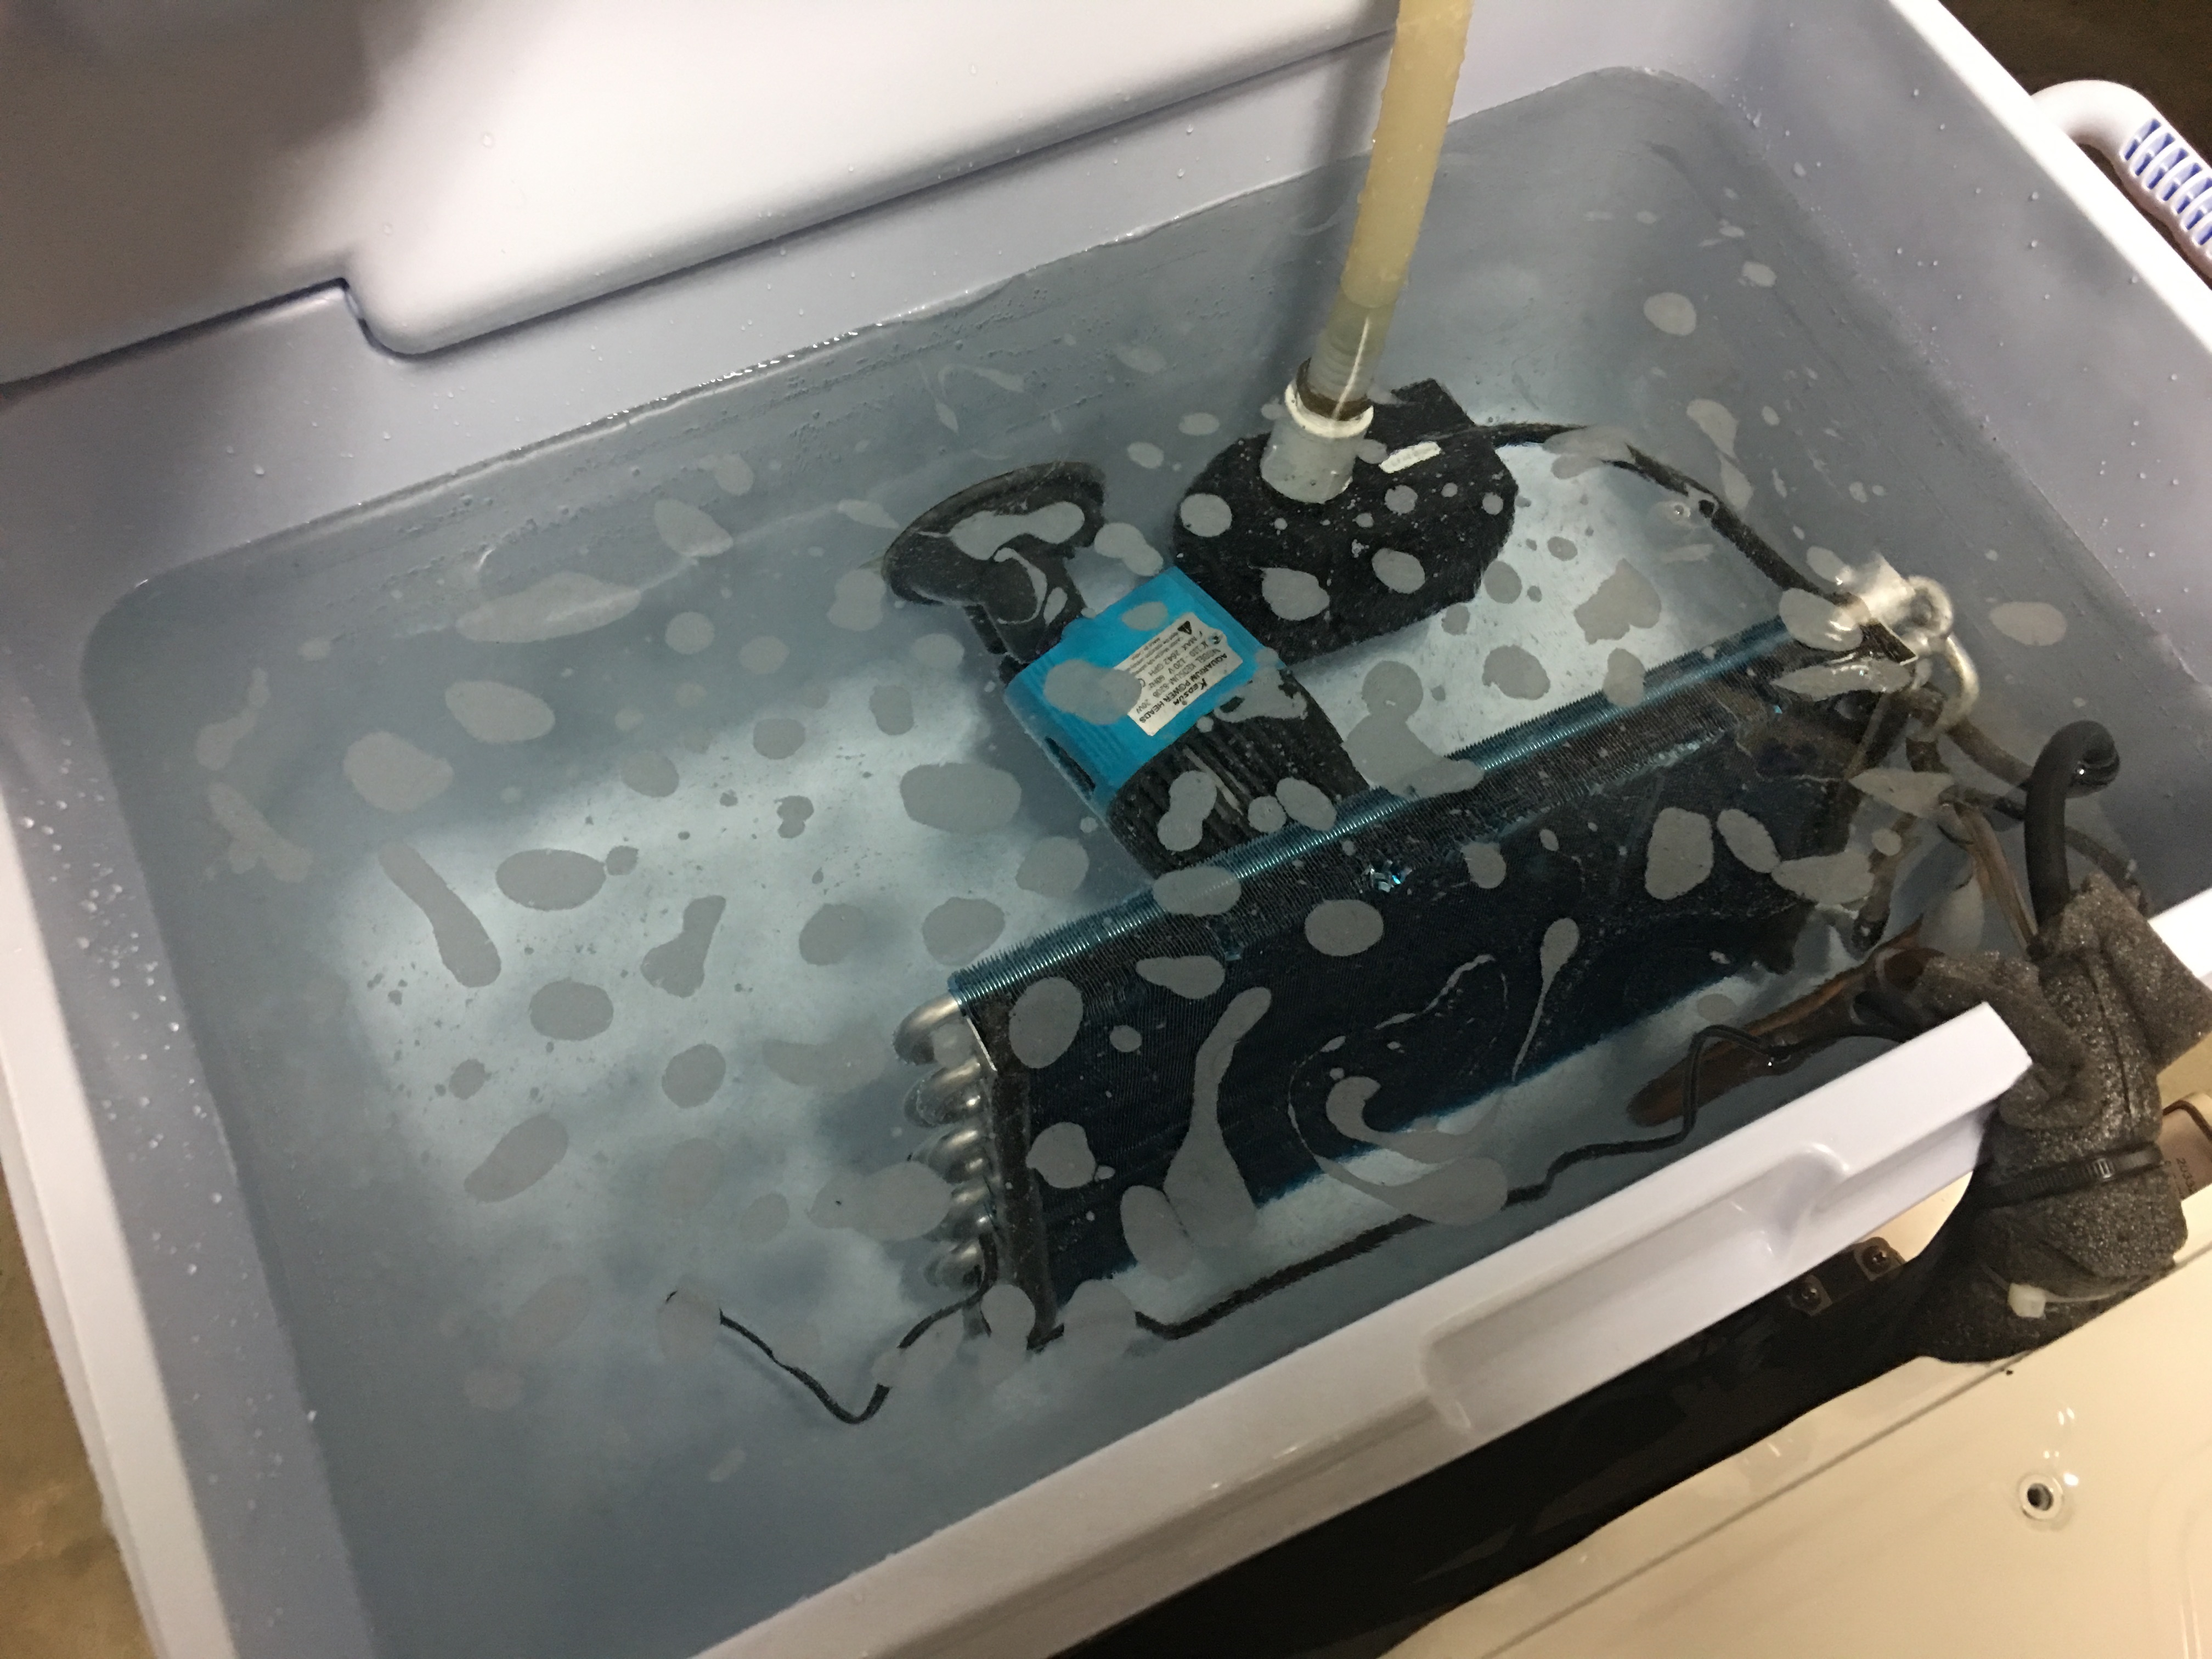
Once satisfied with the evaporator positioning inside the cooler, I wrapped pipe insulation around all the large copper tubing and secured with zip ties. This will minimize condensate inside the AC unit when in operation:
I built this “pallet” out of some old shelves I have stashed away for years. It measures 22″ wide by 28″ long. There are seven 28″ long, 3/4″x 4″ boards and three 22″ 2x4s. I cut the corner bead off of the 2x4s so they are closer to 3″ wide. Five of the 28″ boards, spaced 1/2″ apart cover the top. Two of the 28″ boards on the bottom, one on each side. All boards secured with 2″ sheetrock screws:

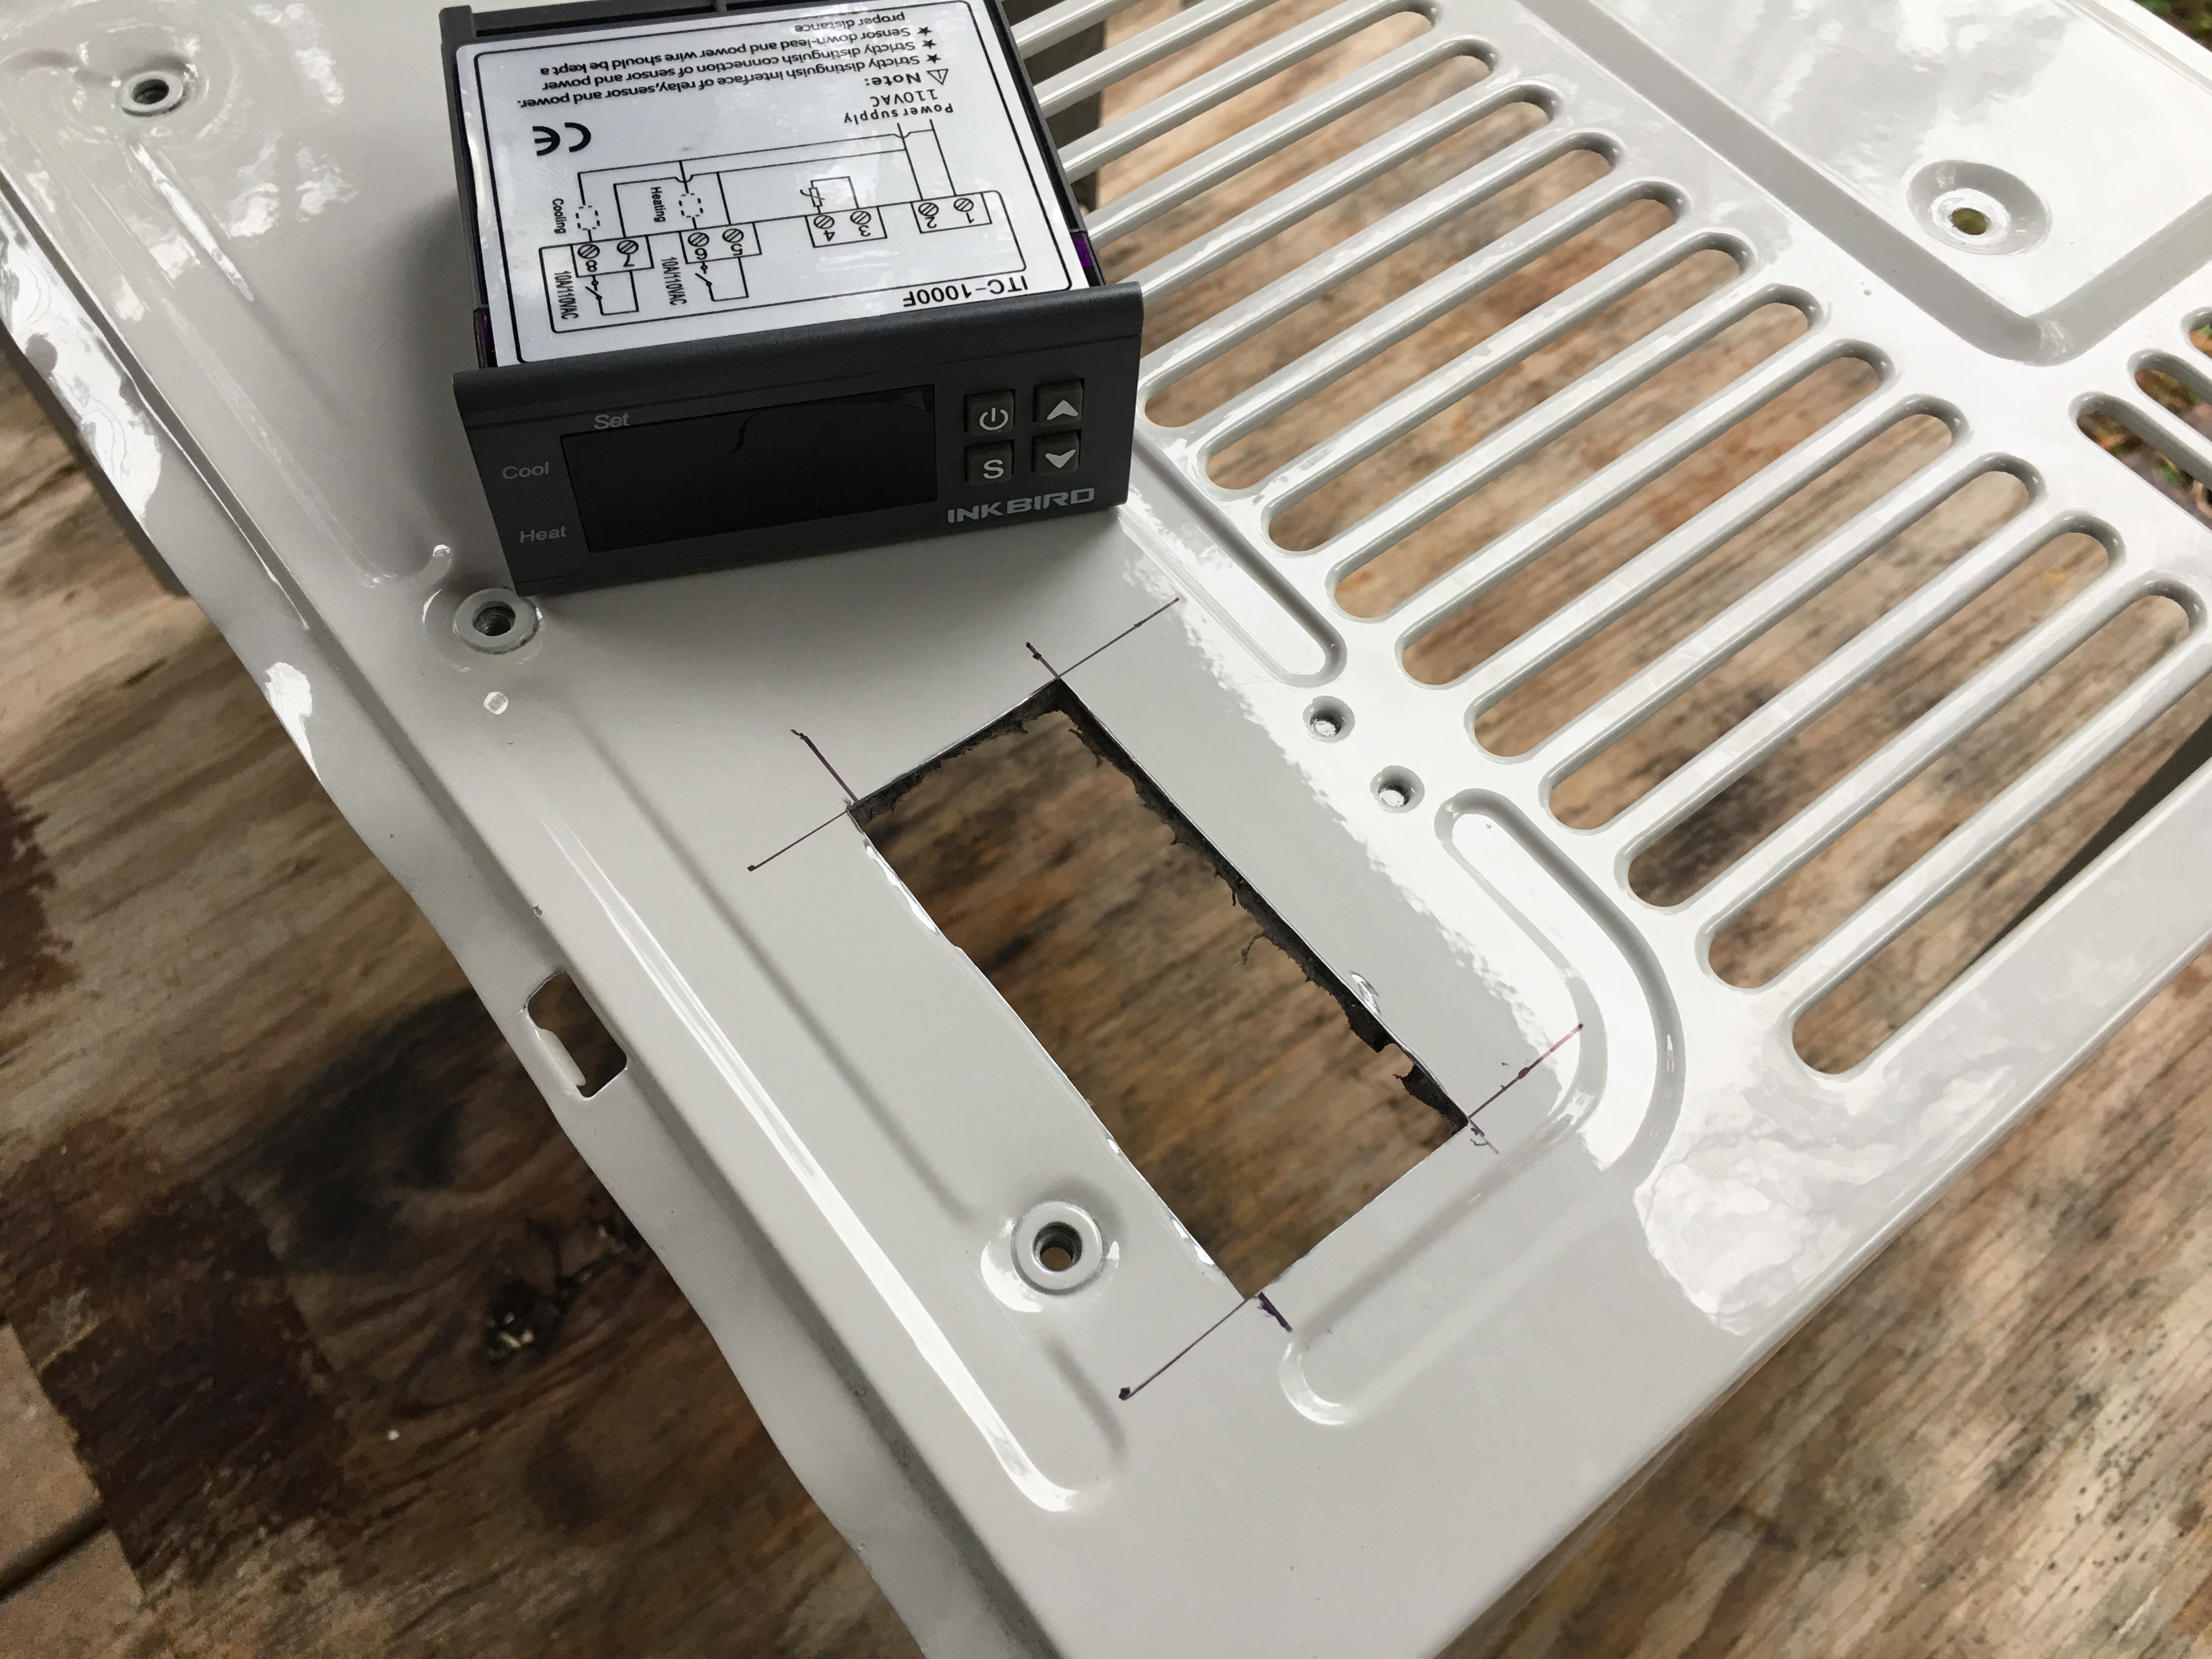
I marked a location for the Inkbird ITC-1000 on top of the unit cover, away from the fan and on the side opposite the HERM and cut out the hole with the Dremel drill with a cut off wheel:
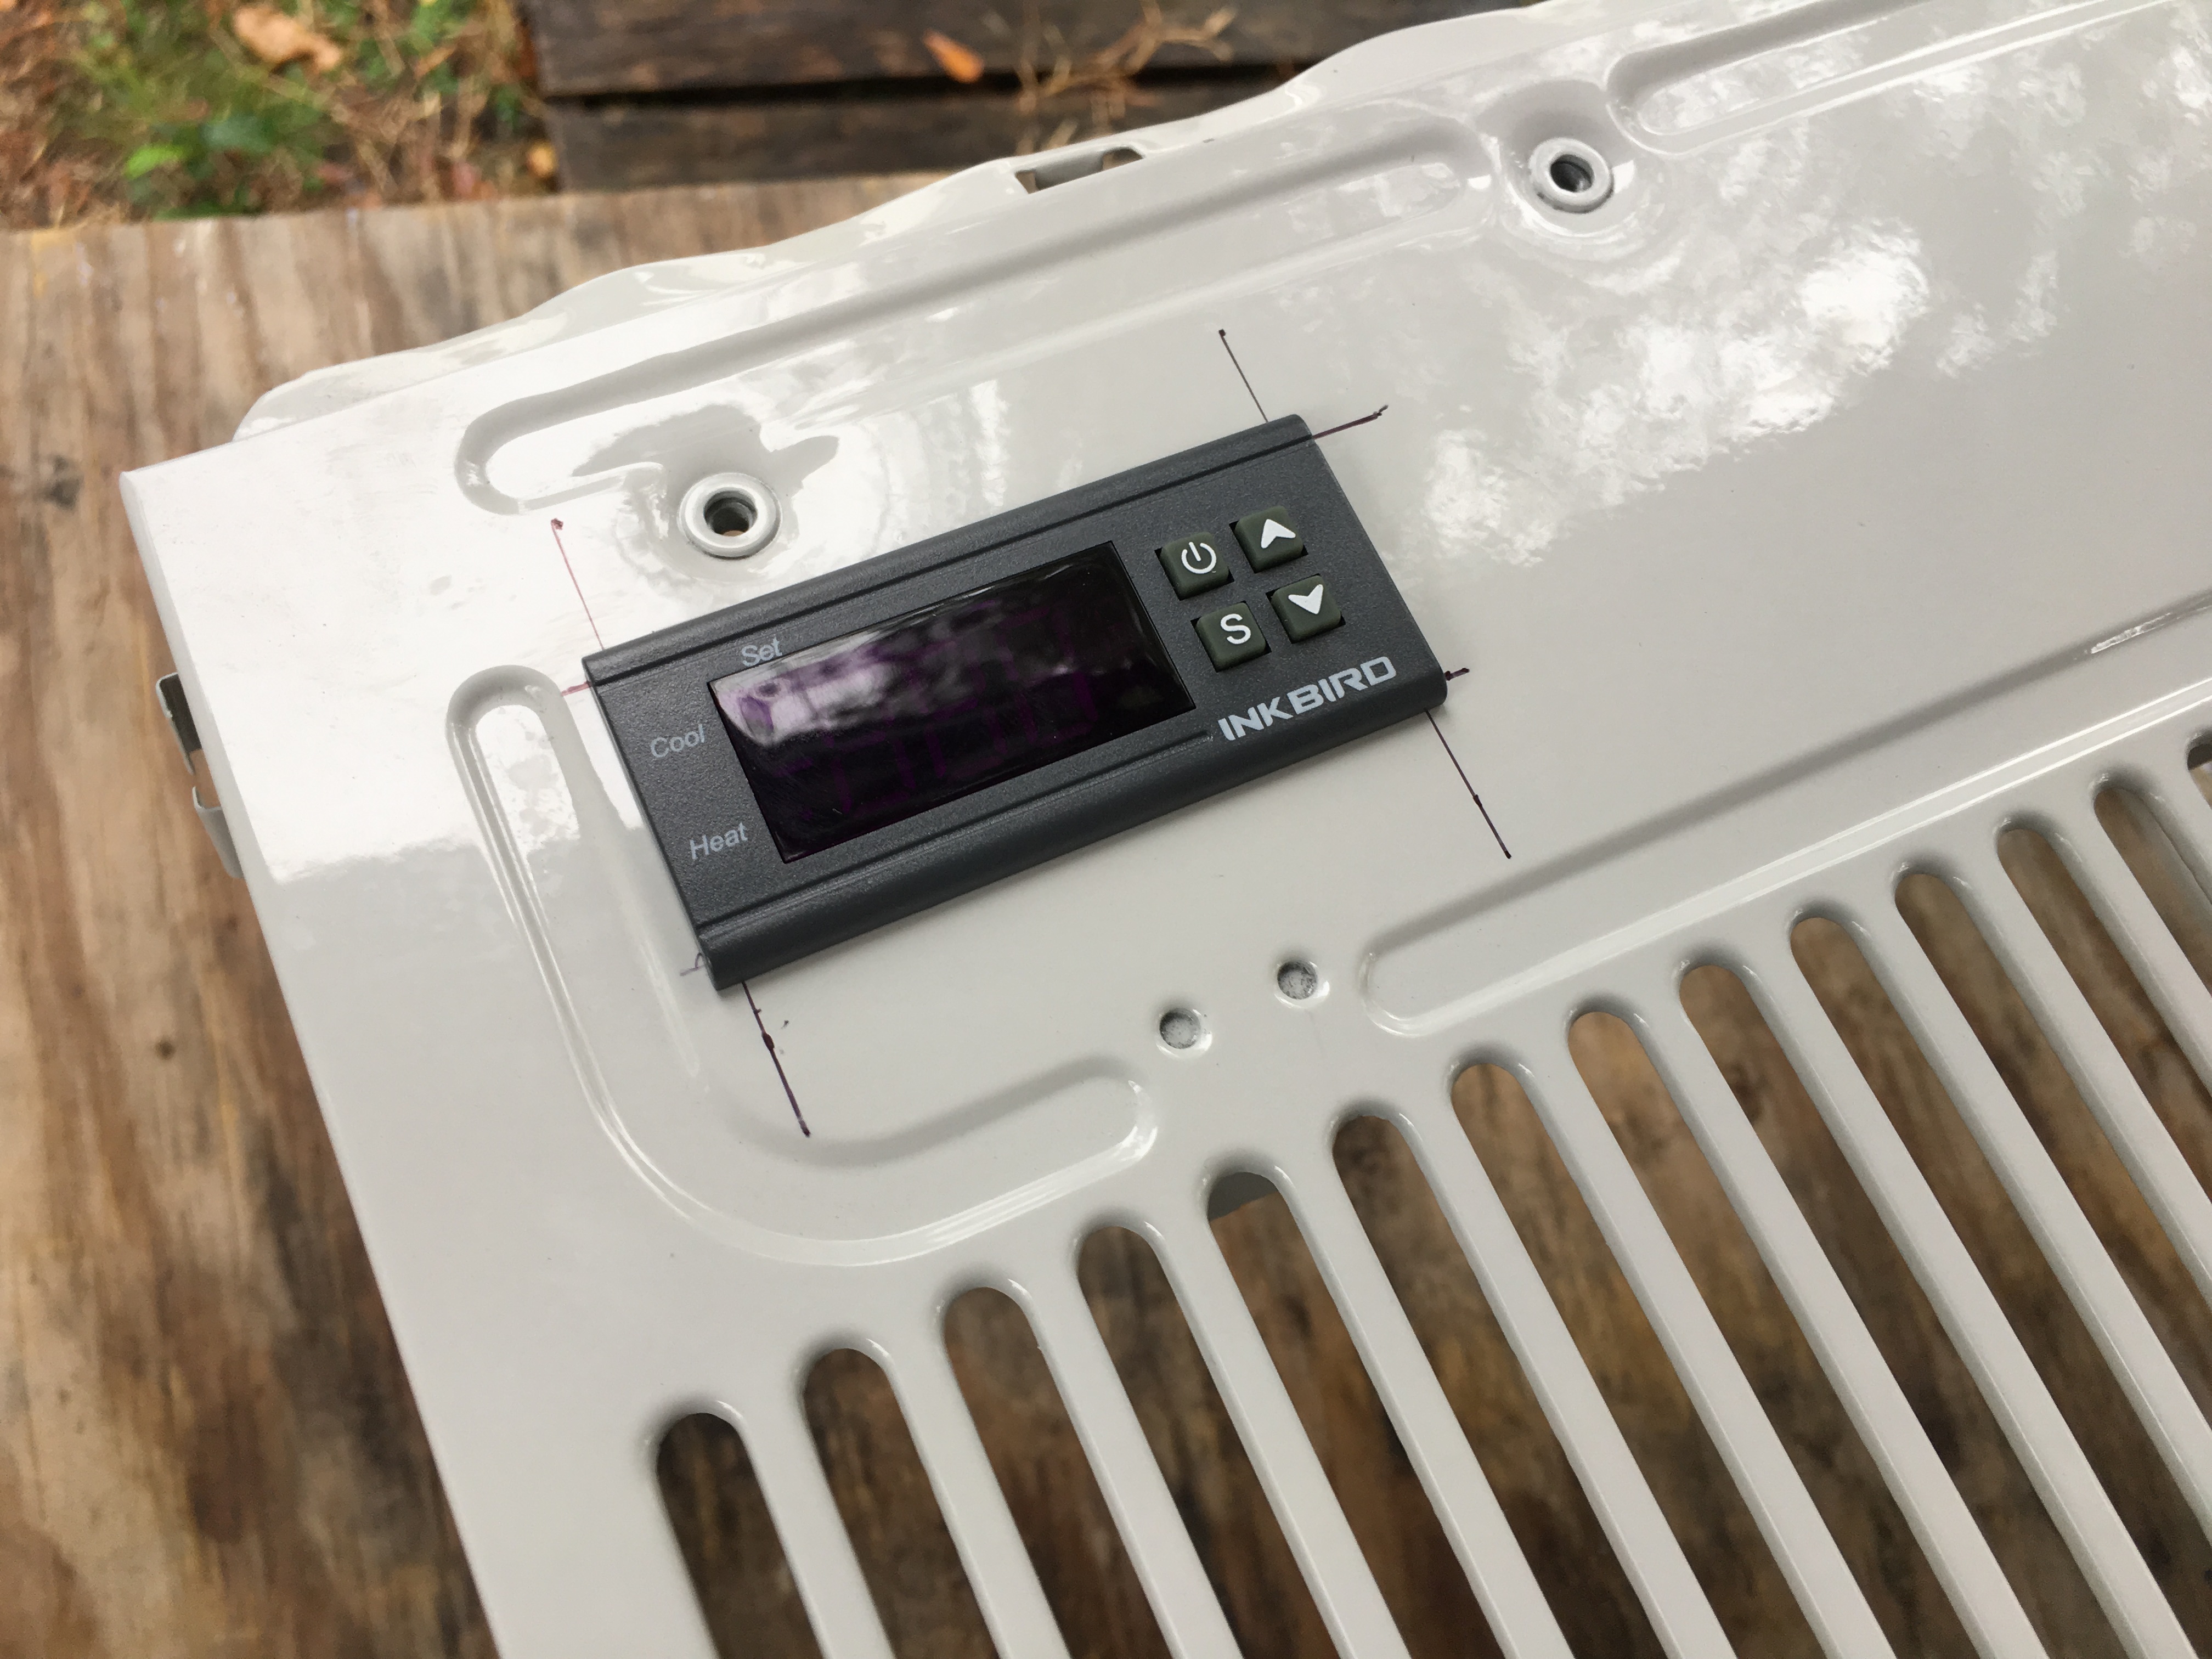
The controller mounted in the cover:
I installed a wave maker pump inside the cooler to move the glycol solution through the evaporator coil for efficiency. I installed a 500 GPH pond pump I have been using previously to pump ice water through my wort chilling rig. Also installed the controller temperature probe:
Carefully following the schematic diagram on the AC unit and the ITC-1000 controller, I hooked up all the wiring. I used the existing electrical box to keep all the wiring tidy once complete. The HERM, the condenser fan and the wave maker pump all come on together:
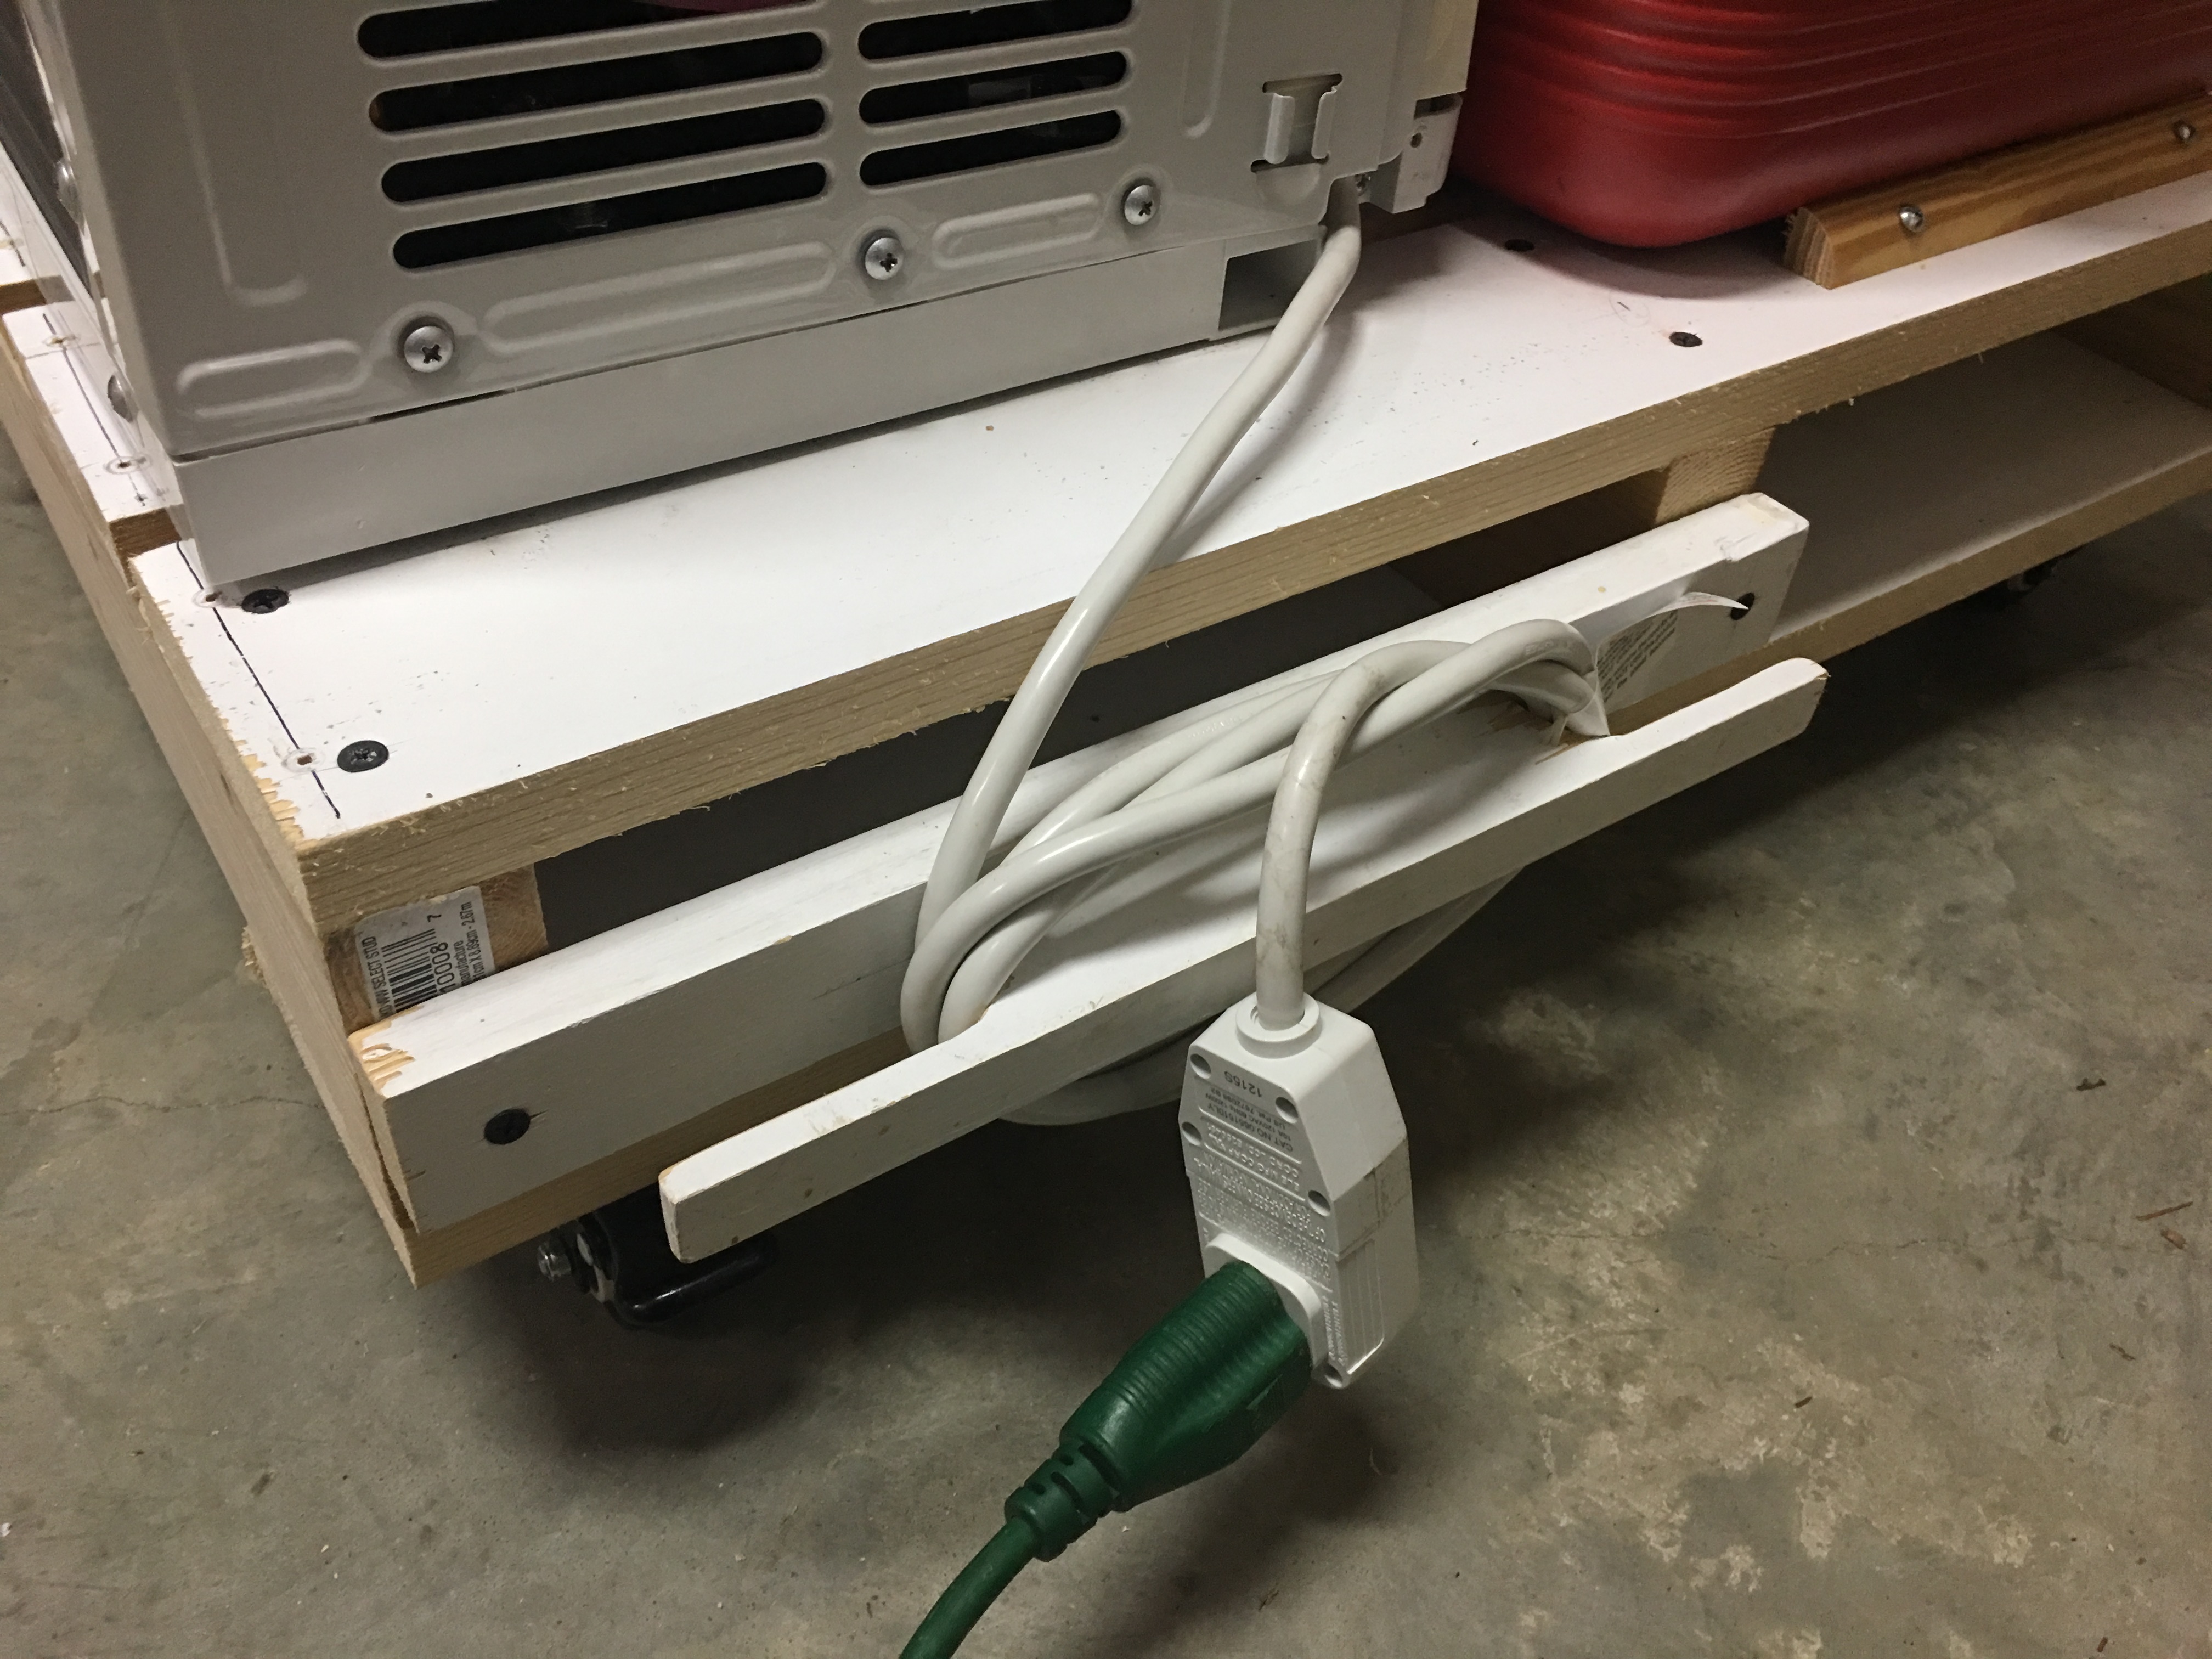
Once I had the wiring complete and the unit was ready to go, I moved it to the pallet on which I had previously installed four 2″ locking casters on from Amazon. I made a cleat to hold the power cable off of the ground. I installed lengths of quarter round on the three exposed sides of the cooler to keep it from sliding around. Before putting the AC cover back on, I installed two screws in the base of the AC unit into the pallet to keep if from sliding:
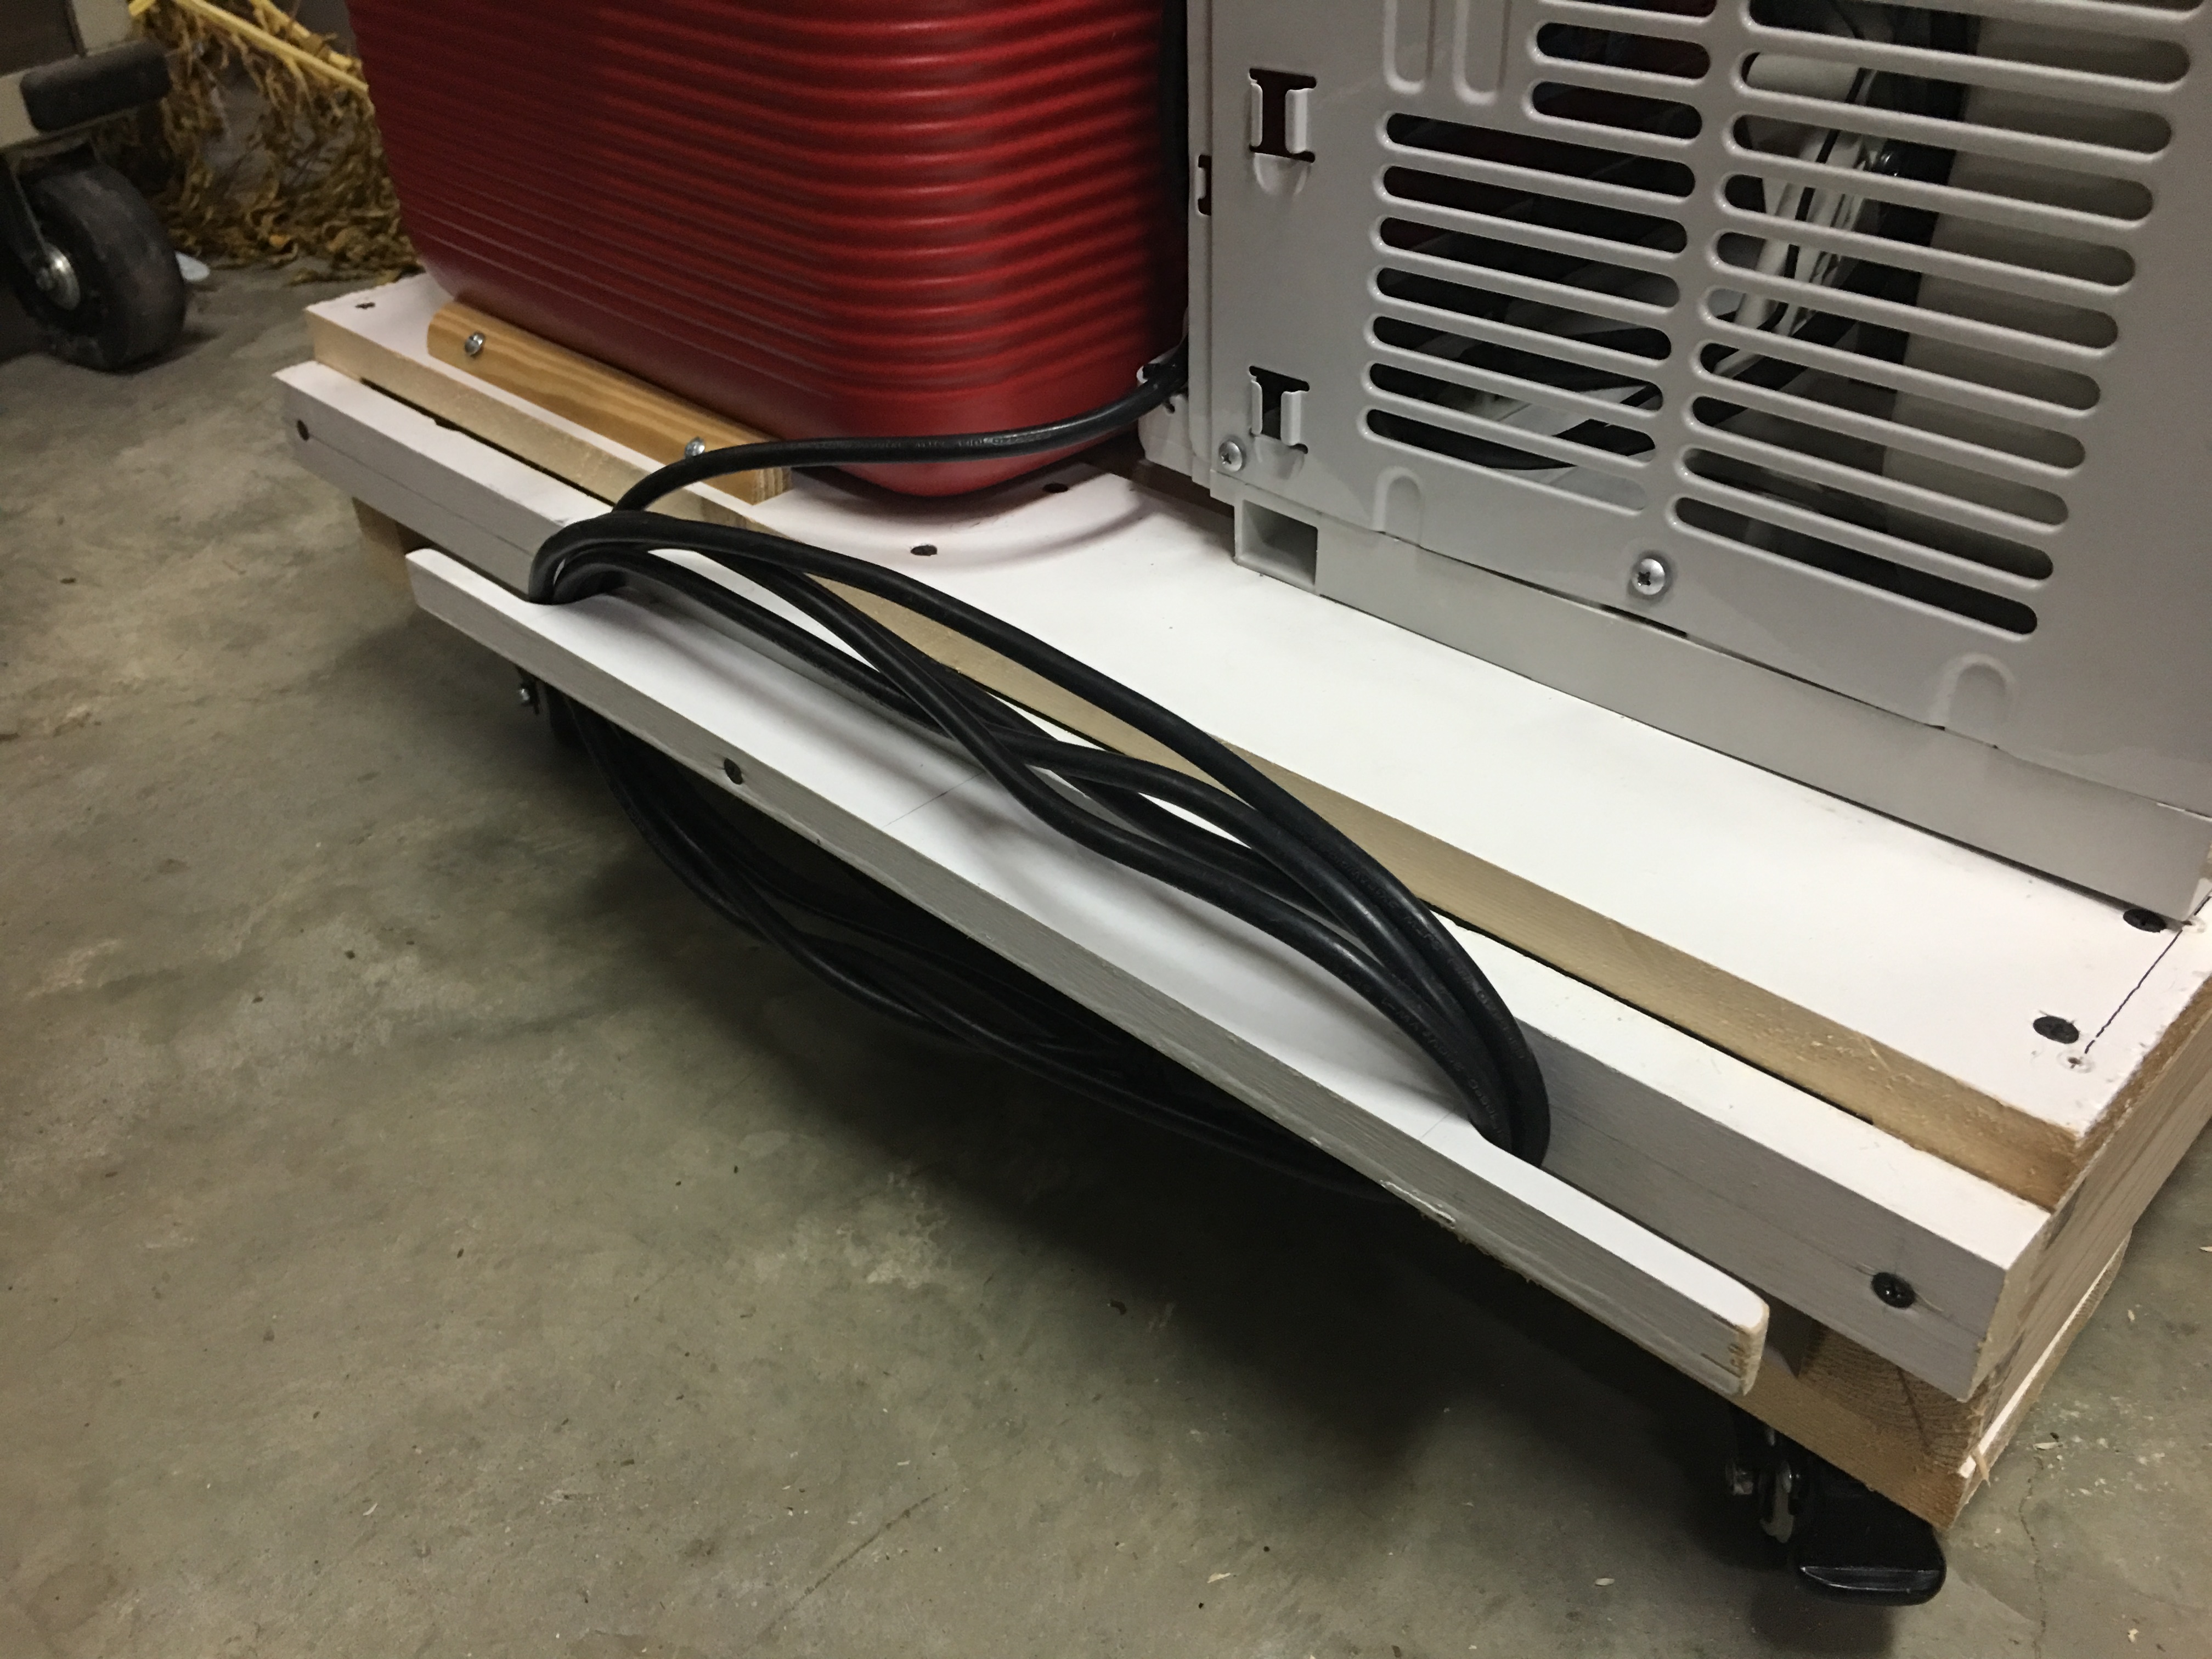
I built another cleat for the other side to store the glycol pump power cord. It is a very long cord:
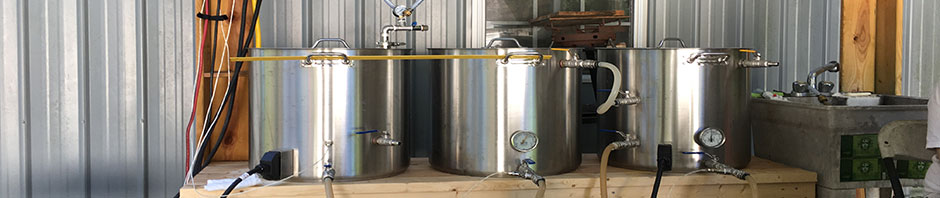
Here is the chiller test fitted with hoses to my wort chiller rig:
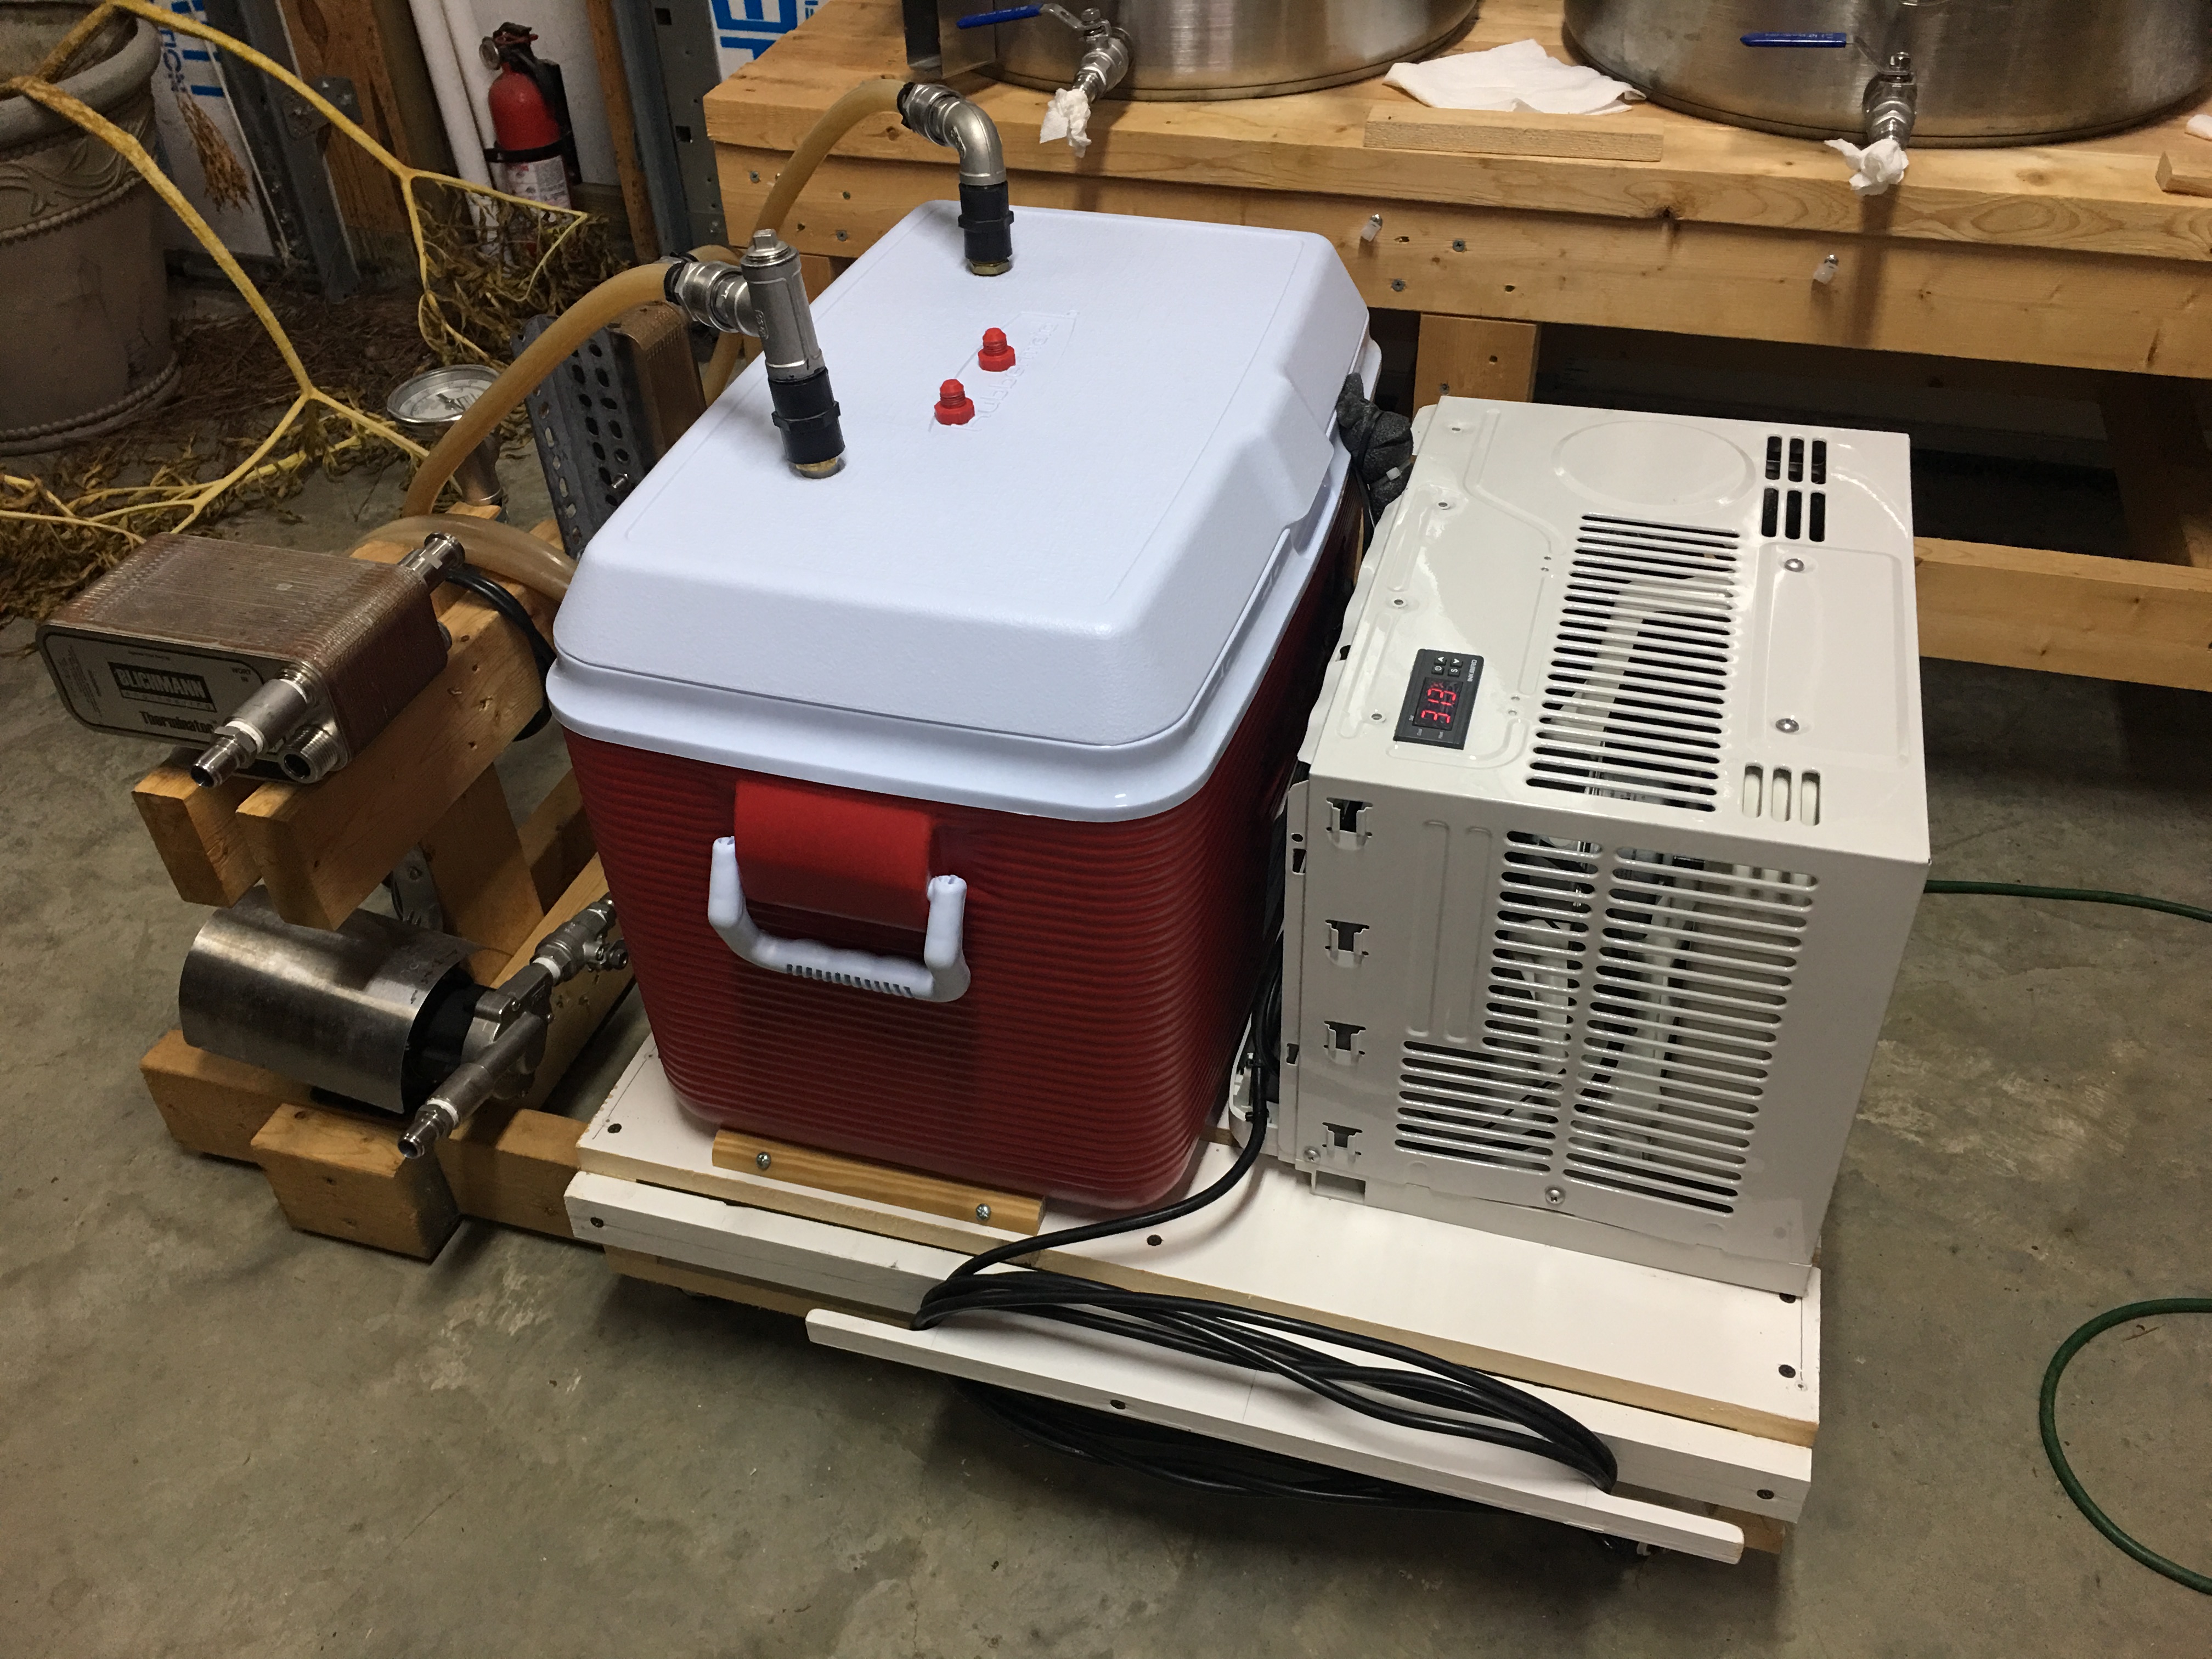
This set up holds 9 gallons of glycol solution which is 1:2 propylene glycol to distilled water, so three gallons of glycol and six gallons of distilled water. Admittedly, glycol can be purchased at a much cheaper price than the expensive glycol I paid for, but I chose USP certified food grade just to be on the safe side. Plus, it is what I used in the first one, so why mess with success!